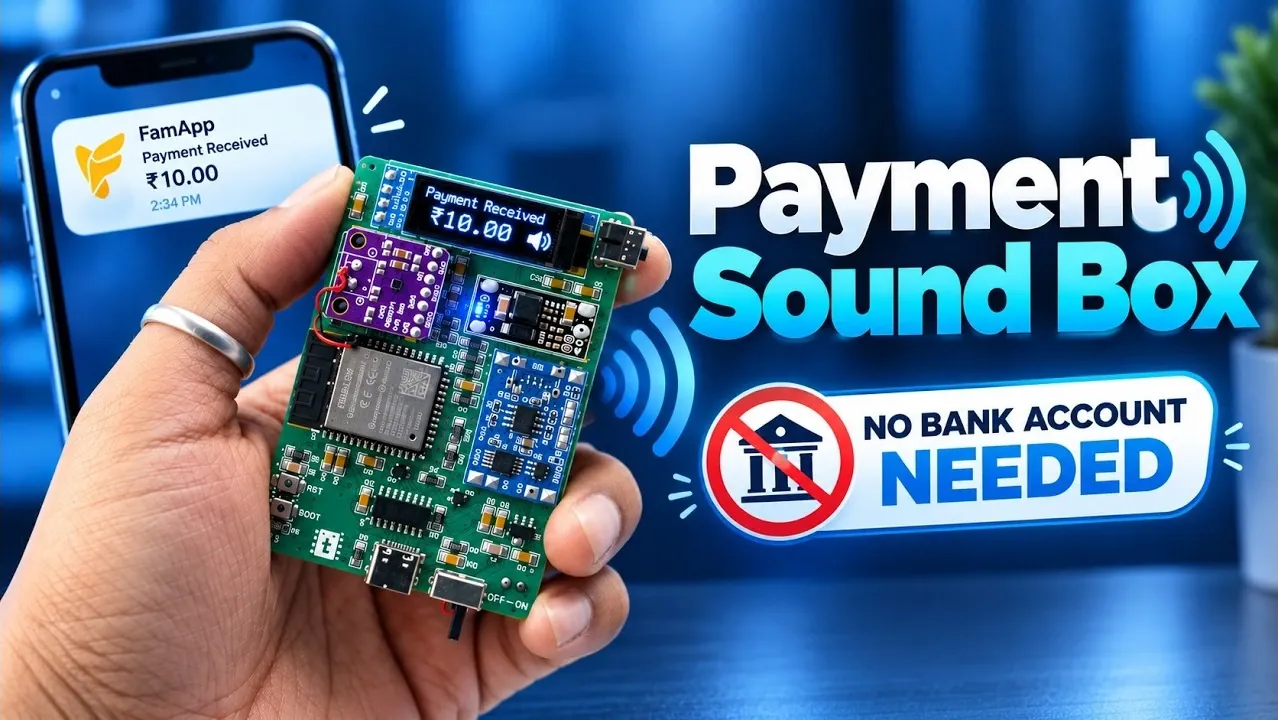
Building a UPI soundbox that receives real payments is an intriguing project that blends hardware and software to create a practical device. In this overview, techiesms demonstrates how to use an ESP32 microcontroller to construct a compact soundbox capable of announcing payments audibly and displaying transaction details in real time. The project bypasses traditional banking systems by integrating a wallet-based payment platform, such as FamApp and relies on email notifications to process payment updates. With components like an OLED display, MAX98357 audio amplifier and a custom PCB, the device provides both audible and visual feedback for incoming transactions.
Explore how to assemble and configure this soundbox by following a step-by-step process, from setting up a wallet account to flashing firmware onto the ESP32. Gain insight into the role of key technologies like the MQTT protocol for real-time communication and Text-to-Speech services for payment announcements. You’ll also discover practical features such as a replay button for recent transactions and a portable design that makes the device suitable for small-scale use. Whether you’re a hobbyist or an IoT enthusiast, this guide offers a hands-on opportunity to deepen your understanding of embedded systems.
Purpose and Benefits
TL;DR Key Takeaways :
- The UPI payment soundbox is a DIY project using an ESP32 microcontroller to create a device that announces and displays payment details without requiring a traditional bank account.
- It integrates wallet-based payments, email notifications, Text-to-Speech (TTS) services and an OLED display for real-time audible and visual transaction feedback.
- Key components include the ESP32 microcontroller, MAX98357 audio amplifier, OLED display, battery management system and custom PCB for compact assembly.
- The device is designed for educational and experimental purposes, offering a hands-on opportunity to explore IoT and embedded systems.
- Limitations include reliance on email notifications for payment updates, which may cause delays and its focus on non-commercial, small-scale applications.
The primary goal of this project is to design a payment soundbox that operates independently of a merchant or bank account. Instead, it uses a wallet-based platform, making it particularly accessible for small-scale users, hobbyists, or those in areas with limited access to traditional banking services. The device ensures a seamless user experience by audibly announcing payments and visually displaying transaction details. This approach not only simplifies payment processing but also provides a hands-on opportunity to explore IoT and embedded systems.
How the Soundbox Functions
The soundbox operates by integrating multiple technologies and components to deliver its functionality. Here’s a breakdown of how it works:
- Payments are initiated via a QR code linked to a wallet account, such as FamApp.
- When a payment is made, a notification is sent to the associated Gmail account.
- The ESP32 microcontroller processes the email notification, extracts payment details and uses a Text-to-Speech (TTS) service to announce the payment amount.
- An OLED screen provides a visual confirmation by displaying the payment information.
This combination of audible and visual feedback ensures that users are immediately informed of transactions, enhancing convenience and usability.

Check out more relevant guides from our extensive collection on ESP32 that you might find useful.
- $5 ESP32-S3 Super Mini Packs Wi-Fi and Bluetooth
- The $4 ESP32 S3 Super Mini Packs a 240 MHz Dual-Core Chip
- How an $8 ESP32 S3 Microcontroller Runs a 28.9M Parameter Local LLM
- 5 ESP32 Projects Worth Building in 2026: Such as an Apple HomeKit Controller
- $4 ESP32 Module Brings Wi-Fi and Bluetooth to IoT Projects
- Replacing Security Cameras with Three $10 ESP32S3 Wi-Fi Boards
- ESP32-S3 Super Mini Costs $5 and Packs Wi-Fi and Bluetooth
- Gemini 4 Argon Writes ESP Mosaico Firmware to Control RGB LEDs
- ESP32-S3 Super Mini Brings 240 MHz Dual-Core Power For $4
- ESP32 S31 Devkit Hands-on: 320 MHz RISC-V Chip Adds Wi-Fi 6
Essential Components and Technologies
To build this soundbox, several key components and technologies are required. Each plays a critical role in making sure the device’s functionality:
- ESP32 Microcontroller: Serves as the core processor, handling data processing, TTS conversion and display updates.
- MQTT Protocol: Facilitates efficient communication between the device and the server for real-time updates.
- Text-to-Speech (TTS) Service: Converts payment details into audible announcements for immediate feedback.
- OLED Display: Provides a clear, visual representation of the most recent payment received.
- MAX98357 Audio Amplifier: Amplifies the TTS output, making sure clear and audible playback.
- Battery Management System: Powers the device and ensures portability for on-the-go use.
- Custom PCB Design: Integrates all components into a compact and efficient layout, simplifying assembly.
These components work together to create a cohesive and functional device that is both practical and educational.
Step-by-Step Assembly and Configuration
Building the UPI soundbox involves a series of straightforward steps. Here’s how you can assemble and configure the device:
- Set up a FamApp account and enable email notifications for payment receipts.
- Connect the ESP32 microcontroller to your Wi-Fi network and provide Gmail credentials to access payment notifications.
- Flash the firmware onto the ESP32 using a web-based tool to finalize the software setup.
- Assemble the hardware components, including the OLED display, MAX98357 audio amplifier and battery management system, onto the custom PCB.
- Test the device by making a payment via the QR code and verifying the audio and visual outputs.
This step-by-step process not only ensures proper functionality but also provides valuable insights into the integration of hardware and software in IoT projects.
Features and Practical Applications
The DIY UPI soundbox offers several features that make it a practical and innovative tool:
- Instant Payment Announcements: The device announces received payments audibly, depending on the speed of email delivery.
- Visual Payment Confirmation: An OLED screen displays the last payment amount for quick reference.
- Replay Functionality: A dedicated button allows users to replay the last payment announcement.
- Compact and Portable Design: The device is lightweight and includes a QR code on the back for easy payment access.
These features make the soundbox a versatile tool for small businesses, hobbyists, or educational purposes, offering both functionality and portability.
Considerations and Limitations
While this project is an excellent learning opportunity, it is important to be aware of its limitations:
- Reliance on Email Notifications: The device depends on email notifications for payment updates, which may introduce delays in announcements.
- Educational Focus: This project is designed for experimental and educational purposes rather than commercial use.
Understanding these limitations helps set realistic expectations and ensures the project is approached with the right objectives in mind.
Building Your Own Soundbox
To create your own UPI soundbox, follow these steps:
- Gather the necessary components, including the ESP32 microcontroller, OLED display, MAX98357 audio amplifier and battery management system.
- Assemble the hardware onto a custom PCB designed specifically for this project.
- Flash the firmware onto the ESP32 and configure the device with your Wi-Fi and Gmail credentials.
- Test the device by making a payment via the QR code and verifying the audio and visual outputs.
For those who prefer a more straightforward approach, pre-assembled versions of the soundbox may be available for purchase, offering a ready-to-use solution.
Exploring the Potential of DIY IoT Projects
This UPI payment soundbox project highlights how accessible technologies like the ESP32 microcontroller, MQTT protocol and TTS services can be combined to create a functional and innovative device. By eliminating the need for a bank account and focusing on wallet-based payments, it provides a unique solution for hobbyists, students and small-scale users. Whether you’re looking to expand your knowledge of IoT or build a practical tool, this project offers a rewarding and educational experience that demonstrates the potential of DIY electronics.
Media Credit: techiesms
Disclosure: Some of our articles include affiliate links. If you buy something through one of these links, Geeky Gadgets may earn an affiliate commission. Learn about our Disclosure Policy.
