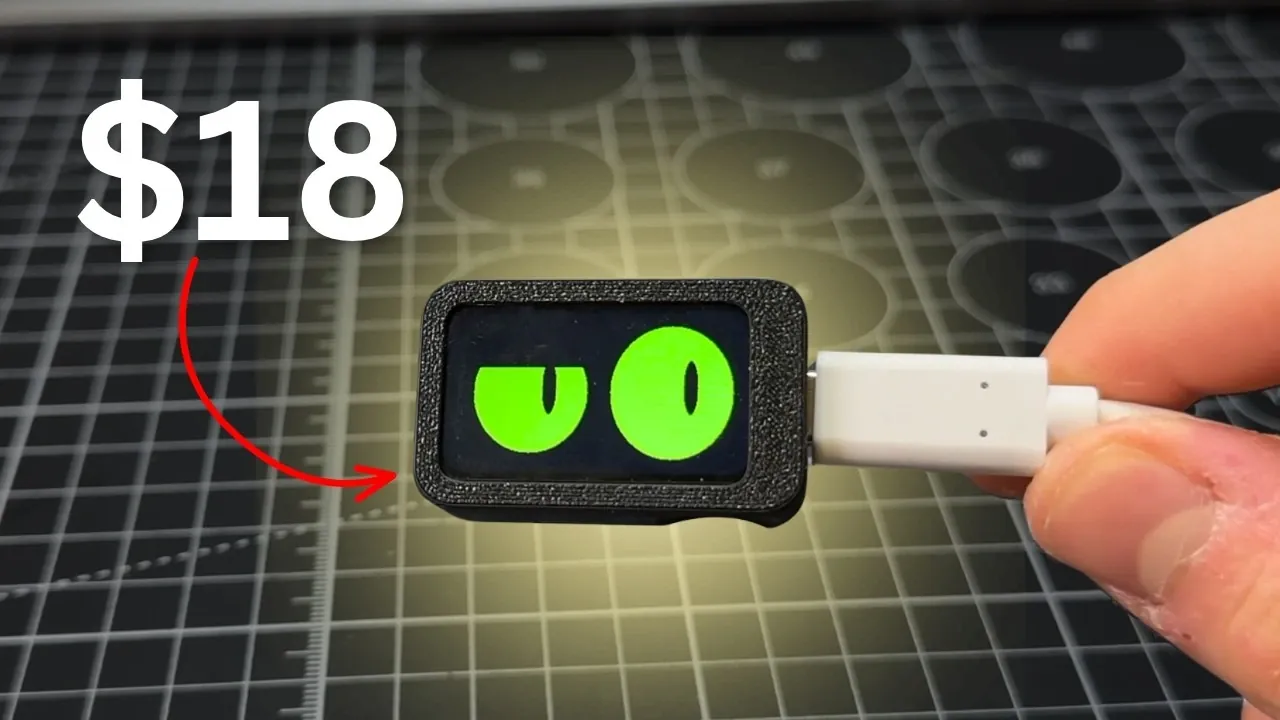
Creating an interactive desk buddy for under $20 is an excellent way to combine creativity with hands-on learning. In a recent guide by printpal, the process is broken down into manageable steps, making it accessible even for beginners. The project revolves around the ESP32-C6 microcontroller, a versatile and budget-friendly component that serves as the device’s core. Paired with a 3D-printed case, interactive buttons and an optional display screen, this desk buddy is both functional and customizable. Whether you’re looking to enhance your workspace or experiment with coding and electronics, this project offers an engaging entry point into DIY technology.
Dive into this step-by-step breakdown to learn how to assemble and program your desk buddy. You’ll discover how to wire and install components like the ESP32-C6 and buttons, design a custom 3D-printed case and upload code to bring your device to life. Along the way, gain insight into expanding its functionality, such as turning it into a notification center or a digital clock. This guide not only helps you build a practical gadget but also equips you with valuable skills in electronics, coding and problem-solving.
ESP32-C6 Desktop Buddy
TL;DR Key Takeaways :
- Build an interactive desk buddy for under $20 using beginner-friendly components like the ESP32-C6 module, USB-C cable, 3D-printed case, buttons and an optional display screen.
- The step-by-step assembly process includes 3D printing the case, installing components, wiring buttons and uploading customizable code for functionality.
- The desk buddy features a two-button interface for resetting the display and triggering basic or advanced actions, with endless customization options through coding.
- Expand the project by programming additional features like a music display, digital clock, interactive games, or a notification center.
- This project helps develop skills in electronics, coding, 3D printing and problem-solving, making it ideal for beginners and tech enthusiasts alike.
Essential Components
To begin, you’ll need a few affordable and widely available components. These items are beginner-friendly and form the foundation of your desk buddy:
- ESP32-C6 Module: A powerful microcontroller that acts as the brain of your project, offering compatibility with various features and functionalities.
- USB-C Cable: Provides power to the device and allows you to upload code from your computer.
- 3D-Printed Case: A custom enclosure designed to house the components securely, with slots for buttons and a display screen.
- Interactive Buttons: Two buttons that enable you to control the desk buddy’s functions with ease.
- Display Screen: An optional but highly recommended feature to enhance the visual output and interactivity of your device.
These components are easy to source online or at local electronics stores, making this project accessible to anyone interested in DIY technology.
Step-by-Step Assembly Process
Assembling your desk buddy is straightforward, even if you’re new to electronics or 3D printing. Follow these steps to bring your project to life:
- 3D Print the Case: Design or download a case that includes slots for the buttons and display screen. Use your own 3D printer or a printing service to create the enclosure.
- Install the ESP32-C6 Module: Secure the microcontroller inside the case, making sure it is properly aligned and accessible for wiring.
- Mount the Display Screen: If you’re including a screen, attach it securely to the designated slot in the case.
- Connect the Buttons: Wire the buttons to the microcontroller and align them with the case’s slots for easy access and functionality.
- Assemble the Case: Attach the cover to the case, making sure all components are securely in place and properly connected.
- Connect to Your Computer: Use the USB-C cable to link the device to your computer for power and programming purposes.
- Upload the Code: Use platforms like Printpal’s web interface to flash pre-designed or custom code onto the microcontroller, allowing your desk buddy’s functionality.
Once assembled, your desk buddy is ready for use. You can further customize its behavior and appearance to suit your preferences.

Here are more detailed guides and articles that you may find helpful on ESP32.
- $5 ESP32-S3 Super Mini Packs Wi-Fi and Bluetooth
- The $4 ESP32 S3 Super Mini Packs a 240 MHz Dual-Core Chip
- How an $8 ESP32 S3 Microcontroller Runs a 28.9M Parameter Local LLM
- 5 ESP32 Projects Worth Building in 2026: Such as an Apple HomeKit Controller
- $4 ESP32 Module Brings Wi-Fi and Bluetooth to IoT Projects
- Replacing Security Cameras with Three $10 ESP32S3 Wi-Fi Boards
- ESP32-S3 Super Mini Costs $5 and Packs Wi-Fi and Bluetooth
- Gemini 4 Argon Writes ESP Mosaico Firmware to Control RGB LEDs
- ESP32-S3 Super Mini Brings 240 MHz Dual-Core Power For $4
- ESP32 S31 Devkit Hands-on: 320 MHz RISC-V Chip Adds Wi-Fi 6
Features and Functionality
The desk buddy is designed to be both functional and customizable, offering a simple two-button interface for control:
- Top Button: Resets the display screen, allowing you to refresh the device quickly and efficiently.
- Bottom Button: Provides dual functionality:
- Short Press: Triggers basic actions, such as switching modes or interacting with the device’s features.
- Long Press: Activates advanced features, such as changing the display style or running specific programs.
The functionality is powered by customizable code, allowing you to tailor the desk buddy to your specific needs. Whether you want it to display messages, run animations, or perform unique tasks, the possibilities are virtually limitless.
Expanding the Project
The versatility of the components used in this project allows you to explore additional creative applications. Here are a few ideas to take your desk buddy to the next level:
- Music Display: Program the device to display the current track playing on your computer or phone, with options to pause, play, or switch songs.
- Digital Clock: Transform your desk buddy into a stylish clock with customizable time formats, alarms and display styles.
- Interactive Game: Create a mini-game, such as a slot machine or a reaction timer, complete with animations and randomized outcomes.
- Notification Center: Configure the desk buddy to display notifications for emails, messages, or calendar events in real time.
These enhancements not only improve the functionality of your desk buddy but also provide valuable opportunities to deepen your understanding of coding and electronics.
Skills You’ll Develop
Building an interactive desk buddy is more than just a fun DIY project, it’s a hands-on learning experience that introduces you to key technological concepts. Here’s what you’ll gain:
- Electronics Fundamentals: Learn how to connect and integrate components like microcontrollers, buttons and display screens.
- Coding Proficiency: Develop programming skills using languages such as Python or C++, and customize your device’s behavior to suit your needs.
- 3D Printing Expertise: Design and print custom enclosures that are tailored to your project’s specifications.
- Problem-Solving Skills: Enhance your ability to troubleshoot and resolve issues during the assembly and programming process.
This project is ideal for beginners looking to explore technology or experienced makers seeking a cost-effective way to experiment with new ideas.
Unlock Your Creativity
For under $20, you can create an interactive desk buddy that combines creativity, functionality and education. Using the ESP32-C6 module, USB-C connectivity and customizable software, this project offers endless opportunities for personalization and expansion. Whether you use it as a playful desk companion, a music display, or a digital clock, the desk buddy demonstrates how accessible and rewarding modern technology can be. Start building today and discover the joy of bringing your ideas to life.
Media Credit: printpal
Disclosure: Some of our articles include affiliate links. If you buy something through one of these links, Geeky Gadgets may earn an affiliate commission. Learn about our Disclosure Policy.
