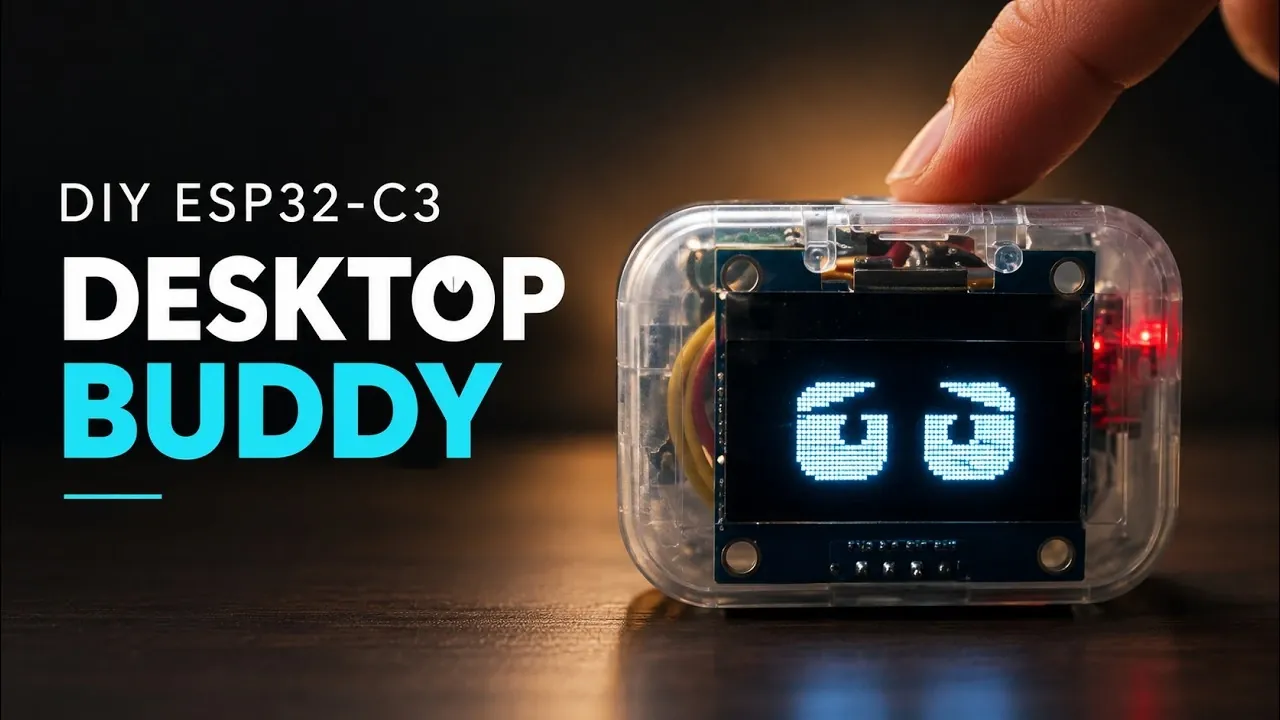
Building a DIY smart desktop companion with the ESP32-C3 microcontroller combines electronics, programming and design into a compact project. MechaMind demonstrates how to assemble a functional device using components such as an ESP32-C3, a 1.3-inch OLED display and a TTP223 touch sensor. A standout feature of this project is its use of Wi-Fi connectivity to enable real-time clock functionality and dynamic updates. Key technical details include wiring the OLED display via the I2C protocol and configuring GPIO pins for touch interaction, making sure precise communication between components.
Explore the steps for programming the ESP32-C3 using the Arduino IDE, including installing the required board package and integrating libraries like Adafruit GFX for animations. Learn how to assemble the hardware into a cohesive enclosure, with guidance on organizing wiring and positioning elements like the charging module and slide switch. This breakdown also covers practical tips for achieving a polished final design that balances functionality and creativity.
ESP32-C3 Microcontroller Project
TL;DR Key Takeaways :
- The project involves creating a smart desktop companion using the ESP32-C3 microcontroller, featuring Wi-Fi connectivity, touch interaction and animated displays.
- Key components include the ESP32-C3 microcontroller, 1.3-inch OLED display, TTP223 touch sensor, rechargeable LiPo battery and TP4056 charging module, all housed in a compact enclosure.
- Step-by-step instructions cover wiring the components, programming the ESP32-C3 using Arduino IDE and assembling the device for functionality and durability.
- The finished device offers features such as animated displays, touch-based interaction, live time updates via Wi-Fi and portability with a rechargeable battery.
- This DIY project is suitable for both beginners and experienced makers, providing a hands-on opportunity to enhance skills in electronics and programming.
What You’ll Need: Essential Components
To successfully build this project, you’ll need a carefully selected set of components. Each part contributes to the functionality, portability and interactivity of the device:
- ESP32-C3 Microcontroller: A powerful microcontroller with integrated Wi-Fi and Bluetooth capabilities, serving as the brain of the device.
- 1.3-inch OLED Display: A compact screen that displays animations, real-time updates and other visual elements.
- TTP223 Touch Sensor: A touch-sensitive module that enables user interaction by detecting touch inputs.
- LiPo Battery (3.7V, 250mAh): A rechargeable battery that powers the device, making sure portability.
- TP4056 Charging Module: A charging circuit that safely recharges the LiPo battery and manages power delivery.
- Enclosure: A protective casing that houses all components, offering durability and a polished appearance.
These components form the foundation of your smart desktop companion, making sure it is both functional and visually appealing.
1: Setting Up Circuit Connections
The first step in building your smart desktop companion is wiring the components correctly. The ESP32-C3 microcontroller acts as the central hub, connecting the display, touch sensor and power system. Follow these instructions for precise wiring:
- OLED Display: Use the I2C protocol to connect the display. Attach the SDA pin to GPIO6 and the SCL pin to GPIO7 on the ESP32-C3.
- Touch Sensor: Connect the TTP223 sensor to GPIO5 to enable touch-based interaction.
- Battery and Charging Module: Wire the LiPo battery to the TP4056 module for charging. Insert a slide switch between the battery and the module to allow manual power control.
Ensure each connection is secure and test the components individually to verify functionality. This step minimizes troubleshooting during the final assembly.

Advance your skills in ESP32 by reading more of our detailed content.
- $5 ESP32-S3 Super Mini Packs Wi-Fi and Bluetooth
- The $4 ESP32 S3 Super Mini Packs a 240 MHz Dual-Core Chip
- How an $8 ESP32 S3 Microcontroller Runs a 28.9M Parameter Local LLM
- 5 ESP32 Projects Worth Building in 2026: Such as an Apple HomeKit Controller
- $4 ESP32 Module Brings Wi-Fi and Bluetooth to IoT Projects
- Replacing Security Cameras with Three $10 ESP32S3 Wi-Fi Boards
- ESP32-S3 Super Mini Costs $5 and Packs Wi-Fi and Bluetooth
- Gemini 4 Argon Writes ESP Mosaico Firmware to Control RGB LEDs
- ESP32-S3 Super Mini Brings 240 MHz Dual-Core Power For $4
- ESP32 S31 Devkit Hands-on: 320 MHz RISC-V Chip Adds Wi-Fi 6
2: Programming the ESP32-C3
Once the hardware is set up, the next step is programming the ESP32-C3 microcontroller. The Arduino IDE is an excellent platform for writing and uploading code. Follow these steps to program your device:
- Install the ESP32 board package in the Arduino IDE to enable compatibility with the ESP32-C3 microcontroller.
- Download and include the Adafruit GFX and Adafruit SH1106 libraries to control the OLED display and create animations.
- Configure Wi-Fi credentials in the code to allow the device to connect to the internet and retrieve live time data.
- Write or upload a program that includes features such as animated expressions, touch interaction responses and real-time clock functionality.
After uploading the code, your ESP32-C3 will transform into a functional smart gadget capable of dynamic interaction and real-time updates.
3: Assembling the Device
With the hardware wired and programmed, it’s time to assemble the components into a compact and durable enclosure. A well-organized assembly ensures the device is both functional and aesthetically pleasing. Follow these guidelines for assembly:
- Test all components individually to confirm they work as expected before final assembly.
- Secure the microcontroller, OLED display and touch sensor inside the enclosure using screws, glue, or double-sided tape.
- Position the slide switch and charging port so they are easily accessible from the outside for convenience.
- Neatly organize the wiring to prevent tangling or interference, which could impact the device’s performance.
A clean and sturdy assembly not only enhances the device’s appearance but also ensures long-term reliability.
Features of the Finished Device
Once assembled, your DIY smart desktop companion will offer a variety of features that make it both practical and entertaining. These include:
- Animated Displays: The OLED screen showcases dynamic animations, adding a personalized and engaging touch to your workspace.
- Touch Interaction: The TTP223 sensor allows you to switch between modes or trigger animations with a simple touch.
- Wi-Fi Connectivity: The device connects to the internet to fetch and display live time updates, keeping you informed.
- Portability: Powered by a rechargeable LiPo battery, the gadget is fully portable and can operate without being tethered to a power source.
These features make the device a unique and interactive addition to any desk, blending functionality with creativity.
Building Your Smart Desktop Companion
Constructing a DIY smart desktop companion using the ESP32-C3 microcontroller is a rewarding project that combines electronics and programming. By integrating Wi-Fi connectivity, touch interaction and animated displays, you create a device that is both practical and engaging. Whether you’re a beginner exploring microcontrollers or an experienced maker seeking a fun project, this guide provides a hands-on opportunity to enhance your skills. With careful assembly and programming, your smart desktop companion will not only elevate your workspace but also serve as a testament to your creativity and technical expertise.
Media Credit: MechaMind
Disclosure: Some of our articles include affiliate links. If you buy something through one of these links, Geeky Gadgets may earn an affiliate commission. Learn about our Disclosure Policy.
