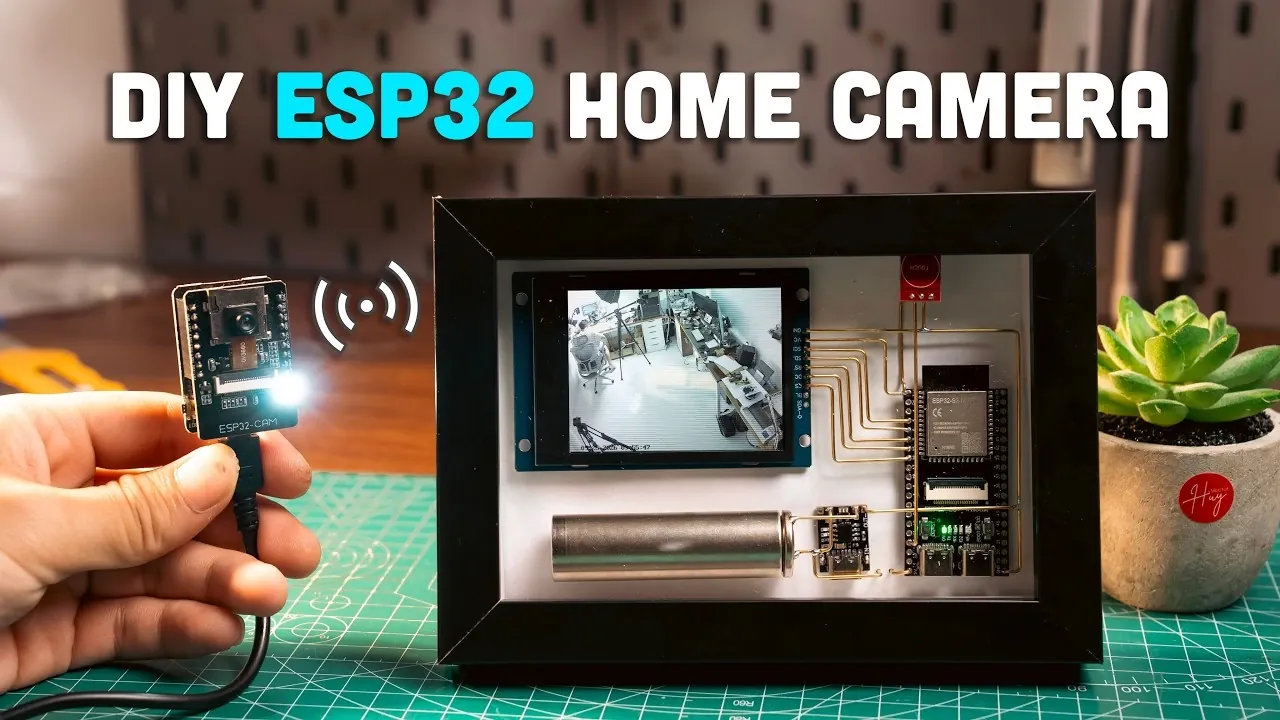
Building a wireless security camera with the ESP32-CAM module offers a practical way to combine cost-effectiveness with essential functionality. HVT Lab explains how this microcontroller, featuring an integrated camera, can be configured for live video streaming, recording and remote monitoring. The project requires assembling components like the ESP32-CAM module, a rechargeable battery and a microSD card, all secured within a protective enclosure to ensure durability and portability.
Explore how to flash firmware onto the ESP32-CAM to enable video streaming, set up Wi-Fi connectivity for remote access and assemble the hardware into a working device. Gain insight into optional upgrades, such as adding a display for local monitoring or incorporating a touch switch for easier operation. This guide provides the steps needed to create a functional and adaptable wireless security camera.
ESP32 Wireless Security Camera
TL;DR Key Takeaways :
- The ESP32-CAM module is a compact and cost-effective solution for creating a wireless security camera with features like live video streaming, recording and remote monitoring.
- Essential components include the ESP32-CAM module, a microSD card for storage, a rechargeable battery with USB-C charging and an optional 2.8-inch display or touch switch for enhanced usability.
- Flashing firmware onto the ESP32-CAM enables video streaming and recording functionality, with companion software allowing remote monitoring and settings adjustments.
- Wi-Fi connectivity is crucial for remote access, with options to connect to a home network or operate as a standalone access point for areas without Wi-Fi coverage.
- The assembled camera offers features like portability, customizable resolution and practical applications for home security, pet monitoring and outdoor surveillance, making it a versatile DIY project.
Essential Components for Your Camera
To begin, you’ll need to gather the required hardware. The ESP32-CAM module serves as the core of this project, combining a microcontroller with a camera in a compact design. Here’s a list of the essential components:
- ESP32-CAM Module: The primary component responsible for video capture and processing.
- MicroSD Card: A storage medium (up to 64 GB) for saving recorded footage.
- Power Supply: A rechargeable 18650 battery paired with a USB-C connector for convenient charging.
- Enclosure: A 3D-printed case or repurposed housing to protect and organize the components.
- Wiring: Brass wiring to establish secure and reliable electrical connections.
- Optional Add-ons: A 2.8-inch display for local video monitoring and a touch switch for user-friendly control.
These components ensure your camera is portable, functional and easy to integrate into your home security setup. The optional add-ons can further enhance usability, depending on your specific requirements.
Flashing Firmware to Enable Camera Functionality
The next step involves flashing firmware onto the ESP32-CAM module to enable its video streaming capabilities. This process transforms the hardware into a fully operational wireless camera. Follow these steps to complete the firmware installation:
- Connect the ESP32-CAM module to your computer using a USB-to-serial adapter.
- Download and install firmware flashing tools compatible with the ESP32 platform, such as the Arduino IDE or ESP32-specific tools.
- Upload firmware that supports live video streaming, recording and adjustable resolution settings.
Once the firmware is installed, you can enhance functionality by integrating companion software on your smartphone or computer. This software allows you to view the live video feed, adjust settings and monitor the camera remotely. Properly flashing the firmware ensures the ESP32-CAM is ready for seamless operation.
Check out more relevant guides from our extensive collection on ESP32 that you might find useful.
- $5 ESP32-S3 Super Mini Packs Wi-Fi and Bluetooth
- How an $8 ESP32 S3 Microcontroller Runs a 28.9M Parameter Local LLM
- $4 ESP32 Module Brings Wi-Fi and Bluetooth to IoT Projects
- ESP32-S3 Super Mini Brings 240 MHz Dual-Core Power For $4
- ESP32 S31 Devkit Hands-on: 320 MHz RISC-V Chip Adds Wi-Fi 6
- $4 ESP32-S3 Super Mini Packs a 0.96-Inch IPS TFT Screen
- ESP32-S3 Super Mini Costs $5 and Packs Wi-Fi and Bluetooth
- Build a DIY Open-Source Flipper Zero Using a ESP32-DIV
- WaveShare ESP32-C5 Offers 32MB Flash and Sensors For $20
- $9 CYD ESP32 Module Includes a 2.88-Inch LCD Screen
Setting Up Wi-Fi Connectivity
The ESP32-CAM module’s built-in Wi-Fi capabilities allow it to connect to your home network, allowing remote access to the video feed. Configuring Wi-Fi connectivity is a crucial step in making sure the camera’s usability. Here’s how to set it up:
- During the firmware setup, input your Wi-Fi network credentials, including the SSID and password.
- Test the connection by streaming video to a device on the same network, such as a smartphone or laptop.
- Optionally, configure the ESP32-CAM as a standalone access point. This allows direct device connections without relying on an external network, which can be useful in areas without Wi-Fi coverage.
Wi-Fi connectivity enables you to monitor your home remotely, providing peace of mind whether you’re at work, traveling, or simply in another part of the house.
Assembling the Camera and Designing the Enclosure
Assembling the camera involves organizing the components within a protective enclosure. A well-designed enclosure not only safeguards the hardware but also enhances the camera’s portability and aesthetic appeal. Follow these steps to assemble your camera:
- Secure the ESP32-CAM module, battery and other components within the enclosure using hot glue or double-sided tape.
- Use brass wiring to establish durable and secure electrical connections between components.
- Position the USB-C connector for easy access, making sure the battery can be recharged without disassembling the device.
- If you’ve included a display or touch switch, ensure they are easily accessible for user interaction.
A 3D-printed case is a popular choice for the enclosure, as it can be customized to fit your specific design preferences. Alternatively, you can repurpose everyday items, such as a picture frame or small box, to house the components.
Features and Practical Applications
Once assembled, your wireless security camera offers a range of features that make it a versatile and valuable addition to your home security system. Key features include:
- Live Video Streaming: View real-time footage on connected devices, such as smartphones or computers.
- Video Recording: Store footage on the microSD card for later review, making sure important events are captured.
- Portability: The rechargeable battery allows you to deploy the camera in various locations without the need for a fixed power source.
- Customizable Resolution: Adjust video quality to balance clarity and storage requirements.
This project is ideal for monitoring entry points, keeping an eye on pets, or securing outdoor spaces. Its affordability and flexibility make it a practical alternative to commercial security systems, especially for DIY enthusiasts seeking a customizable solution.
By building a wireless security camera with the ESP32 microcontroller, you gain a deeper understanding of microcontroller technology while creating a functional and adaptable device. Whether for home security or other monitoring needs, this project demonstrates the potential of modern technology in addressing everyday challenges.
Media Credit: HVT Lab
Disclosure: Some of our articles include affiliate links. If you buy something through one of these links, Geeky Gadgets may earn an affiliate commission. Learn about our Disclosure Policy.
