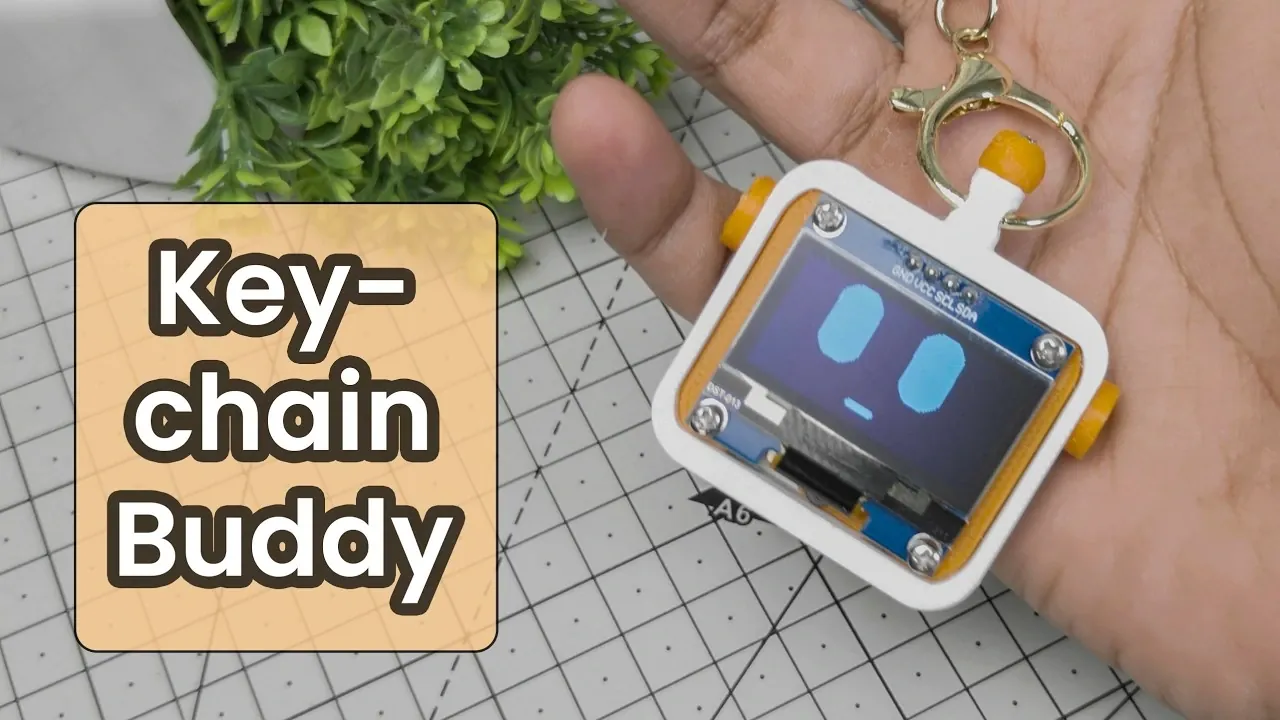
Building a tiny OLED keychain with an ESP32 microcontroller is a compact yet rewarding project that combines electronics, programming and 3D design. In a guide by Tech Talkies, the process is broken down into manageable steps, starting with assembling essential components like a ESP32 S3 board, a 1.3-inch OLED display and a small rechargeable battery. These elements are housed in a custom 3D-printed enclosure, designed to be both portable and functional. Using the Arduino IDE, the project takes advantage of the ESP32’s built-in battery management system, making it accessible for beginners while still offering room for advanced customizations.
Explore how to wire and program the OLED display for personalized outputs, such as scrolling text or real-time sensor data. Gain insight into designing a compact enclosure that securely holds all components while maintaining accessibility for assembly and future modifications. You’ll also discover potential upgrades, from integrating additional sensors to creating a custom PCB for a cleaner design. This guide provides a clear path to building a practical, lightweight device with plenty of opportunities for creative expansion.
DIY Keychain Buddy
TL;DR Key Takeaways :
- Learn to create a miniature OLED keychain using an ESP32 microcontroller, combining electronics, programming and design in a compact, functional device.
- The project involves assembling a 1.3-inch OLED display, a rechargeable battery and a slide switch within a custom 3D-printed enclosure for portability and efficiency.
- Programming the ESP32 via Arduino IDE allows customization of the display, including scrolling text, animations, or real-time sensor data, making it beginner-friendly yet versatile.
- Advanced customizations, such as adding sensors, wireless connectivity, or a custom PCB, can enhance functionality and aesthetics while deepening technical skills.
- This DIY project offers a hands-on introduction to microcontroller programming and electronics, resulting in a unique, portable device with practical applications and creative potential.
Essential Components
To successfully build this project, you’ll need a carefully selected set of components. Each plays a critical role in making sure the functionality and portability of the final product:
- ESP32 S3 Microcontroller: The heart of the device, responsible for managing the display, battery and overall functionality.
- 1.3-inch OLED Display: A compact screen capable of displaying text, animations, or sensor data.
- Small Rechargeable Battery: Provides power to the device, allowing portability and convenience.
- Slide Switch: A simple mechanism to turn the device on or off as needed.
- 3D-Printed Enclosure: A custom-designed case to protect the components and ensure a sleek, portable design.
These components are chosen for their compatibility, compact size and ease of integration, making sure the final product is lightweight, functional and visually appealing.
1: Designing and Assembling the Enclosure
The first step in this project is to design and assemble a custom 3D-printed enclosure. This enclosure will house the microcontroller, OLED display, battery and slide switch, making sure all components are securely held in place. The design should prioritize efficient use of space while maintaining accessibility for wiring and assembly. Once the enclosure is printed, follow these steps to assemble the components:
- Battery Connection: Solder the battery to the ESP32’s battery pads. Place the slide switch in series with the battery to control the power flow.
- OLED Display Wiring: Connect the display’s VCC and ground pins to the ESP32’s 3.3V and ground pins. Wire the SCL and SDA pins to D4 and D5, respectively, for data communication.
To secure the components inside the enclosure, use M2 screws. This ensures durability and gives the device a polished, professional appearance. The compact design of the enclosure makes the keychain portable and easy to carry.

Enhance your knowledge on ESP32 by exploring a selection of articles and guides on the subject.
- $5 ESP32-S3 Super Mini Packs Wi-Fi and Bluetooth
- How an $8 ESP32 S3 Microcontroller Runs a 28.9M Parameter Local LLM
- $4 ESP32 Module Brings Wi-Fi and Bluetooth to IoT Projects
- ESP32-S3 Super Mini Brings 240 MHz Dual-Core Power For $4
- ESP32 S31 Devkit Hands-on: 320 MHz RISC-V Chip Adds Wi-Fi 6
- $4 ESP32-S3 Super Mini Packs a 0.96-Inch IPS TFT Screen
- Build a DIY Open source Flipper Zero Using a ESP32-DIV
- WaveShare ESP32-C5 Offers 32MB Flash and Sensors For $20
- $9 CYD ESP32 Module Includes a 2.88-Inch LCD Screen
- ESP32-S3 Super Mini Costs $5 and Packs Wi-Fi and Bluetooth
2: Programming the ESP32
Programming the ESP32 microcontroller is a straightforward process using the Arduino IDE. The microcontroller is configured to control the OLED display, allowing you to customize the information displayed. The ESP32’s built-in battery management system simplifies charging, with an LED indicator to show the charging status.
Here are some features you can program into the keychain:
- Scrolling text or animations to display personalized messages.
- Real-time sensor data, such as temperature or motion readings.
- Custom graphics or icons for a unique visual experience.
The flexibility of the Arduino IDE makes this project accessible to beginners while offering advanced customization options for experienced hobbyists. With a few lines of code, you can transform the keychain into a personalized, multifunctional device.
3: Advanced Customizations
Once the basic keychain is complete, you can explore advanced customizations to enhance its functionality and aesthetics. These modifications allow you to tailor the device to your specific needs and preferences:
- Custom PCB: Replace the wired connections with a custom-printed circuit board (PCB) for a cleaner, more reliable design. This reduces assembly time and improves the overall durability of the device.
- Additional Sensors: Integrate sensors such as temperature, humidity, or motion detectors to expand the keychain’s capabilities.
- Enhanced Display Features: Experiment with different display layouts, interactive elements, or animations to create a more dynamic user experience.
- Wireless Connectivity: Add Bluetooth or Wi-Fi functionality to enable remote control or data sharing with other devices.
These upgrades not only improve the performance of the keychain but also provide an opportunity to deepen your understanding of electronics and programming.
The Value of Building This Keychain
This project offers a hands-on introduction to the world of DIY electronics and microcontroller programming. By combining a 1.3-inch OLED display, a small rechargeable battery and a slide switch within a custom 3D-printed enclosure, you create a portable and functional device with real-world applications. Whether you’re a beginner eager to learn or an experienced maker seeking a creative challenge, this project provides a rewarding opportunity to develop new skills and explore your creativity.
The compact size and customizable features of the keychain make it a practical and engaging tool. From displaying personalized messages to integrating advanced sensors, the possibilities are endless. This project not only enhances your technical knowledge but also results in a unique, portable device that you can proudly carry or gift to others.
Media Credit: Tech Talkies
Disclosure: Some of our articles include affiliate links. If you buy something through one of these links, Geeky Gadgets may earn an affiliate commission. Learn about our Disclosure Policy.
