
What if you could transform your 3D printing workflow into a seamless, precision-driven process with just one tool? For enthusiasts and professionals alike, the journey from digital design to tangible creation often hinges on the capabilities of slicing software. Enter Creality Print 6, a robust solution tailored to elevate your 3D printing experience. Whether you’re a newcomer navigating the basics or a seasoned maker fine-tuning intricate designs, this software promises to simplify the complex while delivering results that meet your exacting standards. But how do you unlock its full potential? It all starts with understanding its installation and core features.
In this comprehensive walkthrough, you’ll discover how to set up Creality Print 6, explore its intuitive interface, and harness its powerful tools to optimize your prints. From configuring essential settings like layer height and infill density to using advanced features such as real-time printer monitoring, this guide is designed to empower you at every step. You’ll also get a closer look at the software’s streamlined workflow tabs, which guide you from model preparation to slicing and device management with ease. By the end, you’ll not only have a firm grasp of Creality Print 6 but also a newfound confidence in your ability to bring your 3D creations to life. Because in the world of 3D printing, mastery begins with the right tools, and the knowledge to wield them effectively.
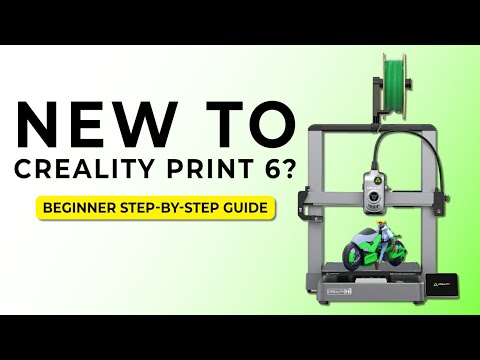
Creality Print 6 Overview
TL;DR Key Takeaways :
- Creality Print 6 is a powerful slicing software designed to streamline 3D printing workflows, offering customizable settings for optimal print quality, durability, and speed.
- The software features an intuitive interface with key tools like undo/redo buttons, printer profiles, and a 3D workspace for precise model positioning and orientation.
- Its workflow is organized into three main tabs: Prepare (model setup and settings), Preview (G-code slicing and inspection), and Device (printer connection and monitoring).
- Creality Print 6 supports USB and Wi-Fi connections, allowing real-time printer monitoring and control, with additional features like remote observation via onboard cameras.
- Advanced tools such as multiple build plates, project management, and cross-platform compatibility enhance productivity and support complex 3D printing projects.
The Importance of Slicing Software
Slicing software is an essential component of 3D printing, acting as the intermediary between your digital model and the physical printer. It translates your 3D designs into G-code, the machine-readable instructions that guide the printer in creating objects layer by layer. Creality Print 6 simplifies this process by offering a range of customizable settings, including layer height, infill density, and print speed. By fine-tuning these parameters, you can tailor your prints to meet specific requirements, whether you prioritize quality, durability, or speed. This level of control ensures that your projects are optimized for the best possible outcomes.
Creality Print 6 Installation & Overview Guide
Getting started with Creality Print 6 is a straightforward process. Follow these steps to download and install the software:
- Visit the official Creality website at Crealitycloud.com.
- Locate the download section and select the version compatible with your operating system, Windows, Mac, or Linux.
- Download the installer and run it on your computer.
- Follow the on-screen instructions to complete the installation process.
- Set your preferences, such as language, default measurement units, and other initial settings.
- Create desktop shortcuts for quick and easy access to the software.
Once the installation is complete, launch Creality Print 6 to begin configuring your 3D printing environment.
Here are more guides from our previous articles and guides related to Creality that you may find helpful.
- Creality Black Friday 2025 Deals : Big Savings on K2 Series 3D
- Creality Black Friday 3D Printer Deals 2025 : K2, K1 Max, Ender-3
- Creality K2 Plus 3D Printer Review: Features, Pros, and Cons
- Creality K2 Plus Review: Features, Performance, and Usability
- Creality CR-6 SE 3D Printer Kit hits Kickstarter from $265
- Creality Falcon2 Pro desktop laser engraver and cutter review
- New Creality CR-5 PRO Desktop 3D printer
- Creality 3DPrintMill desktop conveyor 3D printer passes $1,000,000
- Creality opens official UK online shop with a up to 50% off discount
- CREAL Light Field Display AR Smart Glasses : Combine Digital and
Navigating the Creality Print 6 Interface
The interface of Creality Print 6 is designed to be intuitive and user-friendly, making it accessible to both beginners and advanced users. Upon opening the software, you’ll encounter a virtual print bed where you can position and manipulate your 3D models. Key elements of the interface include:
- Menus: Access a variety of tools, settings, and advanced features to customize your workflow.
- Undo/Redo Buttons: Quickly correct mistakes or revisit previous changes for efficient editing.
- Printer Profiles: Manage multiple printers with ease by creating and saving profiles for each device.
The 3D workspace allows you to zoom, pan, and rotate your model using your mouse, giving you full control over its placement and orientation. This flexibility ensures that your designs are perfectly aligned for printing.
Key Features & Workflow Tabs
Creality Print 6 organizes its functionality into three main tabs, each designed to streamline a specific stage of the 3D printing process:
- Prepare Tab: Import your 3D models, adjust print settings, and position objects on the virtual build plate. Customize parameters such as layer height, infill percentage, and print speed to match your project’s requirements.
- Preview Tab: Slice your model to generate G-code and inspect the slicing process using a layer-by-layer preview. This feature helps you identify and resolve potential issues before printing begins.
- Device Tab: Connect to your printer, monitor its status, and manage multiple devices. View real-time information such as filament usage, nozzle temperature, and print progress.
These tabs provide a logical and efficient workflow, guiding you from initial model preparation to the final stages of printing.
Connecting Your Printer to Creality Print 6
Creality Print 6 supports both USB and Wi-Fi connections, offering flexibility in how you link your printer to the software. To connect via Wi-Fi, follow these steps:
- Ensure that your printer is powered on and connected to the same network as your computer.
- Use the software’s scanning feature to detect available printers on the network.
- Add your printer to the device list and confirm its status within the software.
Once connected, you can monitor and control your printer remotely. If your printer is equipped with an onboard camera, you can even observe the printing process in real time, making sure that everything proceeds smoothly.
Advanced Tools for Enhanced Productivity
Creality Print 6 includes several advanced features designed to improve efficiency and support complex workflows. These tools are particularly useful for experienced users managing multiple printers or intricate projects:
- Multiple Build Plates: Work on several projects simultaneously by assigning models to different build plates within the software.
- Project Management: Organize your files, track print history, and save customized settings for a more streamlined experience.
- Cross-Platform Compatibility: Use the software seamlessly across Windows, Mac, and Linux operating systems, making sure flexibility and accessibility.
These features empower users to handle large-scale or detailed projects with greater ease and precision.
Streamlining Your Printing Workflow
Creality Print 6 simplifies the 3D printing process, making it more efficient and user-friendly. Here’s an overview of the typical workflow:
- Import your 3D model into the software and position it on the virtual build plate.
- Adjust key settings such as layer height, infill density, and print speed to optimize the print for your specific needs.
- Slice the model to generate G-code, using the preview feature to inspect the slicing process and identify potential issues.
- Send the G-code file to your printer and monitor the progress through the software’s interface.
During the printing process, you can make real-time adjustments to ensure the best possible results. This level of control allows you to address any issues that may arise without interrupting the workflow.
Maximizing the Potential of Creality Print 6
Creality Print 6 is a versatile and user-friendly tool that enables users to take full control of their 3D printing projects. By following this guide, you can confidently install the software, navigate its intuitive interface, and use its advanced features to achieve precise and efficient prints. Whether you’re managing a single printer or a fleet of devices, Creality Print 6 provides the tools and flexibility needed to succeed in the ever-evolving world of 3D printing.
Media Credit: DraftID
Disclosure: Some of our articles include affiliate links. If you buy something through one of these links, Geeky Gadgets may earn an affiliate commission. Learn about our Disclosure Policy.