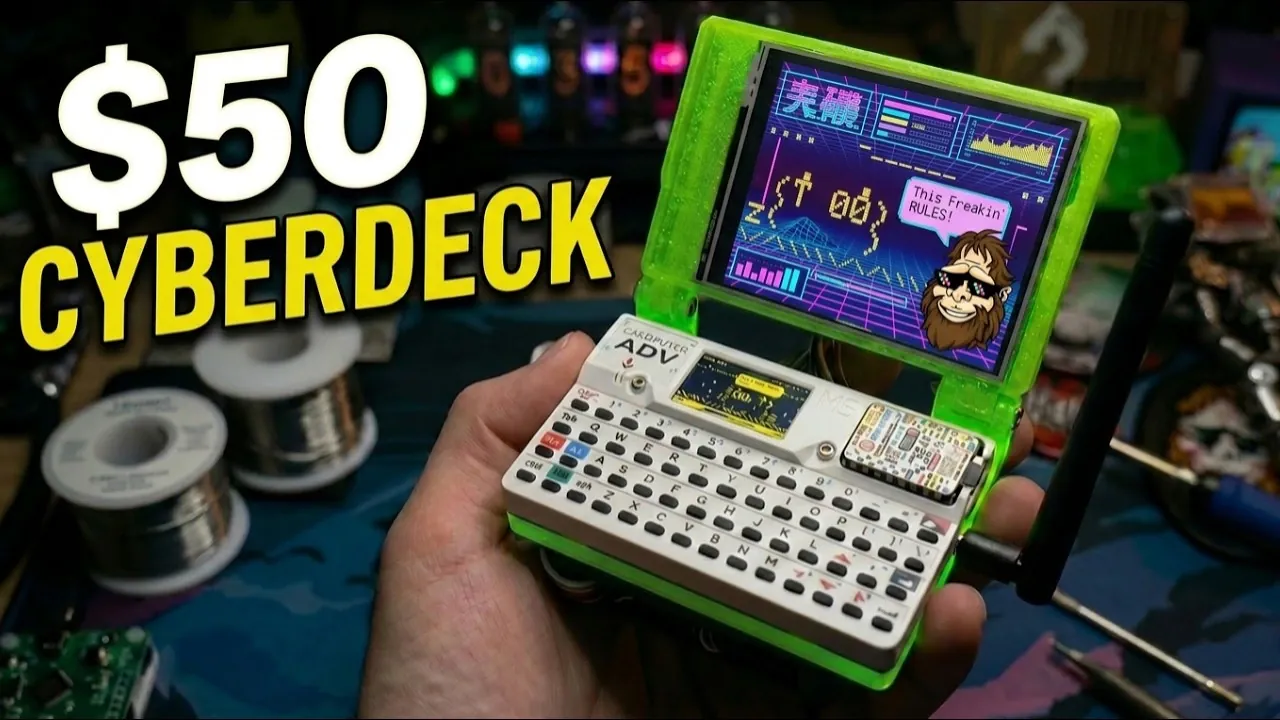
Building a functional and portable cyberdeck for under $50 is a practical challenge that Talking Sasquach approaches with accessible components and clear methods. The project utilizes the Cardputer Advance microcontroller, two 2.8-inch ILI9341 touch displays and a 3D-printed case to create a compact and affordable device. Key steps include aligning the screens precisely and securing the wiring harness to maintain stability during use. This setup is designed to support a variety of tasks, balancing technical capability with creative potential.
Dive into the assembly process, from preparing the 3D-printed case to programming the firmware using Visual Studio Code. Gain insight into how AI resources like Claude AI can assist with coding to expand the device’s functionality. Finally, explore customization options such as dual-screen configurations, animated visuals and personalized menu systems to tailor the cyberdeck to specific needs.
DIY $50 Cyberdeck
TL;DR Key Takeaways :
- Create a compact dual-screen cyberdeck for under $50 using affordable components like the Cardputer Advance and 2.8-inch touch displays.
- Key components include a $30 Cardputer Advance, $20 dual touch displays, a 3D-printed PETG case and a wiring harness made with Dupont cables.
- Assemble the hardware by preparing the case, installing the displays and connecting the wiring with attention to alignment and stability.
- Program the cyberdeck using tools like Visual Studio Code and Claude AI for firmware development, AI integration and debugging dual-screen functionality.
- Customize features such as dual-screen modes, animations and menu interfaces, making the cyberdeck suitable for cybersecurity, creative projects and portable computing.
Essential Hardware Components
To begin, you’ll need to gather a few key components. These are cost-effective, widely available and form the backbone of your cyberdeck:
- Cardputer Advance: A microcontroller platform priced at approximately $30, offering robust performance for its size.
- 2.8-inch Touch Displays: Two screens equipped with ILI9341 drivers, costing around $20 for the pair, providing a dual-screen setup.
- 3D-Printed Case: Designed with PETG filament for durability and heat resistance, making sure a sturdy and heat-tolerant enclosure.
- Wiring Harness: Constructed using Dupont cables and secured with super glue, making sure stable and reliable connections.
These components are readily available online or at local electronics stores, making this project accessible even for beginners. The total cost remains under $50, demonstrating that advanced functionality doesn’t have to come with a high price tag.
1: Assembling the Hardware
The assembly process is straightforward but requires attention to detail to ensure a functional and durable build. Follow these steps to put together your cyberdeck:
- Prepare the Case: Use a 3D printer to create the case using PETG filament. If necessary, refine the fit using a Dremel tool to ensure the displays and components fit snugly.
- Install the Displays: Secure the two 2.8-inch touch panels into the case using screws. Proper alignment is crucial for achieving seamless dual-screen functionality.
- Connect the Wiring: Assemble a wiring harness using Dupont cables. Follow detailed wiring diagrams to connect the displays to the Cardputer Advance, making sure stable and accurate connections.
During assembly, focus on alignment and connection stability. Loose wiring or misaligned components can lead to performance issues, so take your time to double-check each step.

Here is a selection of other guides from our extensive library of content you may find of interest on cyberdeck.
- ClockworkPi uConsole Linux handheld PC from $139
- Build a Modular Cyberdeck for Ultimate Portable Computing Power
- DIY Handheld LattePanda Linux Cyberdeck Build Guide from Scratch
- This Altoids Tin is Actually a Cyberdeck
- How to Build an Awesome LattePanda Mu Cyberdeck
- Awesome DIY Raspberry Pi Satellite Hacking Cyberdeck version 2.0
- Awesome Backpack Cyberdeck powered by overclocked Raspberry Pi
- 8 Hidden Android Apps You Are Missing Out on in June 2026
- New Framework Laptop 12 Upgrades: Thunderbolt 4, Backlit Keyboard, Wi-Fi 7 and More
- How to Turn the Odin 3 Into an ARM-Based Steam Deck Alternative
2: Programming Your Cyberdeck
With the hardware assembled, the next step is programming your cyberdeck. This involves developing firmware, integrating AI tools and testing functionality:
- Develop Firmware: Use Visual Studio Code with the Platform IO extension to write and upload custom firmware. This ensures compatibility with the ILI9341 drivers and supports the dual-screen setup.
- Use AI Tools: Claude AI can assist in generating bridge code for integrating features like Porkbun, simplifying complex coding tasks and reducing development time.
- Test and Debug: Iteratively test your firmware to verify that both screens function correctly. Experiment with mirrored and split-screen modes to ensure versatility.
Even if you’re new to programming, tools like Claude AI and pre-existing libraries make the process more accessible. Testing and debugging are essential to ensure the cyberdeck operates as intended.
3: Customizing and Enhancing Features
Once your cyberdeck is functional, you can begin adding features and customizations to enhance its utility and aesthetics. Here are some ideas to personalize your device:
- Dual-Screen Modes: Implement functionality to switch between mirrored and split-screen modes, allowing for multitasking or enhanced visual presentations.
- Custom Animations: Add visual effects such as matrix code, network scanning visuals, or vaporwave-style animations to give your cyberdeck a unique and dynamic appearance.
- Menu Integration: Design an intuitive interface for navigating features, settings and applications effortlessly.
These customizations allow you to tailor the cyberdeck to your specific needs, whether for professional tasks, creative projects, or personal enjoyment.
Practical Applications of the Mini Cyberdeck
The completed cyberdeck is a versatile tool with a wide range of practical applications. Its portability and adaptability make it an excellent choice for various use cases:
- Cybersecurity: Perform network scanning, channel analysis and other security-related tasks using integrated tools and software.
- Creative Displays: Showcase animations, visual effects, or presentations, whether for personal projects or professional demonstrations.
- Portable Computing: Use the cyberdeck as a lightweight, portable computing device for on-the-go tasks.
Whether you’re a cybersecurity professional, a hobbyist, or a creative enthusiast, the mini cyberdeck offers a compact and functional solution for a variety of needs.
Resources and Additional Notes
To support your build, all necessary files, including 3D models, firmware and wiring diagrams, are available on GitHub. This project also highlights the practical use of AI tools like Claude AI in simplifying coding and hardware integration, making advanced technology more accessible to a broader audience.
By following this guide, you can create a functional, customizable cyberdeck at a fraction of the cost of commercial alternatives. This project not only demonstrates the potential of affordable technology but also encourages creativity and innovation, making it an excellent endeavor for anyone interested in exploring the intersection of hardware and software.
Media Credit: Talking Sasquach
Disclosure: Some of our articles include affiliate links. If you buy something through one of these links, Geeky Gadgets may earn an affiliate commission. Learn about our Disclosure Policy.
