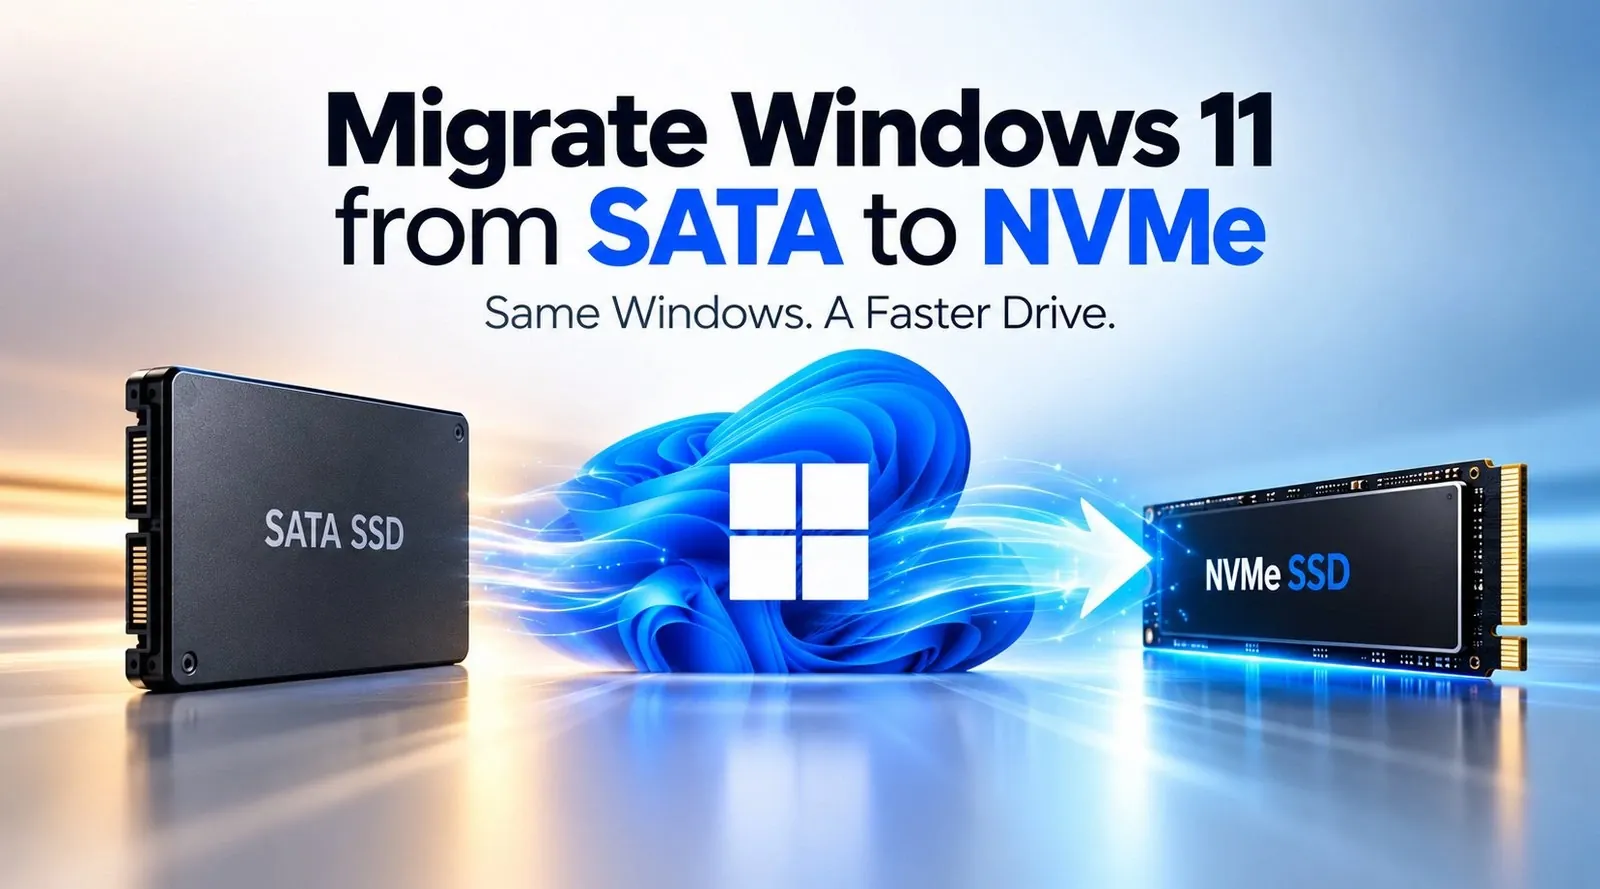
Upgrading from an older SATA SSD to a faster NVMe SSD is an effective way to improve your computer’s storage performance without starting again with a fresh Windows installation. By cloning your existing Windows 11 system drive, you can transfer your operating system, installed applications, personal files and settings to a new SSD while keeping your familiar desktop and software configuration intact.
However, moving Windows 11 to another drive involves more than simply copying files. Your Windows installation relies on several hidden system partitions, including the EFI boot partition and Windows Recovery Environment. These must be transferred correctly to ensure the new NVMe SSD can start Windows independently.
In this comprehensive guide, we’ll explain how to migrate Windows 11 from an older SSD to a new NVMe SSD using reliable disk-cloning software. We’ll also explore free and open-source tools such as Rescuezilla and Clonezilla, explain how to prepare your computer, and cover essential troubleshooting and post-migration checks.
Whether you’re upgrading a desktop PC or replacing the storage in a compatible laptop, these steps will help you complete the migration safely while avoiding common mistakes.
Migrating Windows 11 to a New NVMe SSD
TL;DR Key Takeaways:
- Keep Windows 11 without reinstalling: Disk cloning transfers your existing operating system, applications, settings and personal files to a new NVMe SSD.
- Check compatibility first: Your motherboard or laptop must support the NVMe SSD’s interface, form factor and physical dimensions.
- Back up your files: Create an independent backup before cloning. The destination SSD will normally be overwritten during migration.
- Use reliable cloning software: Rescuezilla and Clonezilla are free, open-source options. Commercial and manufacturer-provided utilities may offer simpler alternatives.
- Clone the entire Windows system disk: Include the EFI System Partition, Microsoft Reserved Partition, Windows partition and recovery partitions where present.
- Check BitLocker encryption: Save your recovery key and follow the cloning software’s encryption instructions before beginning.
- Verify the new SSD boots independently: Temporarily disconnect the original drive where practical to confirm the migration succeeded.
- Optimize your new drive: Check partition sizes, SSD alignment, TRIM support and Windows storage settings after migration.
- Keep the original SSD temporarily: Do not erase your previous Windows installation until you are satisfied that everything works correctly.
Why Upgrade Windows 11 From a SATA SSD to an NVMe SSD?
Traditional SATA SSDs are already significantly faster than mechanical hard drives. However, NVMe SSDs communicate directly over PCI Express, providing substantially greater bandwidth and allowing more storage operations to be processed simultaneously.
A typical SATA III SSD offers sequential transfer speeds of approximately 500–550 MB/s. Modern NVMe drives can deliver several thousand megabytes per second, depending on their PCIe generation, controller, NAND memory and operating conditions.
| Storage Type | Typical Sequential Read Speed | Connection |
|---|---|---|
| SATA III SSD | 450–550 MB/s | SATA |
| PCIe 3.0 NVMe SSD | 2,000–3,500 MB/s | PCIe 3.0 |
| PCIe 4.0 NVMe SSD | 5,000–7,500 MB/s | PCIe 4.0 |
| PCIe 5.0 NVMe SSD | 10,000–14,000+ MB/s | PCIe 5.0 |
Note: These are approximate sequential read-speed ranges for representative consumer SSDs, not guaranteed performance figures. Actual results depend on the drive and computer hardware.
Although these differences are substantial in benchmarks, everyday Windows performance improvements may be less dramatic when upgrading from an existing SATA SSD.
You are most likely to notice improvements when transferring large files, loading substantial game assets, working with high-resolution video, processing large datasets or running applications that perform intensive storage operations.
Windows boot times and ordinary application launches may also improve, although CPU performance, memory capacity and background processes often have a greater influence on overall responsiveness.
Before You Begin: Check NVMe Compatibility
Before purchasing or installing an NVMe SSD, confirm that your computer supports the drive you intend to use. Most modern NVMe SSDs use an M.2 connector, but not every M.2 slot supports NVMe storage. Some older systems support only SATA-based M.2 drives. Check the following:
- Motherboard support: Confirm that your motherboard or laptop supports NVMe SSDs.
- Physical size: Check whether the system accepts M.2 2280, 2242, 2230 or another supported form factor.
- PCIe generation: Determine whether the slot supports PCIe 3.0, 4.0 or 5.0.
- Boot support: Verify that the motherboard firmware supports booting Windows from an NVMe SSD.
- Available connections: Check whether you can connect the original SSD and new NVMe SSD simultaneously.
- Cooling requirements: Some high-performance NVMe drives benefit from an appropriate heatsink, particularly during sustained transfers.
Many PCIe NVMe drives are backward-compatible with older PCIe generations, but they will operate within the bandwidth limits of the installed slot. For example, installing a PCIe 4.0 SSD in a PCIe 3.0-compatible slot generally limits performance to PCIe 3.0 speeds.
Important: If your laptop has only one internal storage slot, you may need a compatible USB-to-NVMe enclosure or another supported migration method. Ensure the enclosure supports NVMe drives rather than SATA-only M.2 SSDs.
1: Back Up Your Existing Windows 11 Installation
Before making changes to your system drive, create a separate backup of important files. Although modern cloning software is generally reliable, selecting the wrong destination disk, encountering a hardware fault or interrupting the migration could result in data loss.
At a minimum, back up your documents, photographs, videos, project files and any other information that cannot easily be replaced. For additional protection, consider creating a complete system image using suitable backup software and storing it on a separate external drive.
A system image can provide a recovery option if the cloning process fails or the original SSD develops a problem. Also consider creating a Windows 11 recovery USB before beginning, particularly if you do not have another computer available to prepare recovery media.
Important: Cloning is not a substitute for maintaining independent backups. The cloning process can overwrite the destination SSD, and an unsuccessful migration should never be your only copy of important data.
2: Check BitLocker and Windows Device Encryption
One of the most frequently overlooked aspects of Windows 11 storage migration is drive encryption. Many Windows 11 computers use BitLocker or Device Encryption to protect the contents of their system drives. Changes to boot configurations, firmware settings or storage hardware can trigger BitLocker recovery. Some cloning applications also require encrypted volumes to be unlocked or decrypted before migration.
Check Whether Your SSD Is Encrypted
Open Command Prompt as an administrator and enter:
manage-bde -status C:This displays information about the encryption status of your Windows system volume. You can also check the encryption settings through Windows Settings or Control Panel, depending on your Windows edition and device configuration.
Save Your BitLocker Recovery Key
If encryption is enabled, make sure you have access to the recovery key before continuing. For personally managed devices, recovery keys may be available through your Microsoft account:
Find your Microsoft account BitLocker recovery keys
For computers managed by an employer or educational institution, recovery keys may be held by the organization’s IT department. Do not proceed until you have confirmed that the correct recovery key is accessible.
Should You Suspend BitLocker Before Cloning?
Temporarily suspending BitLocker protection can help prevent recovery prompts caused by certain boot configuration changes. However, suspending protection does not decrypt the drive.
This distinction is important because different cloning applications handle encrypted Windows installations differently. Some support unlocked BitLocker volumes, while others require the source drive to be fully decrypted before cloning. Follow the instructions provided by your chosen cloning software. If full decryption is required, allow it to finish before starting the migration.
If you suspend BitLocker, remember to resume protection after the new NVMe SSD has booted successfully and you have verified the migration. Microsoft provides additional information about encryption and recovery procedures in its official BitLocker documentation.
3: Install and Connect Your New NVMe SSD
Once you have backed up your files and checked encryption, you can connect the new SSD.
Installing an NVMe SSD in a Desktop PC
- Shut down Windows completely.
- Switch off the computer and disconnect its power cable.
- Follow appropriate precautions against electrostatic discharge.
- Locate a compatible M.2 NVMe slot on the motherboard.
- Remove the M.2 retaining screw or mounting mechanism.
- Carefully insert the NVMe SSD into the connector at the angle specified by the motherboard manufacturer.
- Secure the SSD without overtightening the retaining screw.
- Install a compatible heatsink if required.
- Reconnect power and start the computer.
For laptops, follow the manufacturer’s service instructions. Some devices require additional disassembly, and certain models have restrictions on SSD thickness or heatsink dimensions.
What If Your Computer Has Only One SSD Slot?
If your system cannot accommodate both drives internally, connect the new NVMe SSD through a compatible USB enclosure. You can then clone the original internal SSD to the externally connected NVMe drive, shut down the computer and install the new SSD internally.
Before purchasing an enclosure, confirm that it supports the new drive’s NVMe interface and physical size. Alternatively, you can create a disk image on external storage and restore it to the replacement SSD using suitable imaging software.
Verify That Windows Detects the New SSD
Press Windows + X and select Disk Management.
Locate the new SSD using its capacity and disk information. A completely new drive may appear as unallocated space or trigger a prompt asking whether to initialize it.
For a full-disk clone, you normally do not need to initialize, partition or format the destination SSD.
The cloning application typically creates the required partition structure automatically. If your software specifically requires initialization, follow its instructions. Windows 11 installations using modern UEFI firmware normally use the GPT partition style.
If the SSD does not appear, check the physical connection, motherboard compatibility and BIOS/UEFI storage settings before continuing.
4: Choose the Best Windows 11 SSD Cloning Software
Several reliable applications can migrate Windows 11 from an older SSD to an NVMe drive. Some are completely free and open source, while others provide commercial features or manufacturer-specific migration utilities.
For users who prefer not to purchase cloning software, Rescuezilla and Clonezilla are particularly useful options.
1. Rescuezilla: Free, Open-Source Cloning With a Graphical Interface
Website: Rescuezilla
Rescuezilla is a free, open-source disk imaging and cloning application designed to make backup and recovery tasks accessible through a graphical interface. Unlike conventional Windows applications, Rescuezilla runs from a bootable USB drive using its own Linux-based environment.
Its interface allows users to select source and destination drives, create disk images and perform cloning operations without relying entirely on command-line tools.
Advantages:
- Completely free and open source.
- Graphical interface suitable for users who prefer visual controls.
- Supports disk cloning and image-based backup workflows.
- Runs independently of the installed Windows operating system.
- Useful for system recovery and storage replacement.
Considerations: You must create and boot from a USB drive. Compatibility with encrypted volumes and smaller destination disks should be checked before migration.
Best for: Users looking for a free, graphical disk-cloning solution without purchasing commercial software.
2. Clonezilla: Free, Open-Source Disk Cloning for Advanced Users
Website: Clonezilla
Clonezilla is a widely established open-source disk imaging and cloning utility used for system backup, recovery and deployment. Clonezilla Live can transfer an existing Windows system disk directly to another drive, making it suitable for SSD-to-NVMe migrations. It supports numerous filesystems, including NTFS, and can copy entire disks or individual partitions.
Advantages:
- Free and open source.
- Supports complete disk-to-disk cloning.
- Can copy Windows system and recovery partitions.
- Suitable for advanced users and IT professionals.
- Provides extensive configuration options.
Considerations: Clonezilla’s interface is less beginner-friendly than many graphical alternatives.
Its standard cloning workflow also has restrictions when copying to a smaller destination disk, even if the amount of stored data would fit.
Users should consult the official documentation before attempting complex partition resizing or encrypted-disk migrations.
Best for: Technically confident users who want a powerful, free cloning utility with detailed control over the migration process.
3. Macrium Reflect: Commercial Windows Backup and Cloning Software
Website: Macrium
Macrium Reflect is an established Windows backup and disk-imaging application with features for cloning system drives and restoring Windows installations.
Its graphical interface makes it easier to inspect partitions and configure many common migration tasks. Macrium Reflect is primarily a commercial product. Users should check current licensing, trial availability and edition-specific features before choosing it.
Best for: Users who prefer a polished Windows interface and are comfortable using commercial backup software.
4. Manufacturer-Provided SSD Migration Software
Before purchasing a third-party application, check whether your SSD manufacturer provides a compatible migration utility. For example, Samsung offers data migration functionality through Samsung Magician for supported Samsung SSDs.
Other SSD manufacturers may provide migration tools or access to licensed cloning applications for eligible products. These utilities can be particularly convenient because they are designed around supported hardware.
However, compatibility restrictions vary. Some tools only allow cloning when the destination drive is manufactured by the software provider.
Best for: Users whose new NVMe SSD includes access to a compatible migration utility.
Which Cloning Software Should You Choose?
| Software | Free | Open Source | Best Suited To |
|---|---|---|---|
| Rescuezilla | Yes | Yes | Users wanting a graphical, bootable cloning utility |
| Clonezilla | Yes | Yes | Advanced users and technical deployments |
| Macrium Reflect | Commercial licensing | No | Windows users wanting integrated backup and cloning tools |
| Manufacturer migration utilities | Often included for supported drives | Generally no | Users with eligible SSD hardware |
Our recommendation: For a free and open-source approach, start by evaluating Rescuezilla. Clonezilla is an excellent alternative for experienced users who want greater control. If your NVMe SSD includes a supported migration utility, that may be the simplest option.
Regardless of which software you select, verify that it supports your Windows partition layout, encryption configuration and destination drive capacity.
5: Understand Which Windows Partitions Must Be Cloned
Before starting the migration, it is important to understand how Windows 11 stores its operating system and boot information.
A typical Windows 11 installation using UEFI and GPT includes several partitions.
| Partition | Purpose | Migration Requirement |
|---|---|---|
| EFI System Partition | Stores UEFI boot files and Windows Boot Manager | Essential |
| Microsoft Reserved Partition (MSR) | Reserved for Windows GPT disk management | Preserve in the standard GPT layout |
| Windows Partition (C:) | Contains Windows, applications, settings and personal files | Essential |
| Windows Recovery Partition | Contains Windows recovery tools | Strongly recommended |
Additional partitions may also exist if your computer manufacturer includes recovery images or diagnostic utilities. For most users, the safest approach is to clone the entire Windows system disk rather than attempting to copy only the C: partition. Cloning the complete disk preserves the existing partition structure and reduces the risk of leaving important boot components behind.
Important: A simple file copy using Windows File Explorer will not produce a bootable Windows installation. You need disk-cloning software capable of transferring the required system partitions and boot configuration.
6: Clone Windows 11 From Your Old SSD to the New NVMe SSD
With both drives connected and your cloning software ready, you can begin transferring Windows 11. The exact interface varies between applications, but the essential process is similar.
1. Identify the Source and Destination Drives
Open your chosen cloning application and identify:
- Source drive: The existing SSD containing your working Windows 11 installation.
- Destination drive: The new NVMe SSD that will receive the cloned installation.
Check the model numbers and capacities carefully.
For example, your existing Windows installation might be on a 500GB SATA SSD, while the new destination is a 2TB NVMe SSD.
Never assume that Disk 0 is automatically the original Windows drive or that Disk 1 is necessarily the new SSD. Drive numbering can vary between Windows, firmware and bootable cloning environments.
Warning: Selecting the wrong destination can permanently overwrite important data. Double-check both drives before proceeding.
2. Select the Complete Windows System Disk
Choose the application’s full-disk cloning option. Ensure that the Windows partition, EFI System Partition and other required system partitions are included. If the application offers an operating-system migration wizard, confirm that it includes the partitions necessary for independent UEFI booting.
3. Configure Partition Sizes
If the new NVMe SSD is larger than the original drive, you may want to expand the Windows partition to use the additional capacity.
For example, cloning a 500GB SSD to a 2TB NVMe drive could leave substantial unallocated space if the original partition sizes are copied unchanged.
Some cloning tools allow you to resize partitions during migration. Others preserve the original partition layout and require additional changes afterward. When resizing, preserve the required system partitions and ensure the recovery partition remains functional.
If the recovery partition sits immediately after C:, Windows Disk Management may not be able to extend C: directly into the remaining unallocated space.
In that situation, use a suitable partition-management tool or the cloning application’s supported resizing options rather than deleting recovery partitions unnecessarily.
4. Check SSD Partition Alignment
Modern SSDs perform best when partitions are correctly aligned. Most contemporary Windows installations and reputable cloning applications use suitable partition alignment automatically. If your cloning software offers an SSD alignment or 4K alignment option, ensure it is enabled where appropriate.
Do not confuse 4K alignment with an SSD’s advertised sequential transfer speed. Alignment concerns the placement of partition boundaries relative to storage block structures.
5. Start the Cloning Process
Review the source disk, destination disk, selected partitions and resizing options before confirming. Once cloning begins, avoid disconnecting either drive or interrupting the computer. If you are using a laptop, connect it to a reliable power source. Cloning duration depends on the amount of data, SSD performance, interface bandwidth and cloning method.
A migration involving a few hundred gigabytes may complete relatively quickly, while larger transfers or USB-connected drives can take considerably longer.
Wait for the software to report successful completion before shutting down or restarting.
How to Clone Windows 11 Using Rescuezilla
If you want a completely free, open-source solution with a graphical interface, Rescuezilla is worth considering.
The following workflow outlines the main steps involved in cloning an existing SSD to an NVMe drive.
- Download Rescuezilla from its official download page.
- Create a bootable Rescuezilla USB drive using a suitable USB imaging utility.
- Connect both the original Windows SSD and the destination NVMe SSD.
- Confirm that your source drive’s encryption configuration is supported and that your backup is complete.
- Restart the computer and boot from the Rescuezilla USB drive.
- Launch Rescuezilla and select its cloning functionality.
- Choose the original Windows SSD as the source disk.
- Choose the new NVMe SSD as the destination disk.
- Review the displayed partition information and confirm that the correct disks are selected.
- Follow the on-screen instructions to start cloning.
- Wait until Rescuezilla reports that the operation has completed successfully.
- Shut down the computer before testing the cloned NVMe installation.
Rescuezilla runs independently of Windows, allowing the application to work with the system disk while Windows itself is not running. Its graphical interface makes the process easier to navigate than traditional text-based cloning utilities. However, the software’s ability to handle a particular migration depends on the partition layout, encryption status and relative capacities of the source and destination drives.
Check the current Rescuezilla documentation before attempting to clone to a smaller SSD or migrate an encrypted Windows installation.
How to Clone Windows 11 Using Clonezilla
Clonezilla provides another free and open-source approach, although its text-based interface is better suited to users who are comfortable working with technical utilities.
For a straightforward disk-to-disk migration, the typical workflow is:
- Download Clonezilla Live from the official Clonezilla website.
- Create a bootable USB drive containing Clonezilla Live.
- Connect the original Windows SSD and the destination NVMe SSD.
- Boot the computer from the Clonezilla USB drive.
- Select your preferred language and keyboard configuration.
- Choose Start Clonezilla.
- Select device-device for direct disk-to-disk cloning.
- Choose Beginner mode for a standard supported migration.
- Select disk_to_local_disk.
- Carefully identify the original Windows SSD as the source.
- Select the new NVMe SSD as the destination.
- Review the available verification and partition-handling options.
- Confirm the operation only after checking the selected disks.
- Wait for the cloning process to finish.
- Shut down the computer and prepare to boot from the NVMe SSD.
Clonezilla can copy the complete Windows disk layout, including the partitions needed for booting. However, its standard workflow generally expects the destination disk to be at least as large as the original source disk. Cloning to a smaller drive can require advanced preparation and is not recommended for inexperienced users.
If the destination SSD is larger, Clonezilla may initially preserve the original partition sizes. Additional configuration or partition resizing may be needed to use the full capacity.
The official Clonezilla disk-to-disk cloning documentation provides more detailed instructions.
Watch: How to Migrate Windows 11 to a New SSD
For a visual demonstration of the Windows 11 SSD migration process, the following video from Sid The Geek provides additional guidance on transferring an existing Windows installation to another storage drive.
The video can be used alongside the instructions above. Remember to check the encryption, backup and partition requirements for your own computer before following any cloning procedure.

Become an expert in Windows 11 with the help of our in-depth articles and helpful guides.
- New Windows 11 26H2 Features to Improve Your Daily Workflows
- Affordable Lenovo 2026 LOQ 15 Laptop Scores 9,461 in 3DMark Time Spy
- New Windows 11 demo takes you through all its new features
- Steam Machine Benchmarks: Windows 11 Wins at 4K vs Steam OS
- Microsoft Official Releases Windows Lite an Unbloated Windows 11 for Pros
- New Gateway 23.8″ all-in-one Windows 11 PC
- Minimalist Windows 11 Setup in 7 mins: Boost Your Productivity Instantly
- Intel Panther Lake Powers the MSI Prestige 16 AI+ Laptop
- Remove Windows 11 Bloatware & Tracking For a Faster, Private and More Efficient PC
- Run Windows 11 on M-Series Mac: Full Setup Guide
7: Configure Your Computer to Boot From the New NVMe SSD
After cloning finishes, the next step is to make sure Windows 11 starts from the new NVMe SSD rather than the original SATA drive. This is particularly important because both drives may now contain nearly identical Windows installations and boot configurations.
Recommended Method: Test With the Original SSD Disconnected
Where practical, temporarily disconnect the original Windows SSD before the first boot from the cloned NVMe drive. For a desktop computer with a SATA SSD, this may involve shutting down the system and disconnecting the original drive’s SATA data cable.
This provides a straightforward way to verify that the new NVMe SSD contains everything needed to boot Windows independently. For laptops or systems where disconnecting the original drive is difficult, consult the manufacturer’s instructions and use the firmware boot-selection options instead.
Access the BIOS or UEFI Boot Settings
- Shut down the computer.
- Disconnect the original SSD where practical.
- Turn on the computer.
- Press the appropriate firmware setup key, commonly Delete, F2, F10 or Esc, depending on the manufacturer.
- Locate the boot configuration or boot priority settings.
- Select the Windows Boot Manager entry associated with the new NVMe SSD.
- Save the configuration and restart.
On modern Windows 11 systems, the correct boot option is usually a Windows Boot Manager entry rather than simply the raw NVMe drive name. Some firmware interfaces display the associated SSD model, while others provide less descriptive entries. If the system boots successfully, Windows 11 should load with your familiar desktop, applications and settings.
Important: Do not switch between UEFI and Legacy/CSM boot modes simply to make the cloned drive appear. Windows 11 normally uses UEFI with GPT, and changing the boot mode can prevent an otherwise valid installation from starting.
8: Verify That Windows 11 is Running From the New NVMe SSD
Once Windows starts, confirm that the computer is genuinely using the new NVMe drive. Do not rely solely on the fact that Windows has loaded successfully, particularly if both drives remain connected.
Check the System Disk in Disk Management
- Press Windows + X.
- Select Disk Management.
- Locate the disk containing the active Windows C: partition.
- Inspect the disk properties to identify the underlying SSD model.
- Confirm that the Windows installation is located on the intended NVMe drive.
You can also open Task Manager, select the Performance tab and inspect the available storage devices. For a more detailed check, open PowerShell as an administrator and run:
Get-Partition -DriveLetter C | Get-Disk | Format-List Number,FriendlyName,BusType,SizeThis displays information about the physical disk associated with the Windows C: partition. The friendly name and connection information can help confirm that Windows is using the intended SSD. Keep in mind that some storage controllers and drivers may report connection information differently.
Check Your Applications and Files
Open several frequently used applications and verify that they operate normally. Check important folders, documents, photographs and other personal files. Also confirm that applications requiring activation or licensing continue to function.
Windows activation normally remains intact when cloning to another SSD in the same computer, although unusual licensing configurations or significant hardware changes may require additional activation steps.
9: Expand the Windows Partition to Use Your NVMe SSD’s Full Capacity
If you migrated from a smaller SSD to a larger NVMe drive, you may discover that Windows does not immediately show all the available storage capacity.
For example, cloning a 500GB SSD to a 2TB NVMe drive may leave approximately 1.5TB of additional space unallocated. This is normal when the cloning software preserves the original partition layout.
How to Extend the C: Partition
- Open Disk Management.
- Locate the new NVMe SSD.
- Identify the unallocated space.
- Right-click the Windows C: partition.
- Select Extend Volume if the option is available.
- Follow the wizard to allocate the additional space.
Note: Windows Disk Management generally requires suitable unallocated space immediately after the partition being extended.
If a Windows Recovery partition separates C: from the unallocated space, the Extend Volume option may be unavailable.
In that case, use a reputable partition-management utility capable of safely handling the existing layout, or configure partition resizing during the original cloning process.
Always maintain a backup before moving or resizing system partitions.
10: Check TRIM and Optimize Your New NVMe SSD
After migration, Windows 11 should automatically recognize the new SSD and apply appropriate storage optimization settings. Nevertheless, it is worth checking that TRIM support is enabled.
Check TRIM Status
Open Command Prompt as an administrator and enter:
fsutil behavior query DisableDeleteNotifyFor NTFS volumes, a result such as:
NTFS DisableDeleteNotify = 0indicates that Windows has not disabled delete notifications for that filesystem.
TRIM helps an SSD identify storage blocks that are no longer in use, supporting efficient internal storage management.
However, this command checks the Windows setting rather than independently verifying that TRIM commands successfully reach the physical SSD.
Use Windows Optimize Drives
Windows 11 includes a built-in storage optimization utility.
- Open the Start menu.
- Search for Defragment and Optimize Drives.
- Launch the application.
- Locate the new NVMe SSD.
- Check that Windows identifies it appropriately as a solid-state drive.
- Select Optimize if you want to run the supported optimization operation.
Windows normally performs SSD optimization automatically as part of scheduled maintenance. There is no need to install third-party SSD optimization software simply to enable routine TRIM functionality. Also avoid disabling Windows storage maintenance services based on outdated SSD optimization advice.
Check SSD Firmware and Health
Consider installing the official SSD management utility provided by your drive manufacturer. Depending on the model, these applications may provide:
- SSD firmware updates.
- Drive temperature monitoring.
- Health and SMART information.
- Diagnostic testing.
- Storage performance measurements.
Only install firmware updates from trusted manufacturer sources and maintain a current backup before updating storage firmware.
11: Verify Windows Recovery and BitLocker Protection
A successful Windows boot does not automatically confirm that every recovery feature has been migrated correctly. It is worth checking the Windows Recovery Environment after cloning.
Open Command Prompt as an administrator and enter:
reagentc /infoLook for the Windows RE status.
If it reports Enabled, Windows Recovery Environment is configured as active. If recovery is disabled or its location is incorrect, investigate the partition layout before making further changes. Users with encrypted drives should also confirm that BitLocker protection has been restored appropriately. Check the current status using:
manage-bde -status C:If protection was deliberately suspended for migration, resume it using the supported Windows interface or administrative tools once the new installation has been verified.
Confirm that a valid recovery key remains available and that your recovery-key backup is up to date.
12: What Should You Do With the Original SSD?
Once Windows 11 is working correctly from the new NVMe SSD, you can decide what to do with the original drive.
However, do not erase it immediately. The original SSD provides a useful fallback if you discover missing files, application problems or boot issues after migration. Consider keeping it unchanged for several days while you test the new installation.
Once you are satisfied that the migration succeeded and your independent backups are current, you can repurpose the old SSD for additional storage.
Reusing the Original SSD
If you want to use the original drive as secondary storage:
- Confirm that Windows boots independently from the new NVMe SSD.
- Reconnect the old SSD if it was disconnected.
- Verify that the computer continues booting from the new NVMe drive.
- Back up anything on the old SSD that you still need.
- Open Disk Management.
- Identify the old SSD by its model and capacity.
- Remove the old partitions only after confirming that none are required by the active Windows installation.
- Create a new volume and format it using an appropriate filesystem, such as NTFS.
Some protected system partitions cannot be removed directly through Disk Management.
Advanced disk-management tools can remove these partitions, but selecting the wrong disk can destroy your working Windows installation. For that reason, always verify the physical disk identity before performing destructive operations.
If you intend to sell or dispose of the old SSD, use an appropriate manufacturer-supported secure erase or sanitization method rather than assuming that ordinary formatting permanently removes all previous data.
Troubleshooting: Windows 11 Won’t Boot From the New NVMe SSD
Although disk cloning is usually straightforward when the hardware and software are compatible, problems can occasionally occur. Here are some of the most common issues and how to investigate them.
Problem 1: The NVMe SSD Does Not Appear in BIOS or UEFI
Possible causes:
- The SSD is not correctly installed.
- The motherboard slot does not support NVMe storage.
- The drive is incompatible with the slot’s physical or electrical configuration.
- Firmware settings or shared PCIe resources are affecting detection.
- The SSD or motherboard slot may be faulty.
What to do: Check the manufacturer’s documentation, reseat the drive if appropriate and verify the motherboard’s supported storage configurations.
Some motherboards share bandwidth between M.2 slots and SATA ports, meaning certain connections may become unavailable when another slot is populated.
Problem 2: The SSD Is Detected but Windows Won’t Boot
This can occur if the EFI System Partition was not cloned, the boot configuration is incorrect or the firmware is attempting to start Windows from the wrong drive.
First, confirm that the correct Windows Boot Manager entry is selected. Then verify that the destination SSD contains the necessary Windows system partitions. If the installation still fails to boot, use Windows recovery media and appropriate startup repair tools.
Advanced users may need to rebuild UEFI boot files using Microsoft’s BCDBoot utility, but this should only be attempted after identifying the correct Windows and EFI partitions. Incorrect boot-repair commands can make the situation more difficult to recover from.
Problem 3: Windows Requests a BitLocker Recovery Key
Storage or boot configuration changes may trigger BitLocker recovery. Enter the recovery key associated with the encrypted Windows installation. After Windows starts, review the BitLocker configuration and confirm that protection is functioning correctly. Do not repeatedly change firmware settings or clear the TPM in an attempt to bypass BitLocker recovery.
Problem 4: The New NVMe SSD Shows the Old Drive’s Capacity
This usually means the cloning application preserved the original partition sizes. Open Disk Management and check for unallocated space. Extend the Windows partition if the layout allows it, or use suitable partition-management software to adjust the partitions safely.
Problem 5: The Cloning Software Cannot Copy to a Smaller SSD
Some cloning applications require the destination drive to be at least as large as the original source disk, regardless of how much data is actually stored. Other applications support cloning to smaller drives if the partitions can be resized appropriately and the used data fits.
Check the software’s requirements before beginning. If necessary, reduce the source partition size using supported tools, but do not attempt to shrink partitions without a verified backup.
Problem 6: Windows Boots but the NVMe SSD Seems Slow
Check that the SSD is operating through the expected PCIe connection and that your motherboard supports its advertised performance level. Other factors that may reduce performance include:
- Using a slower PCIe slot.
- Thermal throttling during sustained transfers.
- Insufficient free storage space.
- Background disk activity.
- Outdated SSD firmware.
- USB enclosure bandwidth limitations during testing.
- Performance differences between advertised sequential speeds and real-world workloads.
Remember that a faster NVMe SSD will not necessarily make every Windows operation noticeably quicker than it was on a good SATA SSD.
Frequently Asked Questions About Windows 11 SSD Migration
Can I move Windows 11 from a SATA SSD to an NVMe SSD without reinstalling?
Yes. Compatible disk-cloning software can transfer your existing Windows 11 installation, including the necessary system partitions, to an NVMe SSD. When the migration is completed correctly, Windows should boot from the new drive with your existing applications, settings and personal files intact.
Is Rescuezilla completely free?
Yes. Rescuezilla is free and open-source software. It provides disk imaging and cloning capabilities through a graphical interface and runs from bootable media.
Is Clonezilla safe for Windows 11?
Clonezilla is an established disk-cloning utility that supports Windows-compatible filesystems and complete disk cloning. However, users must select the correct source and destination disks and understand the software’s limitations concerning encryption and destination disk capacity.
Do I need to format the new NVMe SSD before cloning?
Usually not. Full-disk cloning applications typically create the destination partition table and filesystems as part of the cloning process. Only initialize or format the destination if your chosen software specifically requires it.
Will cloning Windows 11 delete my files?
A correctly configured clone should preserve the files stored on the source Windows installation. However, the destination SSD will normally be overwritten. Selecting the wrong destination can result in serious data loss, so independent backups are essential.
Can I clone a 1TB SSD to a 500GB NVMe SSD?
Possibly, but it depends on the amount of used space, partition layout and cloning software. Some applications support shrinking partitions during migration, while others require a destination drive at least as large as the source. Clonezilla’s standard disk-cloning workflow is not generally the easiest choice for migrating to a smaller drive.
Will Windows 11 remain activated after cloning?
Usually, yes. Moving Windows to another SSD within the same computer generally does not invalidate a legitimate Windows activation. Activation problems are more likely when significant hardware components, particularly the motherboard, are changed.
Can I use both the original SSD and the cloned NVMe SSD?
Yes, but it is best to verify that the new NVMe installation boots independently before reconnecting the original drive. Keeping two identical bootable installations connected can create confusion over which Windows Boot Manager or system partition the computer is using. Once the migration is confirmed and your backups are secure, the original SSD can be reformatted and reused as secondary storage.
How long does it take to clone Windows 11 to an NVMe SSD?
The time required depends on the amount of data, the speed of both drives, the connection method and the cloning application. Smaller installations may transfer in less than an hour, while larger systems or slower external connections can take several hours.
Cloning software that copies only used filesystem blocks may complete supported migrations faster than software performing a full sector-by-sector copy.
Is an NVMe SSD always faster than a SATA SSD?
NVMe SSDs generally offer much higher maximum sequential transfer speeds and greater potential for parallel storage operations.
However, the improvement you experience depends on your workload. Large file transfers and storage-intensive applications can benefit substantially, while everyday browsing, office work and ordinary Windows navigation may show smaller differences.
Final Thoughts: The Best Way to Migrate Windows 11 to an NVMe SSD
Migrating Windows 11 from an older SATA SSD to a modern NVMe SSD is a practical way to upgrade your computer without reinstalling the operating system or rebuilding your software environment.
With the right cloning application, you can preserve your Windows installation, applications, personal files and system settings while taking advantage of faster storage technology.
For users who want a free solution, Rescuezilla provides an accessible graphical approach, while Clonezilla offers extensive capabilities for more technically experienced users.
Manufacturer-provided migration software and established commercial cloning applications are also worth considering, particularly when they support your specific SSD and partition configuration.
The most important part of a successful migration is preparation. Check hardware compatibility, create a reliable backup, understand your encryption settings and ensure that all required Windows system partitions are transferred.
After cloning, verify that Windows boots independently from the new NVMe SSD, check your files and applications, confirm recovery and encryption functionality, and make sure Windows recognizes the additional storage capacity.
Finally, keep the original SSD intact until you are confident that the new installation is stable.
By following these precautions, you can move Windows 11 to a new NVMe SSD with minimal disruption and enjoy the benefits of upgraded storage without the time and inconvenience of a complete Windows reinstallation.
Media Credit: Sid The Geek
Disclosure: Some of our articles include affiliate links. If you buy something through one of these links, Geeky Gadgets may earn an affiliate commission. Learn about our Disclosure Policy.
