Staying connected during international travel is essential for navigation, communication, and accessing vital online services. With an eSIM on your iPhone, you can enjoy a convenient and flexible way to maintain connectivity without the need for physical SIM cards. The video below from Apple provides a comprehensive overview of how to purchase, activate, and manage a travel eSIM, ensuring a seamless experience while abroad.

Options for Staying Connected While Traveling
When traveling internationally, there are several ways to stay connected using your iPhone:
- International roaming plans: These are offered by your home carrier and provide the convenience of using your existing number. However, they often come with higher costs, especially for extended trips.
- Local eSIMs: These are purchased from carriers in your destination country and offer affordable, localized plans tailored to your needs. They are ideal for travelers staying in one country for an extended period.
- Prepaid global eSIMs: These temporary data plans are provided by global eSIM marketplaces and are perfect for short-term travel or multi-country trips.
Each option has its advantages and drawbacks. While international roaming is straightforward, it may not be cost-effective. Local eSIMs and prepaid global eSIMs often provide better value and flexibility, particularly for data-intensive activities or longer stays.
Requirements for Using an eSIM
Before using an eSIM on your iPhone, ensure the following requirements are met:
- Device compatibility: Your iPhone must be an iPhone XS, XR, or a later model, as these devices support eSIM functionality.
- Carrier support: Confirm that your wireless carrier offers eSIM services. Not all carriers support eSIM technology, so it’s essential to check in advance.
- Internet access: A stable Wi-Fi or cellular connection is necessary to activate the eSIM on your device.
Meeting these prerequisites ensures a smooth setup process and reliable performance, allowing you to stay connected without interruptions during your travels.
Steps to Set Up a Travel eSIM
Setting up a travel eSIM on your iPhone is a straightforward process. Follow these steps to get started:
- Purchase the eSIM: Obtain an eSIM from your carrier, a local provider, or a global eSIM marketplace. Choose a plan that aligns with your travel needs, whether it’s data-only or includes voice services.
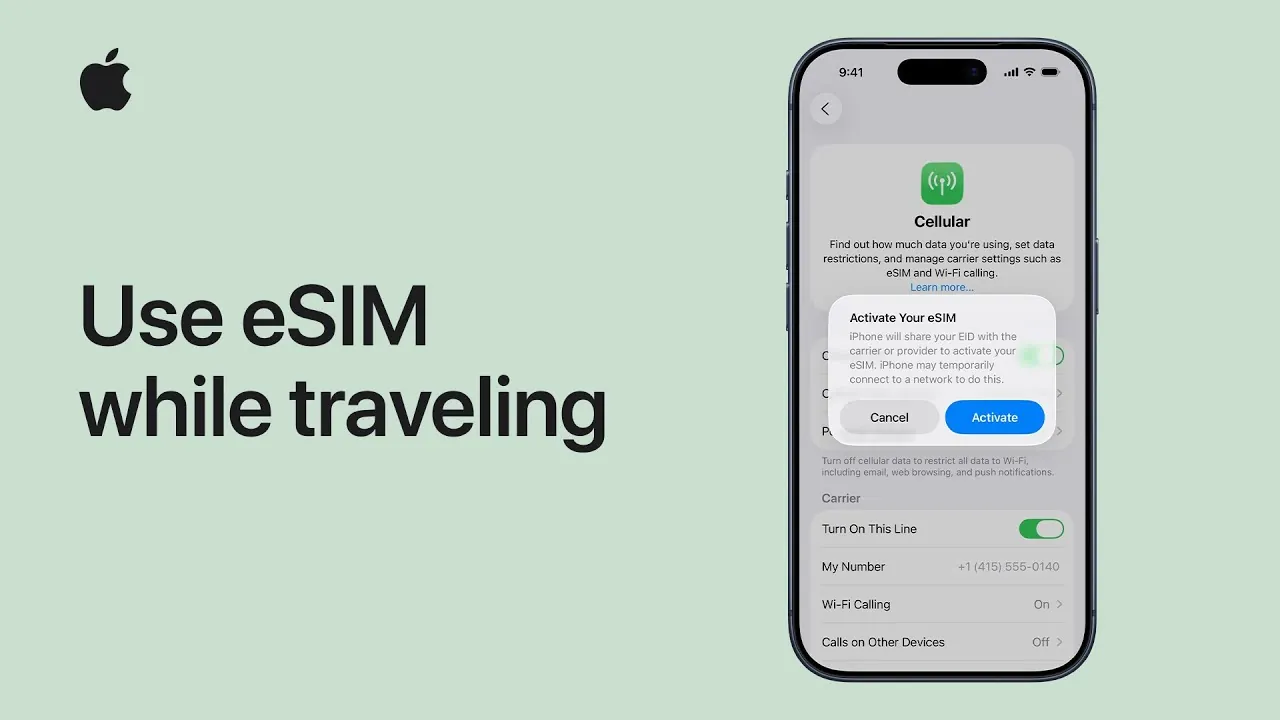
- Activate the eSIM: Use the QR code provided by the seller or manually enter the activation details in your iPhone’s settings under the “Cellular” menu.
- Configure settings: Label the eSIM for travel use and set it as the default line for data or voice services, depending on your preferences.
- Prepare for travel: Keep the eSIM ready but turned off until you arrive at your destination to avoid unnecessary charges.
By completing these steps before your trip, you can activate the travel eSIM effortlessly upon arrival and avoid delays.
Using the Travel eSIM Abroad
Once you reach your destination, managing your travel eSIM is simple and efficient:
- Activate the eSIM: Turn it on via the lock screen notification or in the cellular settings menu of your iPhone.
- Choose your connectivity setup: Decide whether to use only the travel eSIM or keep both your home line and travel eSIM active. Be mindful of potential roaming charges if your home line remains enabled.
- Optimize data usage: Enable low data mode to minimize consumption and avoid exceeding your plan’s limits. This is particularly useful for data-heavy activities like streaming or navigation.
This flexibility allows you to stay connected while managing costs effectively, making sure you have access to essential services throughout your trip.
Switching Back to Your Home Line
When your trip concludes, transitioning back to your home line is quick and hassle-free:
- Turn off the travel eSIM: Manually disable it in your iPhone’s settings to prevent accidental usage.
- Verify automatic switching: If automatic switching is enabled, confirm that your device has reverted to your home line upon returning to your country.
These steps ensure a smooth return to your regular mobile service without any interruptions or unexpected charges.
Additional Considerations
While eSIM technology offers numerous benefits, there are a few factors to keep in mind:
- Carrier and regional support: Not all carriers or regions support eSIMs. Availability may vary depending on your destination, so research in advance to avoid complications.
- Feature limitations: Certain features, such as tethering or specific apps, may not function in every country. Verify compatibility with your chosen eSIM provider before traveling.
Being aware of these considerations helps you plan effectively and ensures a hassle-free experience during your travels.
Maximizing the Benefits of eSIM Technology
Using an eSIM on your iPhone while traveling provides a flexible and cost-effective way to stay connected. By selecting the right eSIM plan, setting it up correctly, and managing your data usage wisely, you can enjoy seamless connectivity without the inconvenience of physical SIM cards. Whether you opt for a local eSIM, a prepaid global plan, or international roaming, eSIM technology ensures you remain connected wherever your journey takes you.
Check out more relevant guides from our extensive collection on eSIM that you might find useful.
- How to Activate eSIM on iPhone: A Step-by-Step Guide
- How to Transfer eSIM to New iPhone (Easy Steps!)
- BMW Expands In-Car Connectivity with Ubigi eSIM
- How to Activate an eSIM on Your iPhone
- How to Activate an iPad eSIM
Source & Image Credit: Apple Support
Disclosure: Some of our articles include affiliate links. If you buy something through one of these links, Geeky Gadgets may earn an affiliate commission. Learn about our Disclosure Policy.