Many beginners try learning every editing feature before finishing anything. New panels, effects, and AI tools quickly create more questions. The first project then gets delayed again and again. Editing starts feeling harder than the actual work requires.
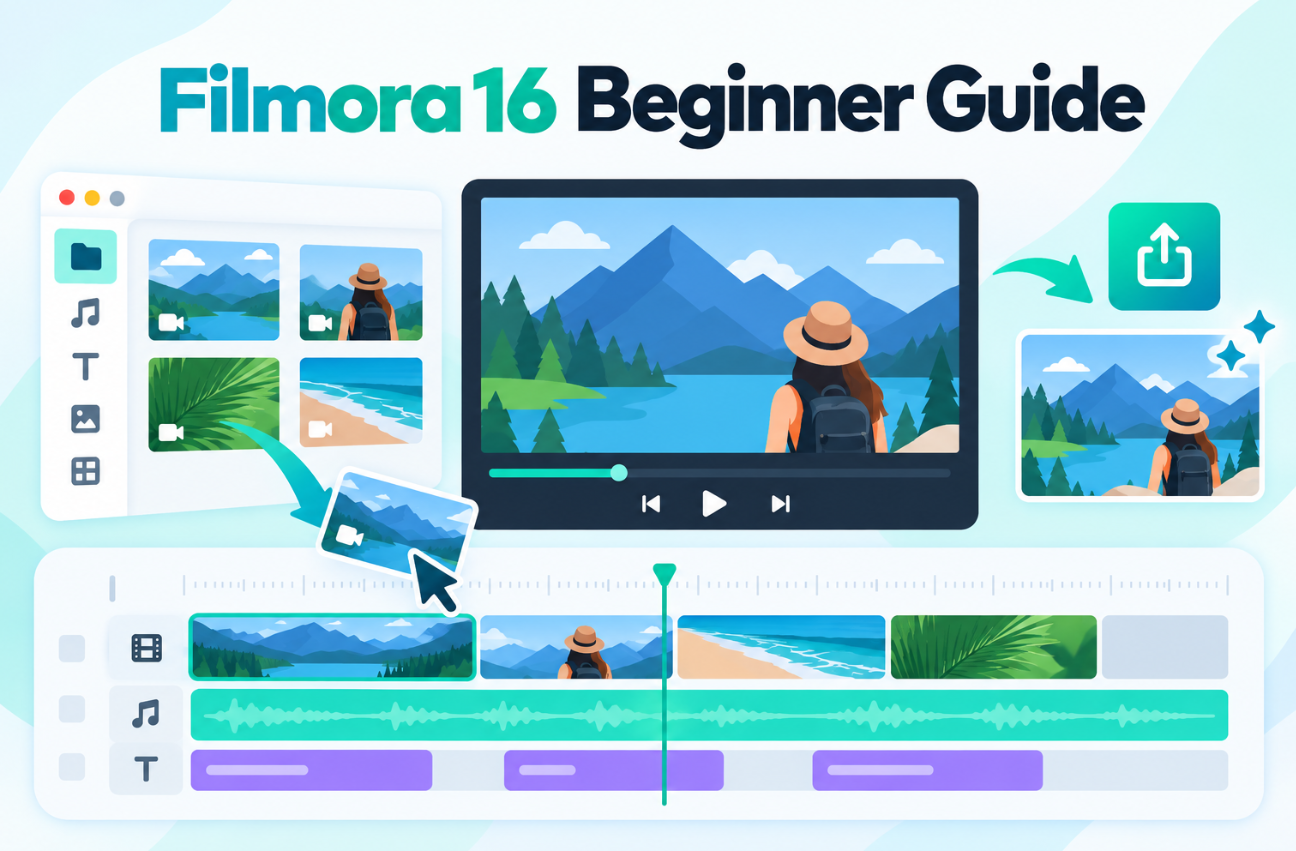
So, what is the simplest workflow for finishing your first video? The Filmora video editor keeps the essential editing steps together. You can import, cut, refine, and export footage easily. This guide breaks that workflow into three simple steps.
Step 1. Import, Organize, and Build the Rough Cut
The first step turns raw clips into a rough cut. This simply puts the story in the right order. It shows whether the video works before adding polish. Four habits help build a clear rough cut.
- Import a Small Set: Add only clips recorded for this video. Avoid importing the entire camera roll or memory card. Fewer clips make reviewing and organizing footage much easier.
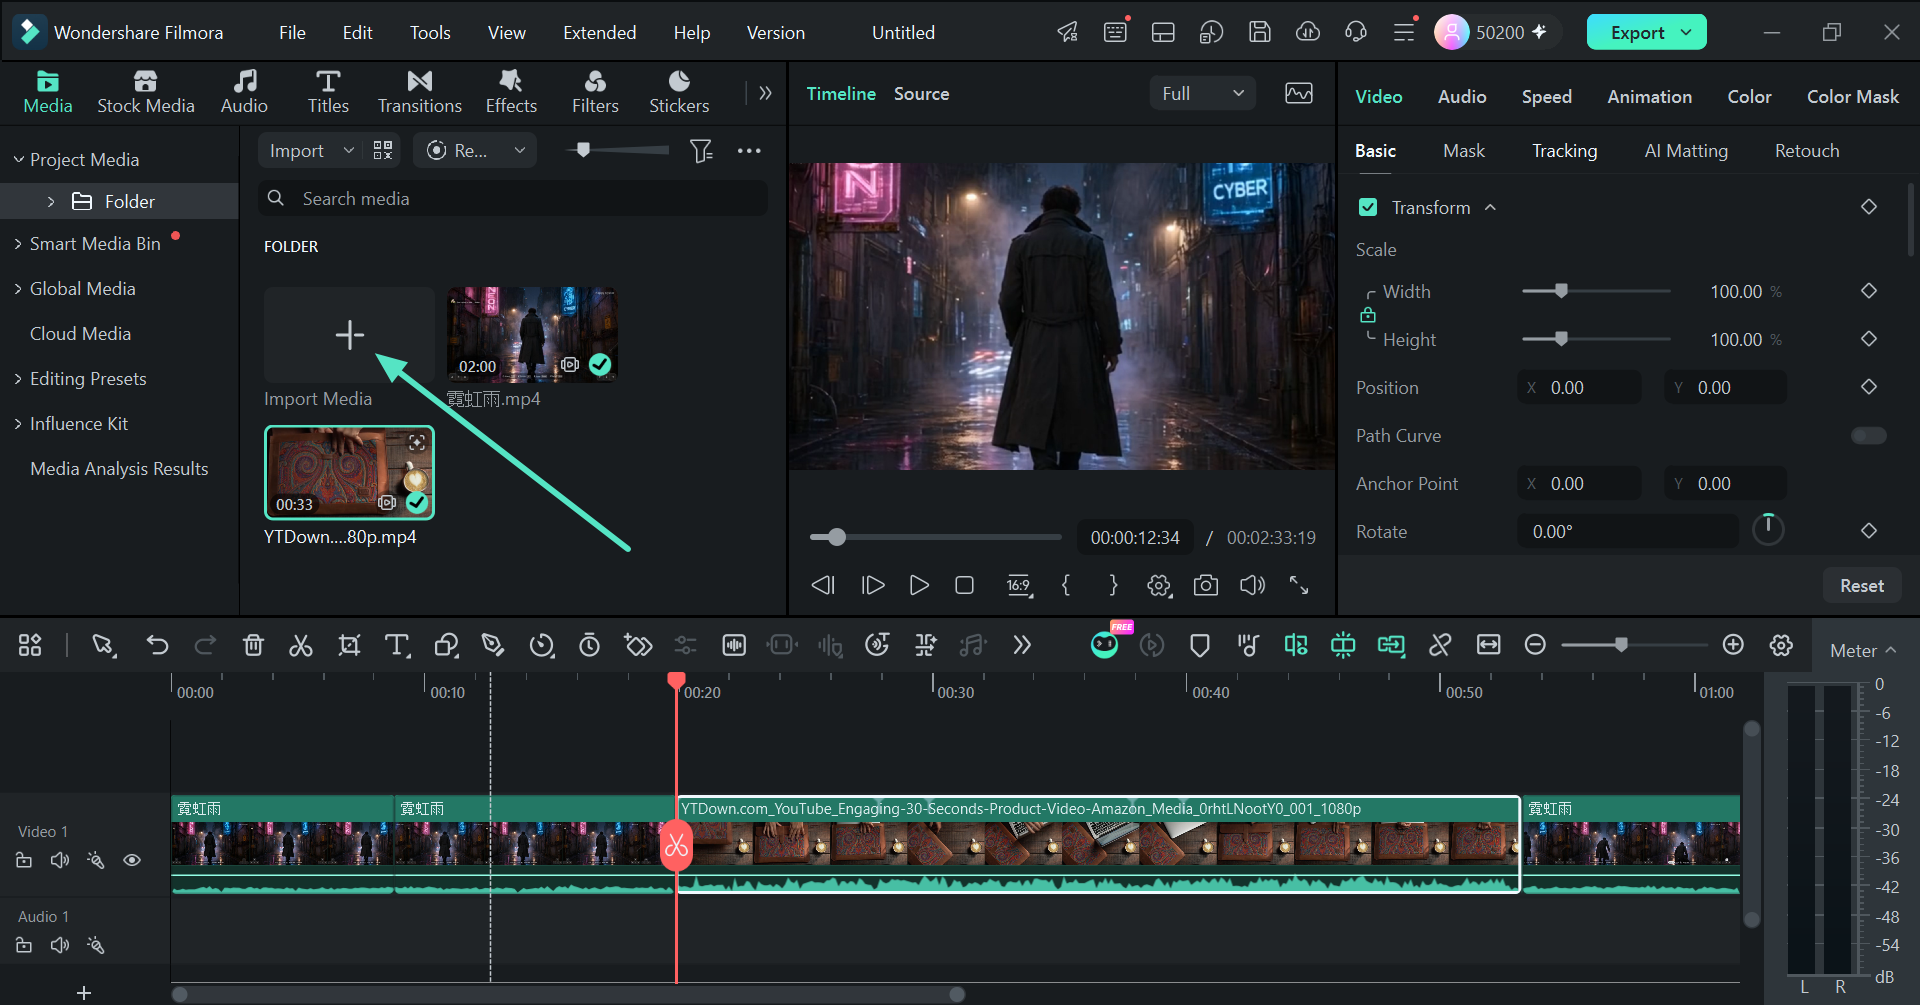
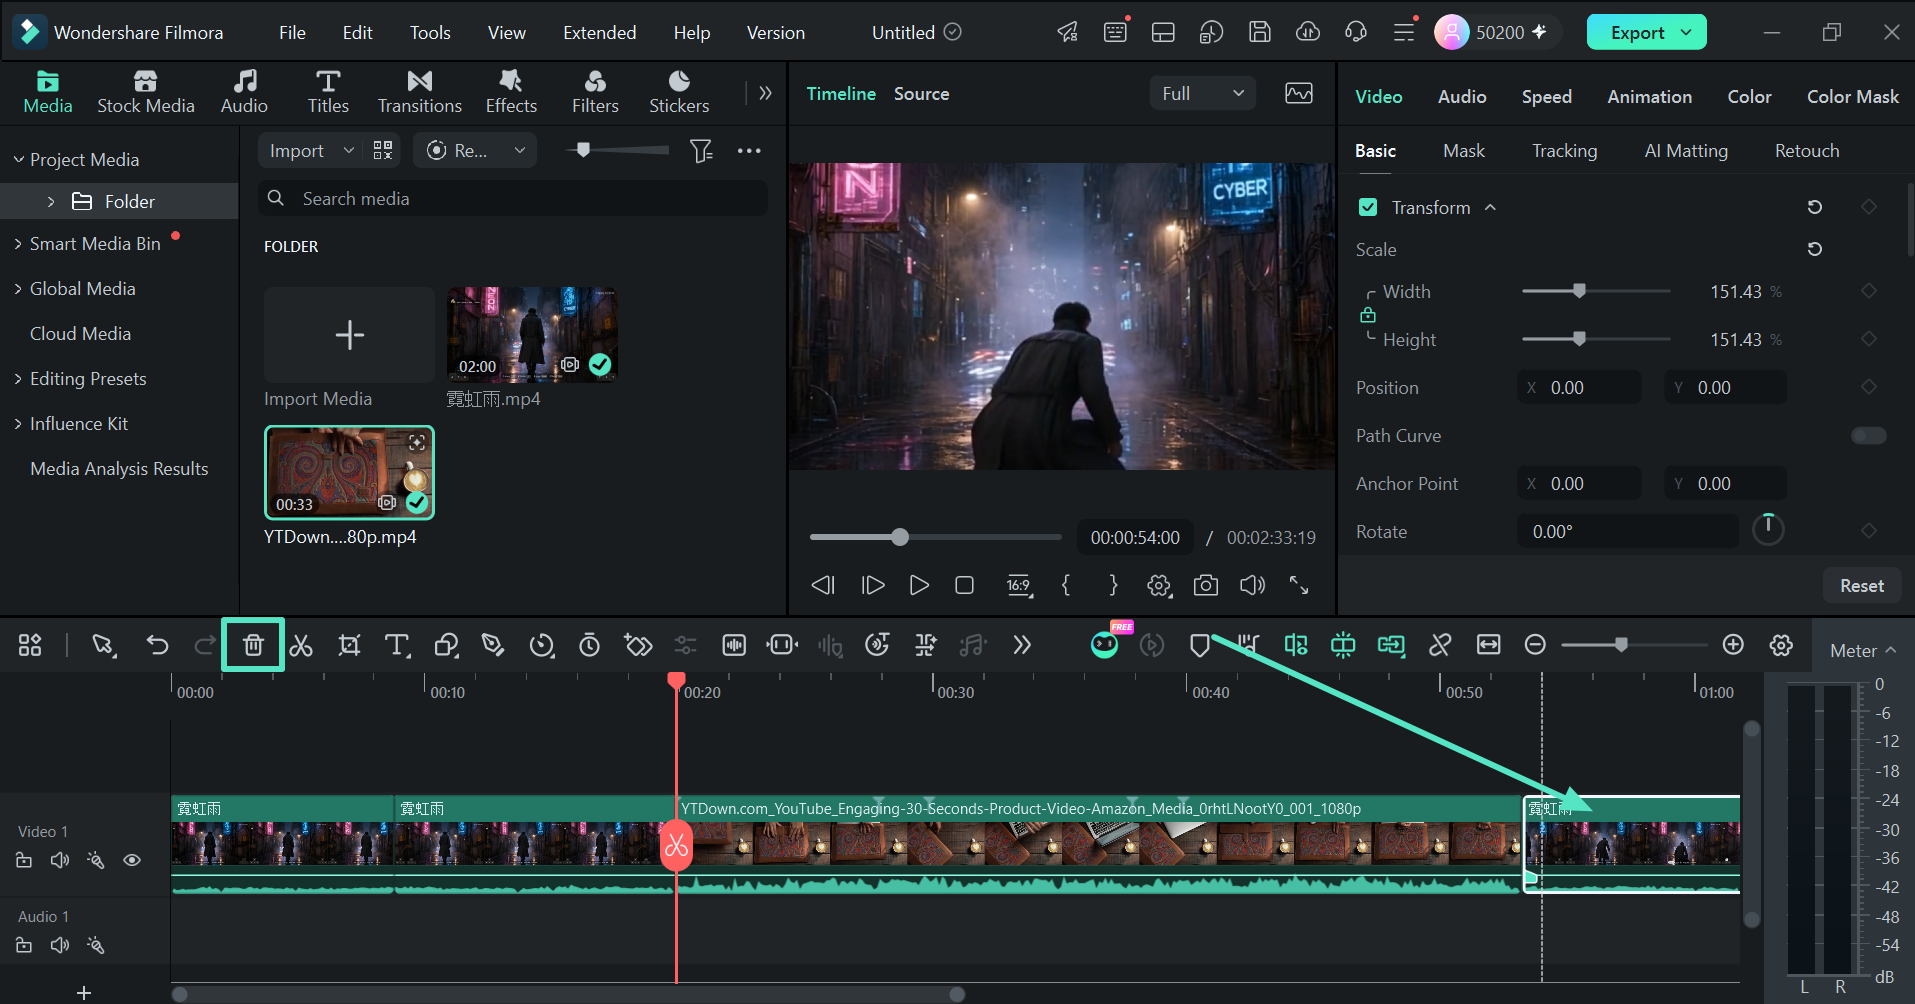
- Remove Unusable Footage: Review each clip and remove obvious mistakes first. Delete blurred, accidental, or extremely shaky footage. Keep useful clips that still support the story.
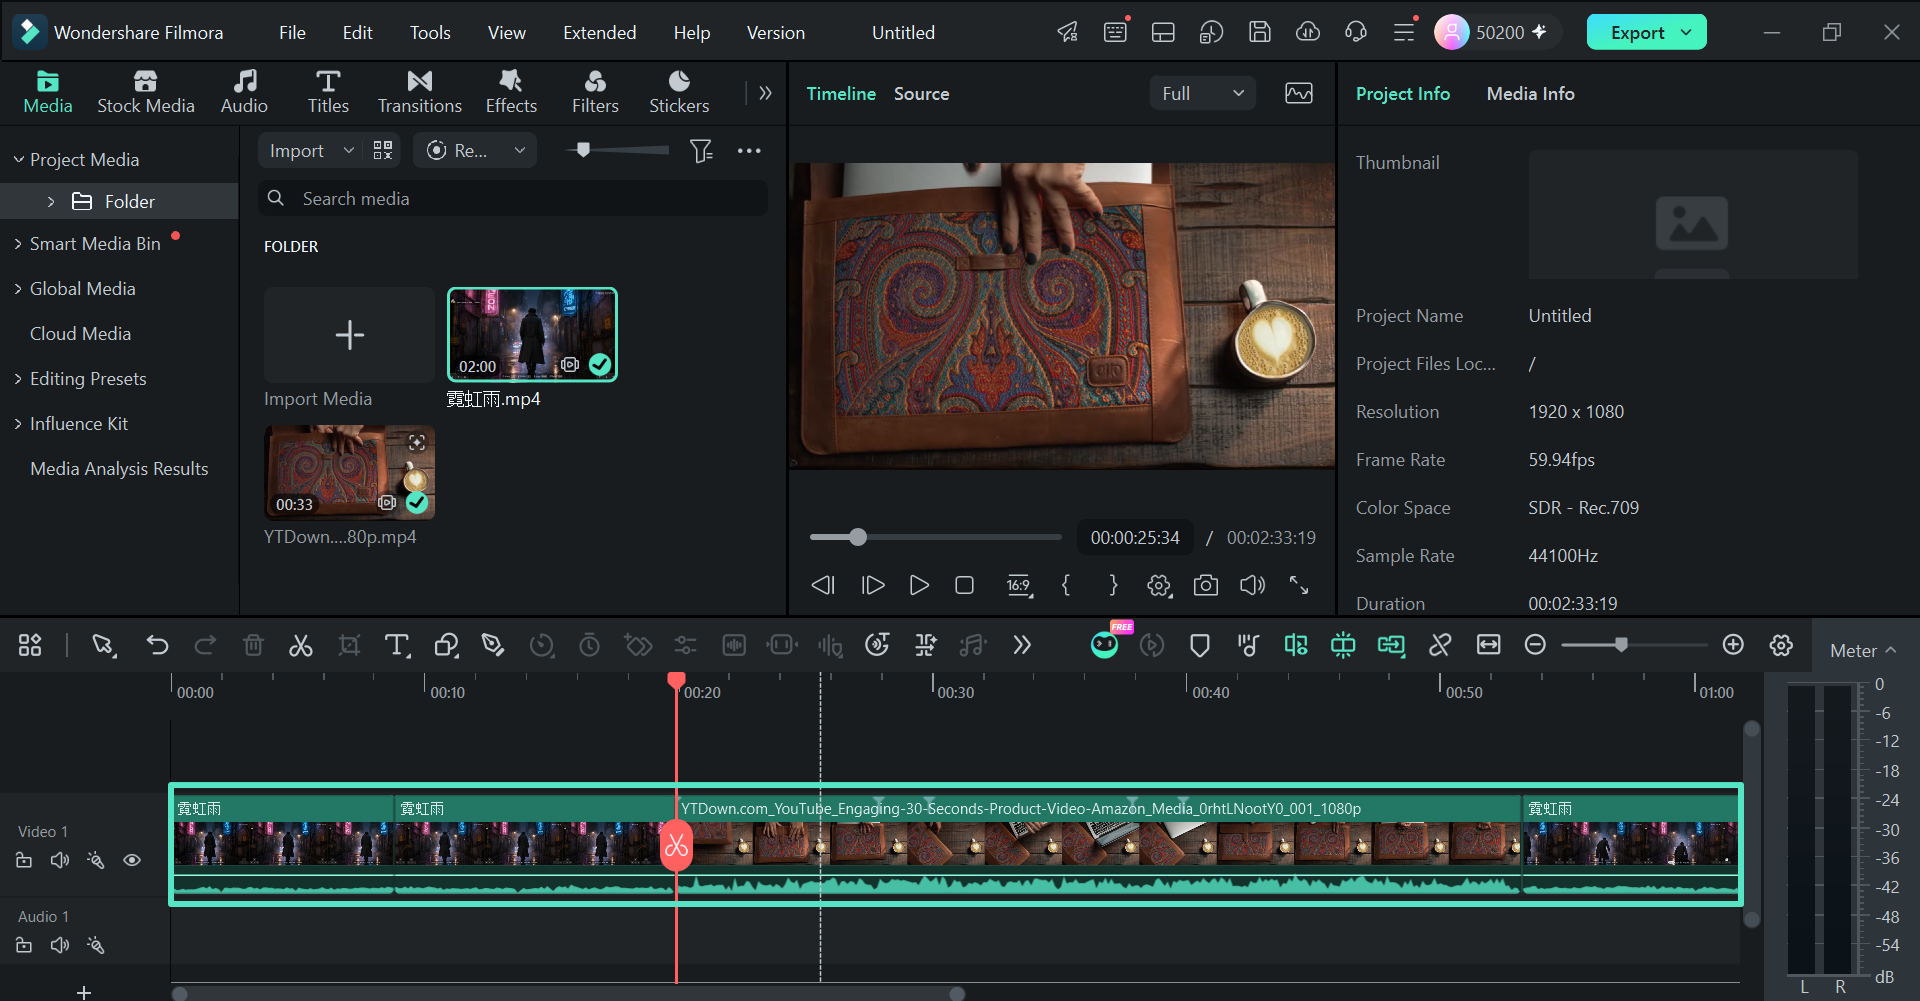
- Arrange in Story Order: Place the strongest clips on the timeline first. Arrange them in the order the story unfolds. Magnetic Timeline helps keep clips connected without leaving gaps.
- Fix Timing Before Style: Trim each clip around its useful action. Remove pauses that slow the story or add nothing. Save transitions, effects, and music for later.
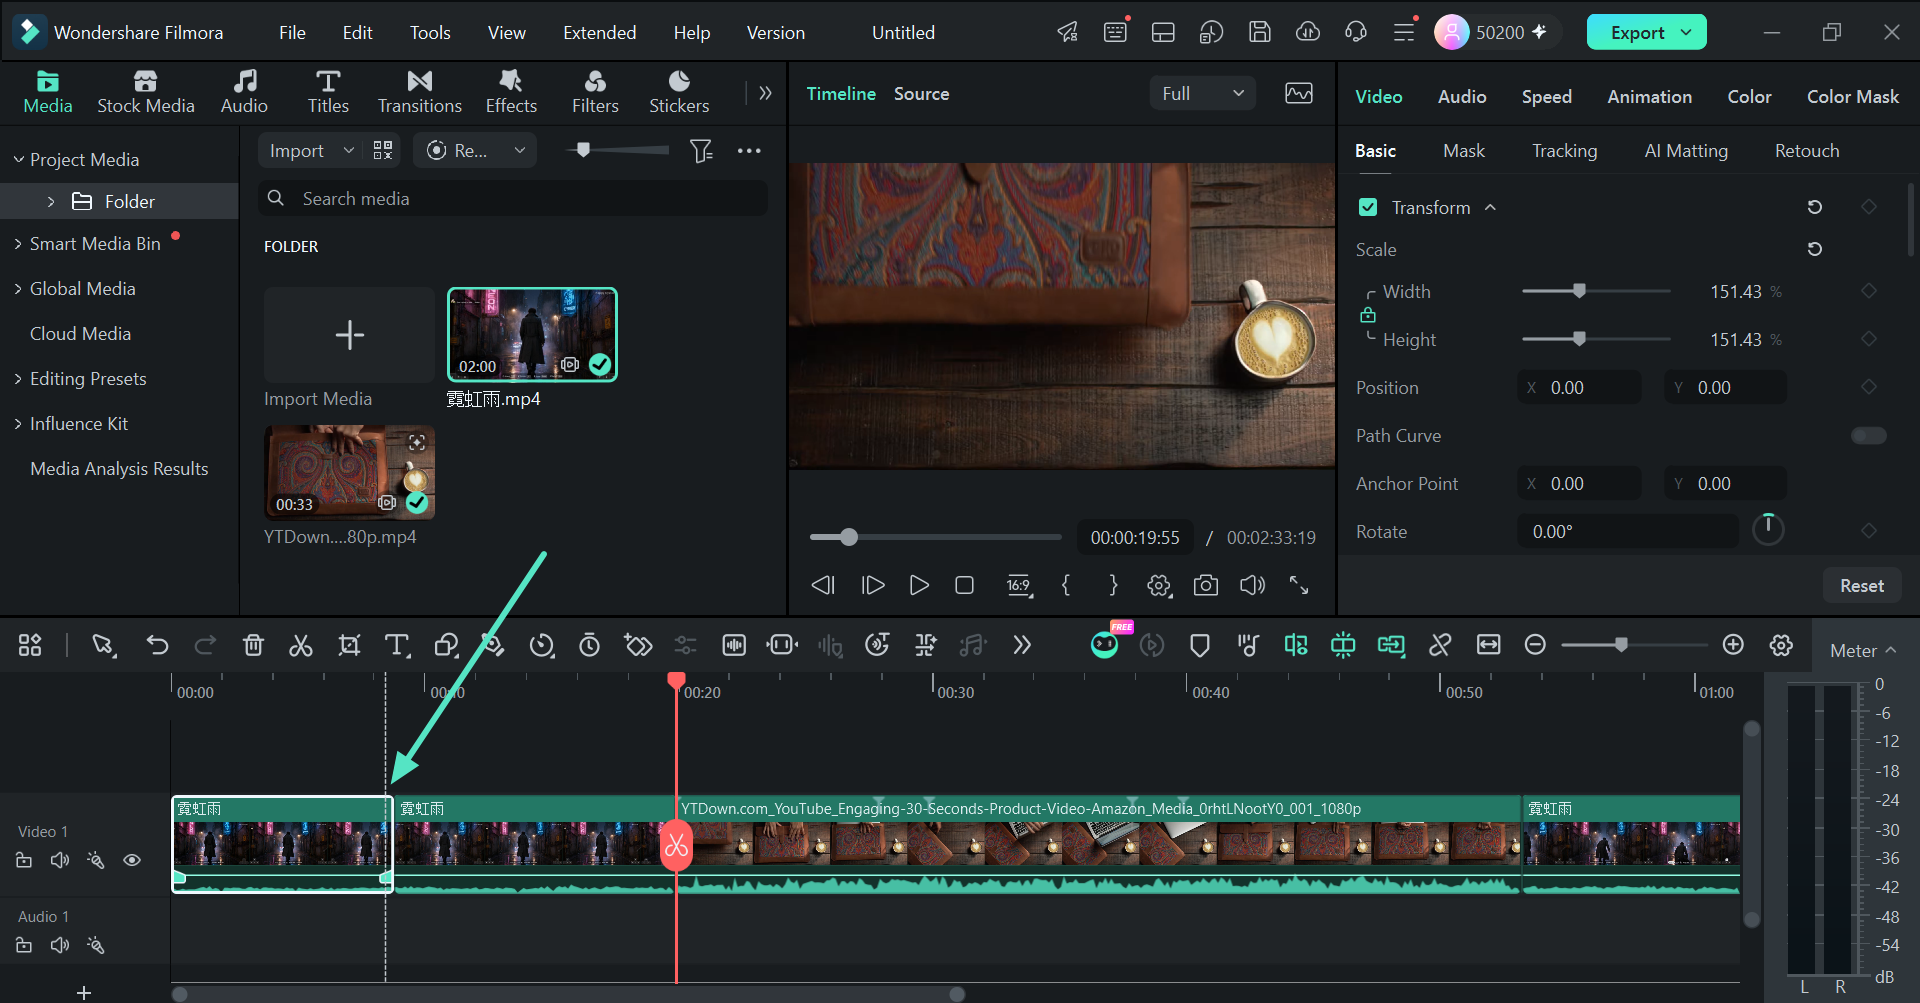
A simple test shows whether the rough cut works. Describe the whole video in one clear sentence. Then check whether every clip supports that main idea. Remove anything that does not strengthen the story.
Note: The Left and Right arrow keys move the playhead one frame at a time, while Up and Down jump between edit points. Those keys make precise trims easier than dragging with a mouse.
Step 2. Refine Picture, Sound, and Captions
Once the rough cut works, refine anything distracting viewers. Mac users can follow the same process in Filmora. Its Mac video editing software supports the same core editing workflow. Start with simple manual fixes before turning to AI tools. The table below pairs common editing problems with practical fixes:
| Problem | Basic Fix First | AI or Automatic Option | Worth Using When |
|---|---|---|---|
| Dark or Night Footage | Raise “Exposure” or “Brightness” under “Color” | “AI Video Enhancer” in the “Basic” video settings, set to “Dark Night View” or “Bright Night View” | Brightening by hand leaves the shot grainy or dull |
| Shaky Handheld Clip | Trim the clip down to its steadiest section | Stabilization, switched on in the same “Basic” video settings | The shake runs through a moment the story needs |
| Thin or Unclear Voice | Raise the voice clip’s volume and cut noisy gaps between sentences | “AI Voice Enhancer” in the clip’s “Audio” settings | Speech still sounds muffled after the basic fix |
| Music Covering the Speech | Lower the volume of the music clip | “Audio Ducking,” also in the “Audio” settings, which dips the music while the voice plays | Speech and music overlap for most of the video |
Add captions after the timing is completely final. This avoids unnecessary caption changes after later trimming. Use captions whenever spoken words carry important information. Speech to Text can generate them automatically. Smart Text Correction can then flag likely transcription errors.
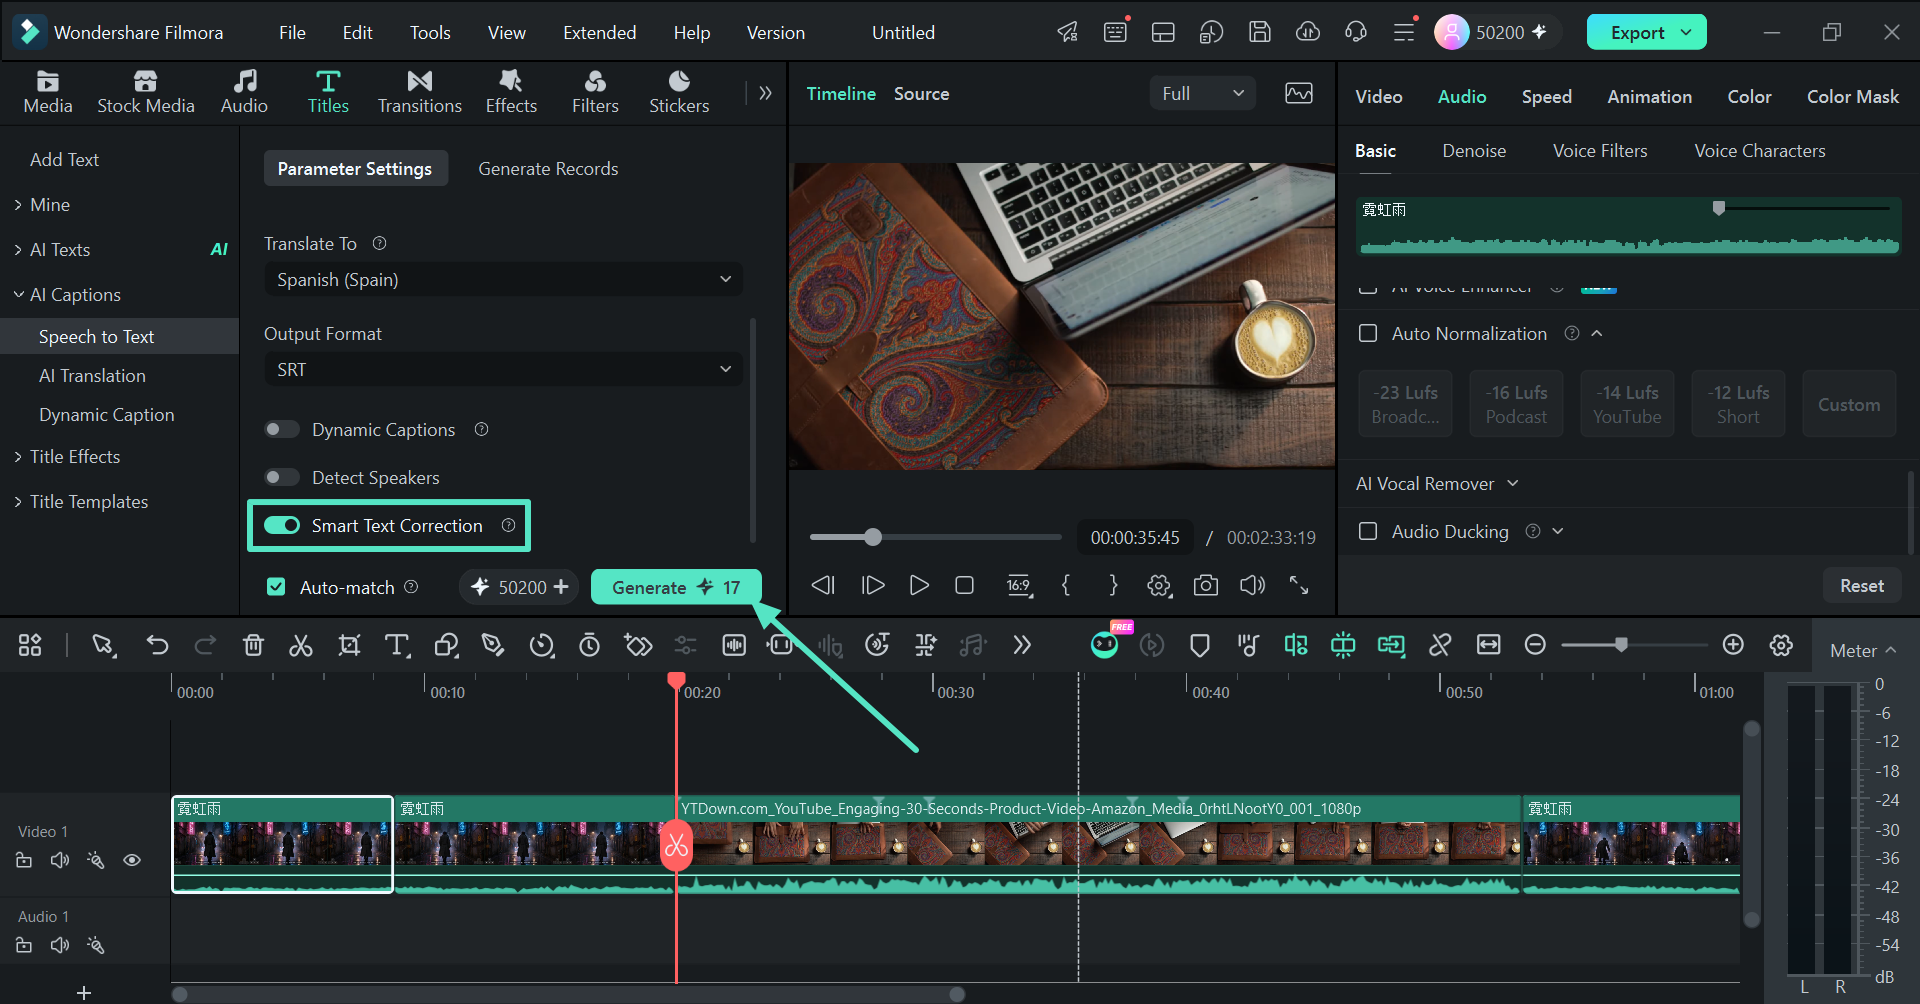
Note: Enable “Audio Ducking” on the voice clip itself. The “Duck Amount” controls how far background music drops.
Step 3. Export and Review the First Draft
With picture, sound, and captions fixed, it is time to export a first draft. Anyone following this workflow in the Filmora free download will see a watermark on exports, which is no problem for a draft. Press “Ctrl + E” on Windows or “Command + E” on a Mac to export it as an MP4. Then check these 4 areas while watching on the device most viewers will use:
| Check | What to Look For | Quick Fix |
|---|---|---|
| Pacing | Shots that keep running after their point lands, and a slow opening that delays the main moment | Trim the end of long shots, and open on the most interesting moment |
| Captions | Misspelled names, brand terms, or numbers, and any caption that covers a face or on-screen text | Correct the wording, and move any caption that hides something important |
| Audio Level | Speech that sinks under the music, sudden jumps in volume, or crackle on loud words | Lower the music or the loud clip, then listen again on headphones and speakers |
| Framing | Heads cut off at the top, subjects drifting to the edge, or text too close to the border | Reposition or scale the clip, and move text away from the edges |
Keeping the first project short makes reviewing much easier. A 2-minute draft can be checked several times quickly. Each review can focus on one specific problem area. Short timelines also make editing mistakes easier to find. Fewer clips mean fewer decisions to revisit or correct.
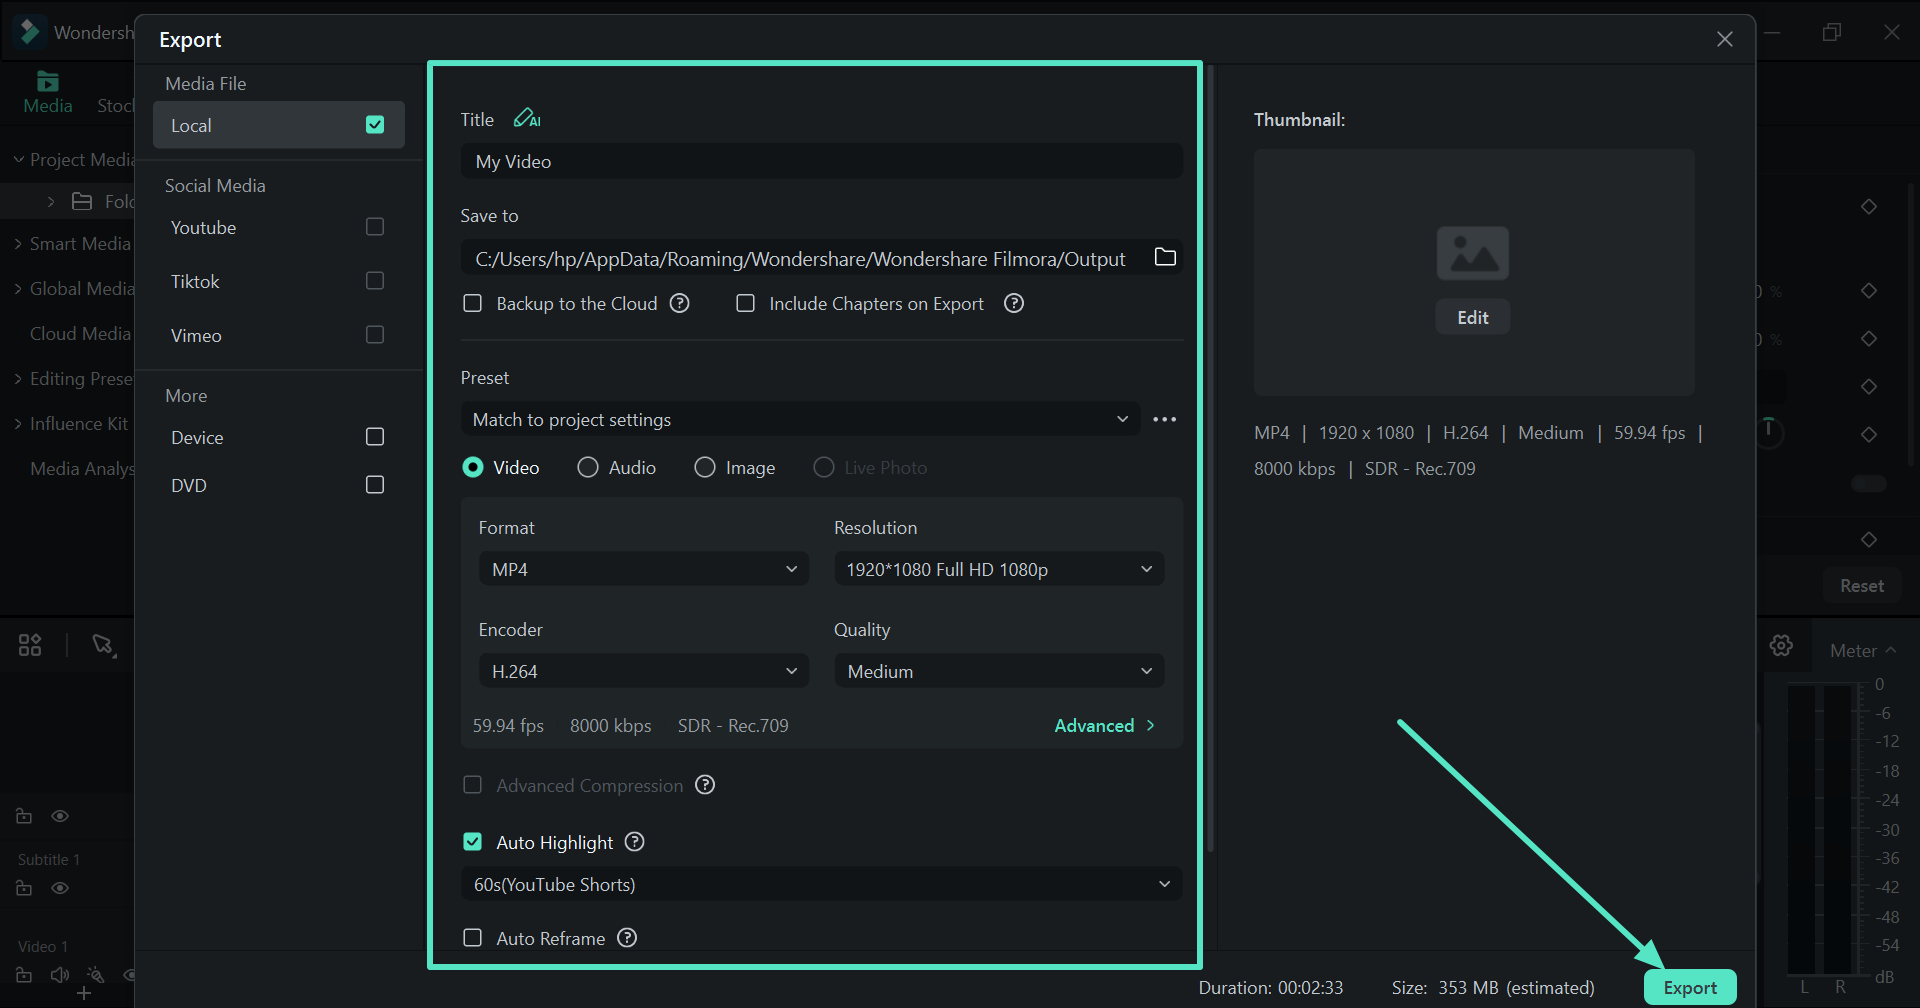
Note: If playback stutters while you fix the draft, press Enter to render the preview. Lowering the playback quality to 1/2 or 1/4 in the preview window also helps, and it never affects the exported file.
Conclusion
To conclude, finishing one simple project teaches beginners how editing works. Keep the first video short and build the story first. Fix only the picture, sound, or caption issues that distract viewers. Review the draft carefully before making the final export. Once this workflow feels natural, explore advanced Filmora 16 tools like Camera Tracking and Color Mask with greater confidence and control.
Disclosure: Some of our articles include affiliate links. If you buy something through one of these links, Geeky Gadgets may earn an affiliate commission. Learn about our Disclosure Policy.
