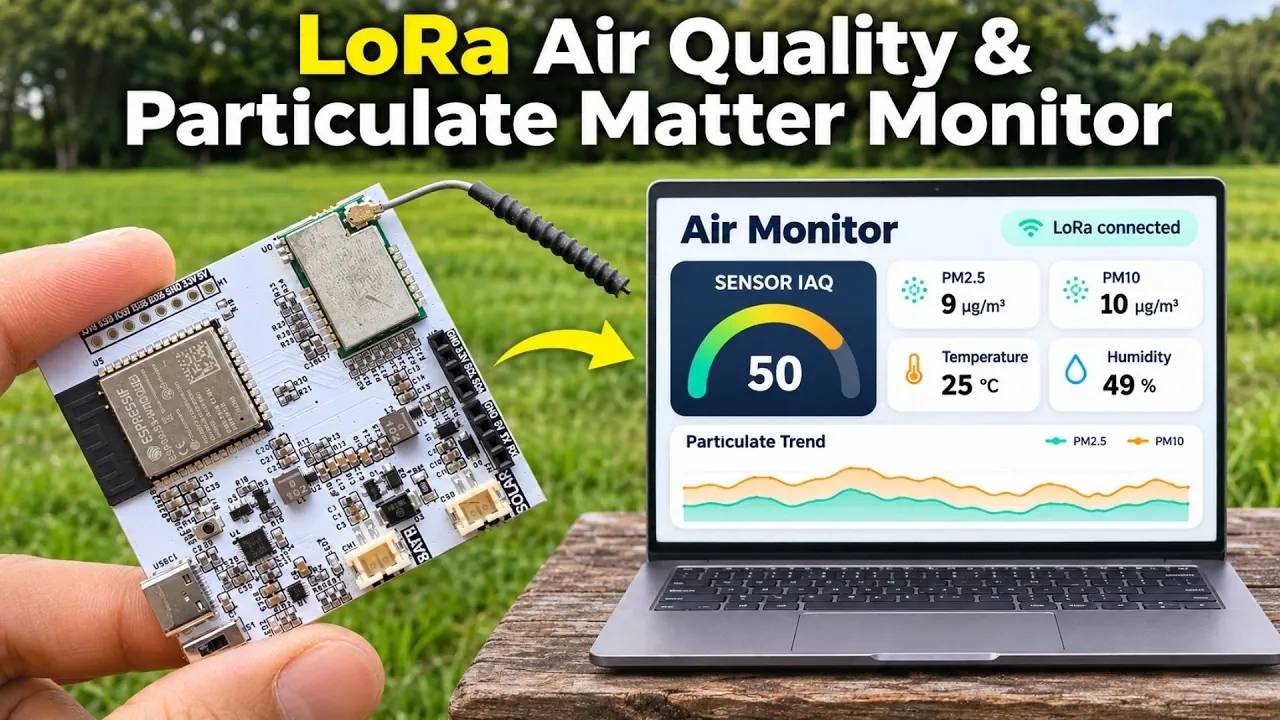
Checking the air quality at the end of your garden, or a kilometer down the road, normally means running power and Wi-Fi out to wherever the sensor sits. This solar-powered ESP32 project needs neither: it sent readings from almost one kilometer away using LoRa radio, with a solar panel and battery keeping it running through the night. How To Electronics shows how the sensors and radio boards fit together, as well as how to view and save the readings from a dashboard on your phone or computer.
Solar-Powered LoRa Air Quality Monitor With ESP32
TL;DR Key Takeaways :
- Two ESP32-S3 boards link an outdoor sensor station to an indoor dashboard over LoRa, so the outdoor unit needs no Wi-Fi.
- The PMS7003 measures PM1.0, PM2.5 and PM10, while the BME680 measures temperature, humidity, pressure and gas resistance.
- The outdoor ESP32-S3 passes sensor data to its LoRa radio approximately every 15 seconds.
- A solar panel charges the outdoor transmitter’s 3.7 V, 5,200 mAh battery, which powers it when the panel is not generating power.
- The indoor receiver connects to local Wi-Fi and hosts a dashboard that saves readings in flash storage and exports them as CSV files.
This solar-powered LoRa air quality monitor uses two custom ESP32-S3 boards: one collects readings outdoors, while the other receives them indoors and hosts a local dashboard. In the test, the outdoor unit was placed almost one kilometer from home and its readings were viewed on a computer, although the dashboard can also be opened on a smartphone or tablet. What stands out to us is the range. Most home air quality monitors only tell you about the room they sit in, so being able to read one almost a kilometer away opens up uses that a Wi-Fi sensor simply cannot cover.
Choose the Sensors and Radio Hardware
The transmitter combines a particulate sensor and an environmental sensor. The Plantower PMS7003 uses laser scattering to measure PM1.0, PM2.5 and PM10 concentrations in µg/m³, while the BME680 measures temperature, humidity, pressure and gas resistance.
Bosch BSEC2 processes the BME680 data to produce an Indoor Air Quality (IAQ) index and estimated CO₂-equivalent and VOC-equivalent readings. An ESP32-S3 collects the data and passes it to the LoRa radio approximately every 15 seconds.
The build uses these main components:
- ESP32-S3 boards: One handles the outdoor sensors; the other runs the receiver and web server.
- E22-900M22S modules: A LoRa transceiver connects to each board over SPI.
- 915 MHz antennas: One connects to each radio in this build.
- Solar panel: Charges the outdoor transmitter’s battery.
- 3.7 V, 5,200 mAh battery: Supplies the transmitter when the panel is not generating power.

Become an expert in LoRa and air quality with the help of our in-depth articles and helpful guides.
- Meshnology W10 LoRa AIoT Dev Kit Runs ESP32 S3 at 240 MHz
- Build Your Own Air Quality Monitor and Protect Your Well-Being
Connect the Outdoor Transmitter
The custom transmitter board has an I²C header for the BME680 and a UART header for the PMS7003. Extra GPIO headers support additional sensors, and a connector accepts the solar panel.
On the board, the BQ25185 manages solar and USB charging, with reverse-polarity protection at the battery connection. A 5 V boost converter supplies power when the microcontroller signals it, while a separate buck converter provides 3.3 V.
For charging and code uploads, the transmitter has a USB-C port connected through a CP2104 USB-to-UART converter. The battery capacity was chosen to keep the unit running overnight, when the solar panel cannot supply power.
Assemble the Indoor Receiver
The receiver uses the same LoRa module and another ESP32-S3, but it does not need external environmental sensors. Connect its antenna and rechargeable lithium-ion battery to complete the basic hardware.
Its MCP73831 charger handles battery charging without a solar input, and a buck-boost converter supplies 3.3 V. The receiver also has reverse-polarity protection, an autoprogrammer and a reset section.
Both boards were designed as custom PCBs in EasyEDA, with placement and routing based on component data-sheet guidance. A PCB service assembled the boards.
Upload the Firmware to Both Boards
The firmware uses the Arduino IDE, RadioLib for LoRa communication and Bosch BSEC2 for environmental processing. The transmitter code separates the two sensor readings and sends them to the receiver. Its low-power mode turns off Wi-Fi and Bluetooth and runs the CPU at 80 MHz.
Because the PMS7003 fan must remain on, the transmitter cannot enter deep sleep. To upload the code, select the ESP32-S3 dev module and the correct COM port, then connect the transmitter to the computer by USB-C.
In the receiver code, change the Wi-Fi SSID and password before uploading. Select the same board type and the appropriate COM port, then use an FTDI module through the programming header: the receiver’s USB-C port is for charging only. The receiver’s dashboard.h file contains the HTML, CSS and JavaScript for the web page.
Position the Station and Open the Dashboard
Place the transmitter outdoors with its sensors, battery and solar panel. After you switch on the transmitter and power the receiver indoors, the receiver connects to the configured Wi-Fi network.
In the receiver’s serial monitor, you can see incoming readings, signal strength, acknowledgements and its local IP address. RSSI and SNR readings also provide information about the radio link. Open the IP address in a browser to reach the dashboard.
Read, Store and Export Measurements
On the dashboard, the overview shows an IAQ gauge alongside PM2.5, PM10, temperature, humidity and estimated CO₂- and VOC-equivalent values, with graphs over time. The environment page adds altitude, dew point, vapor pressure, air density and heat index, plus separate temperature, humidity and pressure graphs.
The air quality page shows historical IAQ and estimated gas-equivalent trends. The particulate page displays PM1.0, PM2.5 and PM10, a combined graph and a particle-size distribution chart. Settings include alert thresholds for air quality and particulate matter, as well as light and dark themes.
Readings are automatically saved in the receiver’s LittleFS flash storage, which retains the history after a restart. The data logger displays timestamps, lets you select parameters and exports a CSV file for later analysis.
Circuit diagrams, PCB design files, source code, wiring details and setup instructions have been published with the project, so you can build it as shown or adapt it to your own needs.
The spare GPIO headers on the outdoor board leave room to add other sensors later, giving you a way to grow the station beyond the original build. For anyone who wants to keep an eye on outdoor air quality from indoors, this solar-powered LoRa air quality monitor is an ESP32 project well worth building.
Media Credit: How To Electronics
Disclosure: Some of our articles include affiliate links. If you buy something through one of these links, Geeky Gadgets may earn an affiliate commission. Learn about our Disclosure Policy.
