Scanning documents into Apple Notes allows users to digitize physical paperwork directly within the app, making it easier to store and access important information. According to Apple Support, the process involves opening a note, tapping the camera icon and selecting “Scan Documents” to activate your device’s camera. Features like automatic edge detection and manual adjustments help ensure accurate captures, even in less-than-ideal conditions such as uneven lighting or intricate layouts.
Learn how to capture high-quality scans using both automatic and manual settings, adjust document edges for better alignment and apply filters like grayscale or black-and-white for enhanced readability. Explore methods for scanning multi-page documents into a single file and organizing your scans with folders, tags and descriptive titles.
Getting Started with Notes Document Scanning
TL;DR Key Takeaways :
- Apple Notes allows users to scan, edit and store documents directly within the app, eliminating the need for third-party tools and integrating seamlessly with the Apple ecosystem.
- The app offers two capture modes: Automatic Mode for quick scans and Manual Mode for precise control, making sure flexibility for different document types and conditions.
- Users can enhance scans with tools like cropping, rotating and applying filters (Color, Grayscale, or Black-and-White) to optimize readability and presentation.
- Apple Notes supports multi-page document scanning, allowing users to compile lengthy materials like contracts or reports into a single digital file for better organization.
- Scanned documents can be saved, renamed, tagged and organized into folders, with iCloud syncing making sure accessibility across all Apple devices.
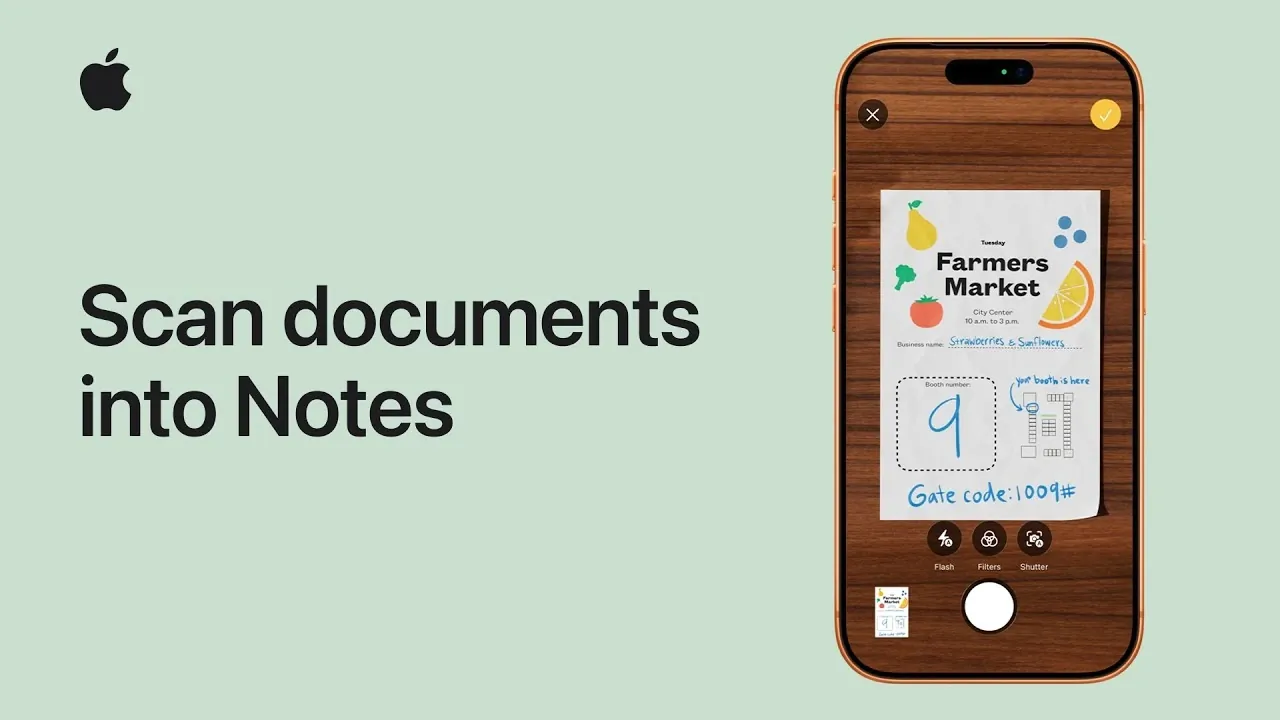
To begin scanning a document, open the Apple Notes app and either create a new note or select an existing one. Locate the camera icon, which serves as the attachments button and tap it. From the menu that appears, select the “Scan Documents” option. This action activates your device’s camera and launches the scanning interface, providing a user-friendly platform for capturing your documents.
Apple Notes is designed to make this process straightforward, making sure that even first-time users can navigate the feature with ease. By integrating this functionality directly into the app, Apple eliminates the need for third-party scanning tools, offering a convenient, all-in-one solution.
Capturing and Refining Your Document
Position your device’s camera so the entire document fits within the frame. Apple Notes offers two capture modes to suit different needs:
- Automatic Mode: The app automatically detects the edges of the document and captures the image without requiring manual input. This mode is ideal for quick scans.
- Manual Mode: You control the capture process by tapping the shutter button, allowing for greater precision when scanning documents with complex layouts or challenging lighting conditions.
Once the document is captured, Apple Notes provides tools to refine the scan. You can crop the image to remove unnecessary borders, rotate it for proper alignment, or adjust the corners to ensure accuracy. These features help you achieve a polished result, even when scanning documents in less-than-ideal conditions.

Explore further guides and articles from our vast library that you may find relevant to your interests in Apple Notes.
- How to Make Apple Notes Templates You Can Reuse in iOS 18
- How to Use Apple Notes as a Vertical Kanban Board for Tasks
- Apple Notes: The Best Tool for Digital Knowledge Management
- Use the Zettelkasten Method in Apple Notes for Better Organization
- How to Use Apple Notes for Drawing and Sketching Like a Pro
- Apple Notes vs Goodnotes 6: Which Note-Taking App is Best for You?
- Apple Notes 2026 Features for Faster Note Taking & Planning
- Apple Notes Guide 2026 : Easily Organize Your Tasks & Projects
- Apple Notes Quick Capture Setup for Mac, iPhone & Apple Watch
- How to Use Apple Notes Like a Pro
Enhancing and Customizing Your Scan
After capturing your document, Apple Notes allows you to enhance its appearance using built-in filters and settings. These tools ensure that your scans are clear, legible and tailored to your specific needs. Available options include:
- Color: Preserves the original colors of the document, making it suitable for images or colorful layouts.
- Grayscale: Converts the document into shades of gray, offering a clean and professional look.
- Black-and-White: Maximizes contrast, making text-heavy documents easier to read.
Additionally, you can adjust the flash settings to improve visibility in low-light environments. These customization options ensure that your scanned documents are optimized for both readability and presentation.
Scanning Multi-Page Documents
Apple Notes simplifies the process of scanning multi-page documents, allowing you to compile multiple pages into a single digital file. After scanning the first page, position the next page within the camera frame and repeat the capture process. Continue this sequence until all pages are scanned.
This feature is particularly useful for organizing lengthy materials such as contracts, reports, or study notes. By consolidating multiple pages into one file, you can maintain a cohesive and organized digital record of your documents.
Saving and Organizing Your Scans
Once you’ve completed the scanning process, tap “Save” to embed the document directly into your note. From there, you can take additional steps to organize your scans effectively:
- Rename the note: Assign a descriptive title to make the document easy to locate later.
- Add tags: Use tags to categorize your scans by topic, project, or purpose.
- Organize into folders: Place the note in a specific folder for streamlined access and better organization.
Because Apple Notes syncs across all your devices via iCloud, your scanned documents are instantly accessible wherever you need them. This eliminates the hassle of transferring files between devices and ensures that your important documents are always within reach.
Why Choose Apple Notes for Scanning?
Apple Notes offers a comprehensive solution for document scanning, combining advanced camera technology with intuitive software. Whether you’re digitizing a single page or compiling a multi-page document, the app provides the tools you need to capture, enhance and organize your files efficiently. By saving your scans directly within your notes, Apple Notes streamlines document management, making it an invaluable tool for both personal and professional use.
With its seamless integration into the Apple ecosystem, Apple Notes ensures that your scanned documents are not only easy to create but also simple to access and manage. This functionality transforms your device into a powerful tool for staying organized, helping you keep track of important paperwork without the clutter of physical files.
Media Credit: Apple Support
Disclosure: Some of our articles include affiliate links. If you buy something through one of these links, Geeky Gadgets may earn an affiliate commission. Learn about our Disclosure Policy.