This review is a hands-on look at home DTF printing use the Procolored K13 Lite, setup, creativity, and small-scale production. Procolored gave me the opportunity to try out its complete T-shirt printing system, consisting of a K13 Lite printer, oven, and heat press, and it turned out to be one of the most enjoyable hands-on technology experiences I have had in a long time.
Creating your own T-shirts at home with vibrant colours and original designs using AI is genuinely exciting, and far more satisfying than I initially expected it to be. What started out as a technical setup very quickly becomes a creative process, where ideas move from screen to fabric in a surprisingly short amount of time. Once you see your first successful print pressed onto a T-shirt, it is very easy to want to keep going, and as you do more and more new ideas and inspiration arrives.
TL;DR Key Takeaways :
- The Procolored offers a complete home DTF printing system, combining a printer, smokeless curing oven, and automatic heat press into a single, end-to-end workflow.
- Initial setup has a learning curve (60 to 90 minutes), but once configured the system becomes intuitive, shifting focus away from technical steps and toward creative design and production.
- Print quality is vibrant, flexible, and durable, with strong white ink coverage and no cracking or peeling after multiple wash tests.
- A finished T-shirt can be produced in roughly 15 minutes, making the system practical for small runs, bespoke designs, and staggered workflows.
- The setup pairs exceptionally well with AI-generated artwork, enabling fast experimentation with original designs and one-off personalised garments.
- Home-friendly features such as the smokeless oven, compact automatic heat press, and LCD display make it suitable for small studios rather than industrial spaces.
- Best suited for regular use and small-scale business scenarios, particularly short production runs and high-quality custom orders, with Windows-only software as the main limitation.
There is something uniquely rewarding about producing a wearable garment yourself. Not just designing an image on a screen or from a prompt, but actually wearing it, washing it, and seeing how it holds up over time. This setup turns that experience into something tangible and easily repeatable. It does not feel like a novelty or a gimmick. It feels like a real production workflow that happens to fit into a home or small studio environment.
Table of Contents :
- First impressions & Unboxing
- Setting up the Procolored K13 Lite Printer
- Procolored K13 Lite DTF Printer Specifications
- Print Quality & Feel on Fabric
- Using the Panda Heat Press
- Procolored Panda Heat Press Machine Specifications
- The Smokeless Oven and Curing Process
- Procolored Smokeless Oven for DTF Printer Specifications
- Handling Chemicals and Safety Considerations
- Maintenance & Reliability
- Speed & Real-World Workflow
- Creativity, AI & Design Freedom
- Small Business Potential & Realism
- Final thoughts
What really surprised me is how quickly the technical side fades into the background once everything is set up. After the initial learning curve, the system becomes intuitive and enjoyable to use. The focus shifts away from the machines and onto the creativity. Choosing designs, experimenting with colours, testing fabrics, and seeing how different images translate onto clothing becomes the main event. It is also the kind of process that naturally draws other people in. This very quickly became something the whole family could enjoy, from coming up with ideas to seeing the finished garments come off the heat press.
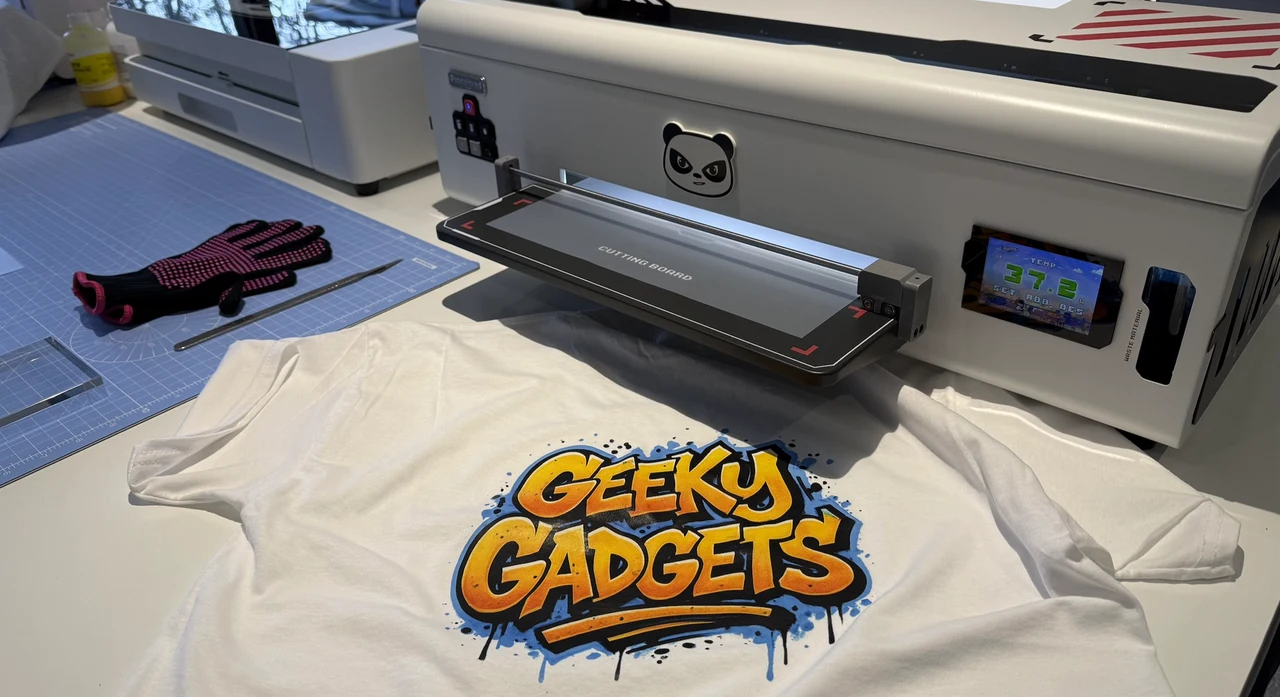
One of the small but surprisingly impactful details is the LCD display on the Procolored K13 Lite. Not only does it clearly show when temperatures are correct and when the printer is ready to work, it also features playful animations. That might sound trivial, but it genuinely adds a sense of personality to the printer. Making the whole process feel less industrial and more approachable, especially when you are learning. It feels like a machine that is designed to be used by people, not just technicians.
First impressions & Unboxing
When the printer, smokeless oven, and heat press first arrived, I will admit that I felt a little overwhelmed. The size of the packages alone makes it clear that this is not a simple gadget, but a complete small-scale production system. Each box is substantial, and when initially setting everything up, it can look like a lot to take in.
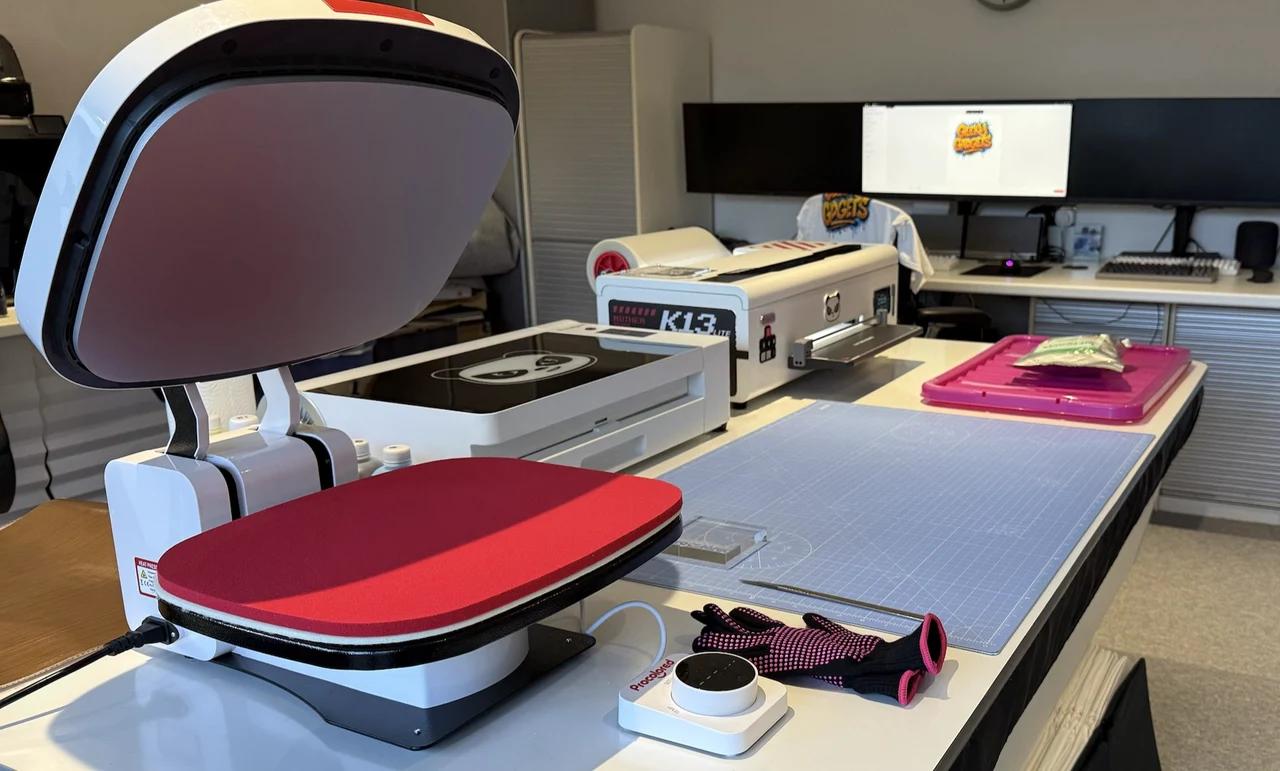
However, after around thirty minutes of unpacking everything, laying it out, and simply understanding what each component actually does, the system starts to make sense. There are three clear stages to the process, and each piece of equipment has a defined role. Once that clicks, the complexity drops away very quickly.

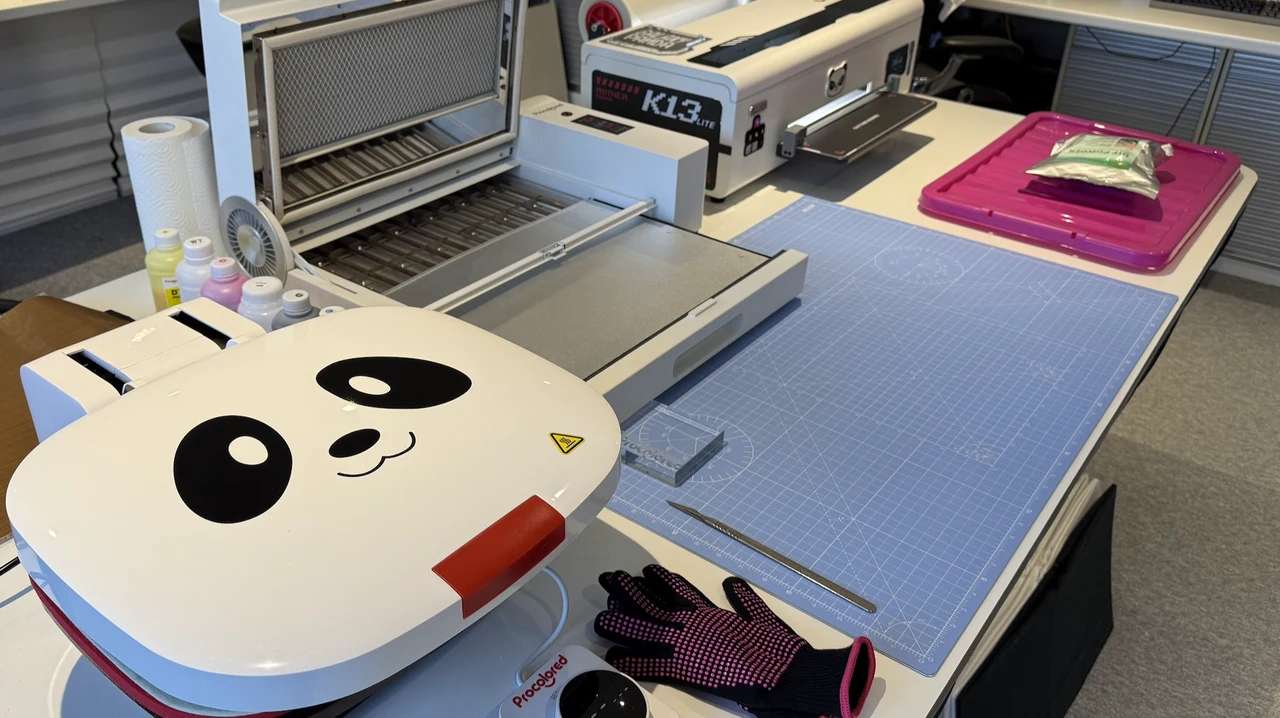
Space is important. You do need a reasonable working area to use this setup comfortably. Ideally, you want enough room to place the printer, oven, and heat press in a loose line so you can create a simple production flow. Printer first, smokeless oven in the middle, and heat press at the end. Once we arranged everything this way, the workflow felt natural and efficient, and moving from one step to the next became almost automatic.
Setting up the Procolored K13 Lite Printer
The most complex piece of equipment in the setup is the Procolored K13 Lite printer itself. That is unavoidable. It is a DTF printer, and DTF printing involves white ink, specialised transfer film, and precise but repeatable workflows. However, once you start thinking of it as a large, specialised inkjet printer rather than some mysterious, magical machine, it becomes much easier to understand.

Procolored provides a series of easy to follow setup and workflow videos, and while at first glance it looks like a lot of material, each video is only a couple of minutes long. Taken together, they walk you through the entire setup process step by step. I would strongly recommend watching them all rather than trying to jump ahead. Doing things in the right order makes a big difference.

Procolored K13 Lite DTF Printer Specifications
- Printing Technology: Direct-to-Film (DTF)
- Maximum Print Width: 13 inches (330 mm)
- Print Resolution: Up to 1440 × 1440 DPI
- Ink Configuration: CMYK + White
- Printhead Configuration: Single array
- Ink Consumption: Approx. 3.75 ml per A4 print
- Supported Media: DTF transfer film (roll and sheet)
- Operating System Support: Windows only (macOS and Linux not supported)
- Software: Procolored RIP software (USB dongle required)
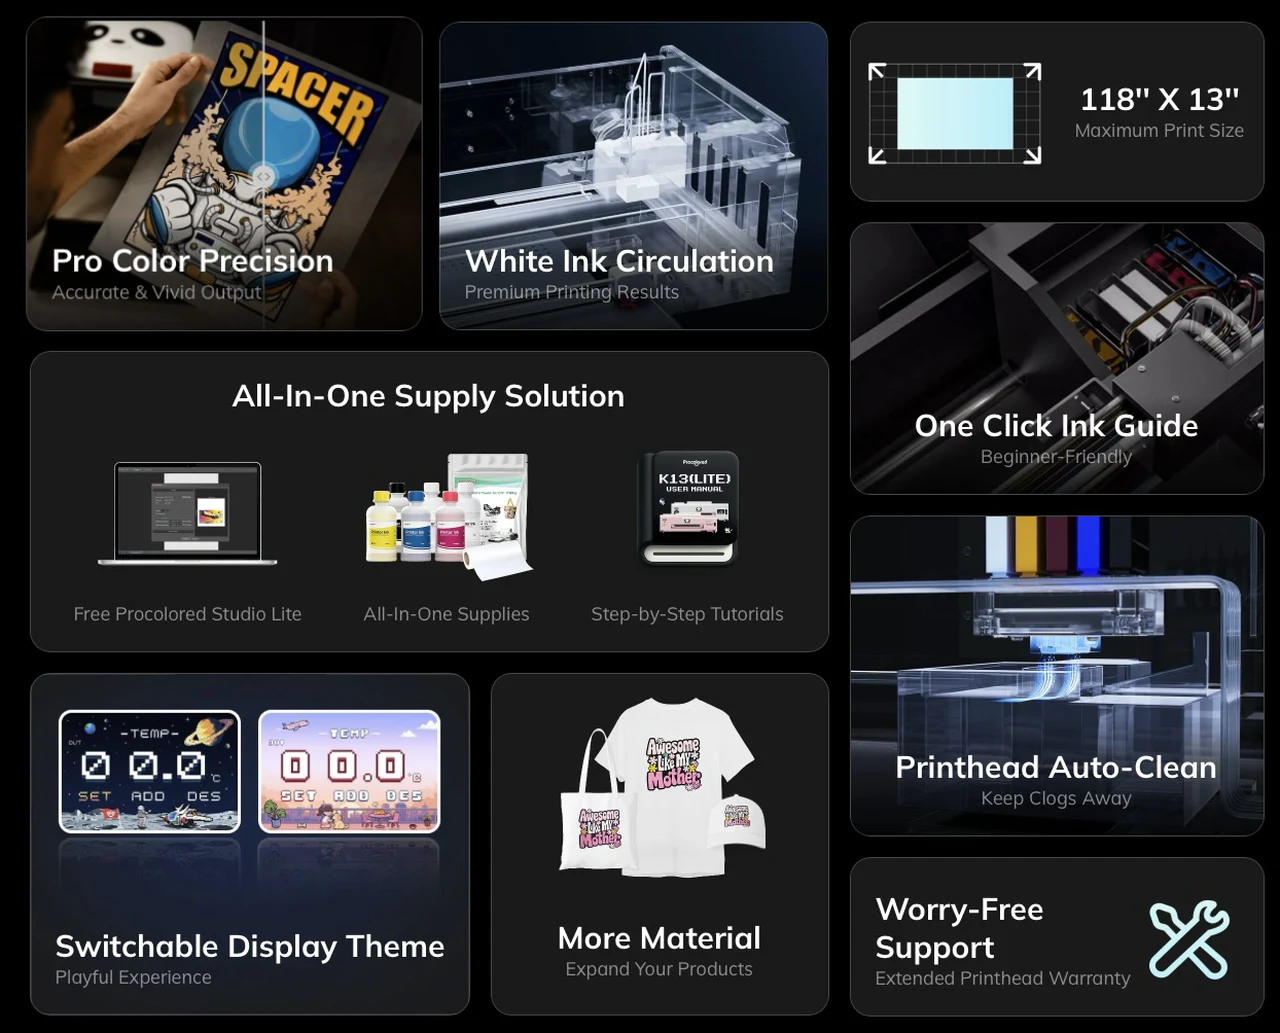
- White Ink Management: Automatic white ink circulation system
- Maintenance Features: Automated cleaning system, manual nozzle check
- Display: Built-in LCD screen with temperature indicators and animated status display
- Connectivity: USB
- Power Requirements: AC 110–240V
- Printer Dimensions: Approx. 29.1 × 12.6 × 9.1 inches
- Net Weight: Approx. 18 kg
- Target Users: Beginners, home studios, small businesses
The initial setup took us somewhere between sixty and ninety minutes, depending on how comfortable you are with technology. This includes filling the ink reservoirs, connecting the printer, installing the software, and running the initial tests. Once that is done, the printer feels stable and predictable.
One thing worth mentioning is that the Procolored software only runs on Windows. This is a little frustrating if, like me, you primarily use macOS. That said, the software itself is very easy to use. Image reversing is handled automatically, so you simply load your design and press print. There is no complicated setup each time you want to run a job.
The software also uses a USB dongle that needs to be connected to the PC running it. That is something you will want to be careful with. Do not lose it. Treat it as an essential part of the system.
Print Quality & Feel on Fabric
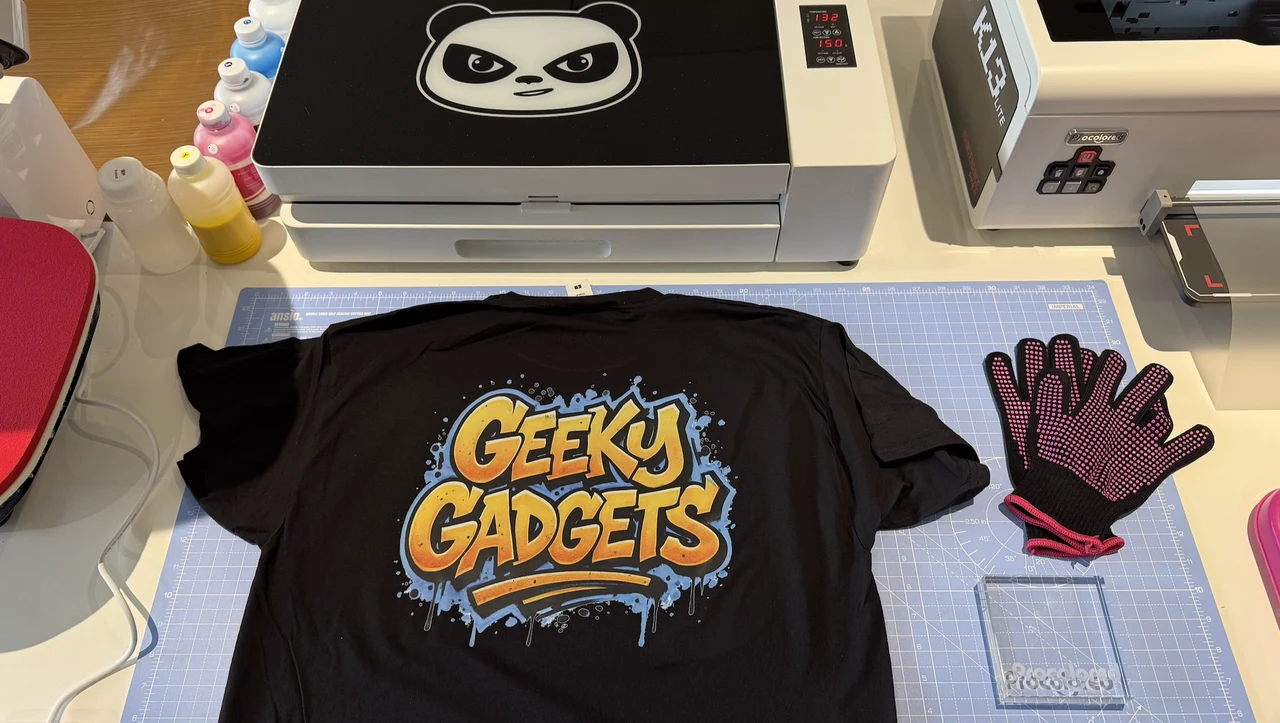
The finished prints genuinely exceeded my expectations. The print on the T-shirt is durable, slightly rubbery, but still flexible. Importantly, it adheres extremely well to cotton fabrics. The colours are vibrant, far more vibrant than I expected from a home-based system, and the white DTF ink coverage is solid. Allowing your prints to securely adhere themselves to your chosen garment.

To test the system fully printed some large images and applied them to the back of T-shirts, then wore them for several days. Despite the size of the prints, I did not experience any discomfort, sweating, or stiffness from the print area. That was something I was slightly concerned about beforehand, but in practice it was not an issue at all.
I also carried out several wash cycles specifically to see how the prints would hold up. After four or five washes, there was no peeling, cracking, or lifting. The prints remained vibrant and well bonded to the fabric. I do plan to update this review after fifteen to twenty washes, but so far, the durability has been impressive.
Using the Panda Heat Press
The Panda heat press turned out to be one of my favourite parts of the setup. It is compact, well designed, opens and closes fully automatically and is very easy to use. Simply set your temperature to 160 degrees C and 35 seconds later your print has been transferred to your T-shirt permanently. The automatic opening and closing mechanism makes a big difference to the overall experience. You set your temperature and time using the rotary knob with LED display, position your garment, and the press handles the rest. When the timer finishes, it opens automatically.
Heat distribution was even and consistent across every garment we tested. That consistency is crucial for DTF transfers, and it shows in the final results. We did not experience any uneven adhesion or cold spots.
It can also be used as an iron, before you apply the print, which is a nice bonus. Being able to quickly smooth out and slight heat garments before pressing helps improve final results and speeds up the workflow.

Procolored Panda Heat Press Machine Specifications
- Press Type: Automatic clamshell heat press
- Power Consumption: 750 W
- Heating Temperature Range: 40–205 °C (104–401 °F)
- Working Area: 370 × 290 mm
- Control System: Rotary knob with LED digital display
- Operation: Automatic closing and opening cover
- Timer Function: Built-in countdown timer with automatic release
- Heat Distribution: Even heat plate for consistent transfers
- Safety Features: Insulated shell and internal insulation pad
- Additional Functionality: Can be used as a heat press or iron
- Compatible Printing Types: DTF, DTG, HTV, sublimation (with appropriate materials)
- Power Supply: AC 110–240V
- Net Weight: Approx. 15 kg (main body and control components)
- Gross Weight: Approx. 17 kg
- Intended Use: Home studios, small businesses, creative workspaces
The Smokeless Oven and Curing Process

The smokeless oven is a critical part of this setup, especially if you are using it in a home environment. DTF curing can produce unpleasant smells, and this oven is designed specifically to address that.
There is still a slight smell when the oven is curing the print, but opening a window and ensuring good ventilation quickly removes it. The activated carbon filtration and dual fans make a noticeable difference compared to more basic curing methods.
Heating is even and controlled, which is essential for consistent results. The oven is very easy to use, and the default settings worked well for us without any need for constant adjustment. I used the default timing and when the alarm sounds your print and glue have been successfully combined. You could even sell these prints separately, allowing customers to apply them to their own garments, if desired.

Procolored Smokeless Oven for DTF Printer Specifications
- Product Type: Smokeless curing oven for DTF transfers
- Heating Temperature Range: 0–140 °C (32–284 °F)
- Power Consumption: 820 W (220 V) / 650 W (110 V)
- Voltage Support: AC 110–220 V
- Heating Method: Even heat circulation with internal temperature balancing
- Filtration System: Activated carbon filter cotton
- Odor Reduction: Up to 98% odor absorption
- Airflow System: Dual high-power internal fans
- Working Area: Approx. 13.0 × 16.5 inches
- Oven Dimensions: Approx. 23.6 × 15.7 × 6.7 inches
- Net Weight: Approx. 21.4 kg
- Gross Weight: Approx. 28.5 kg
- Safety Features: Overheat protection, sealed housing
- Noise Level: Low, suitable for home or small studio use
- Intended Environment: Home studios, small workspaces, indoor use
Handling Chemicals and Safety Considerations
It is important to be realistic about what is involved here. You are working with inks, adhesive powders, and high temperatures. The glue powder in particular is fine and does tend to get everywhere if you are not careful. Wearing gloves and a face mask is strongly recommended, along with working in a well ventilated area. This is particularly important when handling the DTF adhesive powder and during the curing stage.

We used a low tray when applying the powder, which allowed us to tip the excess powder back into the bag and reuse it. That helps reduce waste and keeps things a bit tidier.

I found that using a shallow tray and above and sprinkling the DTF powder over the prints in the tray and then moving the excess powder onto a folded piece of discarded transfer paper. Worked very well at getting the DTF powder back into the bag without too much spillage and mess.
The printer itself is similar in noise level to a standard inkjet printer. The oven and heat press obviously get very hot, so this setup is not suitable for unsupervised use by younger children. With adult supervision, however, it can be a fantastic family activity, especially when it comes to creating designs and seeing them magically turned into finished garments.
Maintenance & Reliability
During the review process, I deliberately left the system unused for over a week to see how it would cope. I did not use the special Moisturizing liquid during this time. After a week, I flushed ink back through the system, ran the standard cleaning cycle, and printed again. The printer performed perfectly, with no noticeable degradation in print quality.

That gave me confidence in the reliability of the system, as long as basic maintenance routines are followed. The only part of the process that can be messy is filling the ink reservoirs. As long as you take your time and are careful, it is easily manageable.
Another point to be aware of is handling the printed film when it comes out of the printer. The white ink backing is still wet, and touching it will ruin the print. I learned this the hard way by accidentally scuffing the white ink with my hand. Procolored includes a sliding cutter, which makes removing the prints much easier. Just do not cut too close to the image 🙂

Speed & Real-World Workflow
Once you understand the workflow, the speed is very reasonable. Printing an image can take between seven and fifteen minutes depending on size and colour complexity. Applying the glue powder takes a couple of minutes, curing in the oven takes another couple of minutes, and heat pressing takes two to three minutes.
All told, you can produce a finished T-shirt in around fifteen minutes once you are familiar with the process. That pace feels perfectly acceptable for small runs and bespoke designs and while one machine is running you can be using the next.
Creativity, AI & Design Freedom

One of the most enjoyable aspects of this setup is how well it pairs with modern AI image generation tools. Creating original artwork becomes incredibly accessible. You can generate multiple designs, remove backgrounds, adjust colours, and test variations quickly. Seeing an image you created with AI end up on a T-shirt, sweatshirt, or vest is genuinely exciting and your images can be very personal if needed.
This is where the system really shines as both a creative tool and a potential business asset. The ability to produce one-off designs or small runs gives you flexibility and a creative edge.

Small Business Potential & Realism
If you are considering this setup for a small business, it is important to be realistic. The cost is a factor, and the system rewards regular use. If you are only going to print the occasional T-shirt, it may not make sense. However, if you plan to print regularly on a weekly basis, this setup becomes very compelling.
It feels particularly well suited to small production runs of five to fifteen shirts for events, parties, hen nights, stag nights, and local custom orders. At the same time, it excels at high quality one-off designs, which is where it really stands out in a crowded marketplace.
The Windows-only software is a limitation, but it is not a deal breaker. A small second-hand Windows laptop dedicated to running the software is a perfectly viable solution.

Final thoughts
What stood out most to me is how much fun this entire process turned out to be. Yes, there is a Procolored K13 Lite learning curve. Yes, there are safety considerations. But once you are up and running, the system feels creative, empowering, and genuinely enjoyable and easy to use.
Whether you are looking to create custom clothing for yourself, involve the family in a creative project, or explore the beginnings of a small T-shirt printing business, this setup delivers a complete and well thought out workflow. It feels capable, reliable, and surprisingly approachable.
This is not just about printing T-shirts. It is about creativity, experimentation, and the satisfaction of making something you can wear.

Disclosure: Some of our articles include affiliate links. If you buy something through one of these links, Geeky Gadgets may earn an affiliate commission. Learn about our Disclosure Policy.