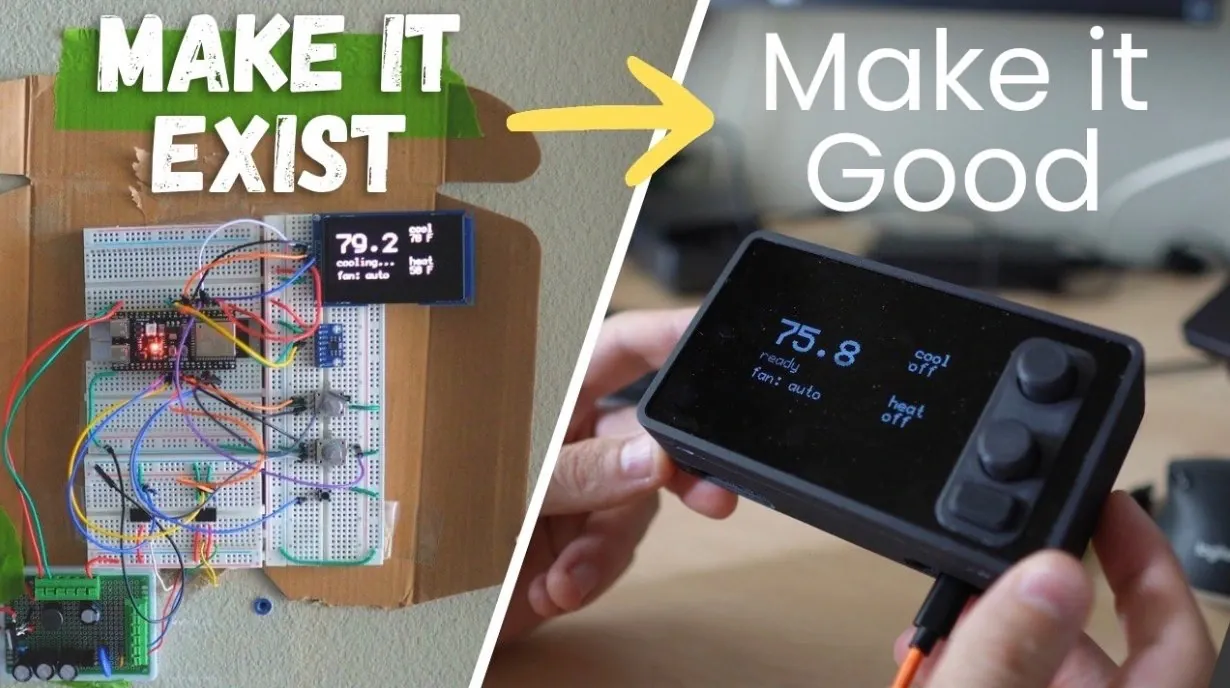
Building an open source smart thermostat is an engaging project that blends technical skills with practical applications. According to Designing Good Ideas, this project revolves around the ESP32-S3 microcontroller, which offers both WiFi and Bluetooth connectivity. Key components include an OLED display for user interaction and relays to manage HVAC systems. Understanding specific concepts like 24V AC wiring and relay circuits is essential for creating a thermostat that meets your unique requirements.
Discover how to prototype your circuit on a breadboard, design a custom PCB using KiCAD and construct a housing with 3D printing or laser-cut materials. Learn to implement the Matter protocol for smart home compatibility and test your firmware with Arduino IDE. This explainer provides a step-by-step approach to building a functional and customizable thermostat.
Why Build an Open source Smart Thermostat?
TL;DR Key Takeaways :
- Building an open source smart thermostat offers privacy, customization and avoids subscription fees, while providing hands-on learning in electronics and software design.
- The project uses an ESP32-S3 microcontroller for its WiFi and Bluetooth capabilities, along with components like OLED displays, temperature sensors, rotary encoders and relays.
- Custom firmware is developed to manage functionality and integrate with smart home platforms using the Matter protocol for seamless device communication.
- Prototyping involves breadboard testing, transitioning to a custom PCB and creating a durable housing using 3D printing or laser-cut materials.
- The total cost is approximately $70, making it an affordable and accessible DIY project that fosters innovation and contributes to the open source community.
Choosing to build your own smart thermostat offers significant benefits, particularly in terms of control and customization. Many commercial thermostats collect user data or require ongoing subscriptions, raising privacy concerns. By designing your own, you retain complete control over your data and avoid unnecessary fees. Additionally, this project allows you to customize the thermostat to suit your specific preferences, such as unique temperature settings or integration with platforms like Home Assistant. Beyond the practical advantages, this project is an excellent opportunity to deepen your understanding of hardware and software design, making it both a functional and educational endeavor.
Understanding Thermostat Basics
Before starting, it’s essential to understand how thermostats interact with HVAC systems. Most HVAC systems rely on 24V AC wiring to control heating, cooling and fan operations. Thermostats act as the interface between the user and the HVAC system, sending signals to adjust temperature or airflow.
Key components include relays, which act as switches to control high-voltage circuits using low-power signals from a microcontroller. Familiarizing yourself with HVAC wiring diagrams and relay circuits is a critical first step. This foundational knowledge ensures that your thermostat will function safely and effectively when connected to your HVAC system.

Below are more guides on smart home systems and devices from our extensive range of articles.
- IKEA Liljebagge Costs Just €15 to Undercut Eve Thermo By €65
- What Makes the Aqara W200 the Ultimate Apple Home Thermostat Upgrade
- Apple Smart Home 2025: The Ultimate Beginner’s Guide
- 20 Smart Thermostats Compared and Tested 2026 Guide
- Aqara Thermostat Hub W200 vs Ecobee Premium: Smart Home Thermostats Compared
Essential Hardware Components
The hardware for this project is centered around the ESP32-S3 microcontroller, chosen for its robust WiFi and Bluetooth capabilities. This microcontroller serves as the brain of the thermostat, running custom firmware to manage its functions. Additional components include:
- OLED Display: Provides a clear and user-friendly interface for temperature readings and settings.
- Temperature Sensor: Continuously monitors the ambient temperature to ensure accurate control.
- Rotary Encoders: Allow precise adjustments to heating and cooling setpoints.
- Power Supply: Converts the 24V AC from the HVAC system into 5V DC to power the microcontroller and other components.
- Relays: Enable the thermostat to control HVAC components like heating, cooling and fans.
Each component is selected for its compatibility, ease of integration and reliability, making sure a streamlined and efficient design.
Developing and Testing the Software
The software is the core of your thermostat’s functionality. Custom firmware is developed to manage the display, sensors and relays while allowing communication with smart home platforms like Home Assistant. To ensure seamless integration with other devices, the Matter protocol is implemented. Matter is a standardized framework that simplifies communication between smart home devices, regardless of the platform.
Developing the firmware requires careful attention to detail, particularly in debugging and testing. Tools like Arduino IDE or PlatformIO can be used to write and upload the code to the ESP32-S3. Testing the software on a breadboard setup ensures that all components interact correctly before moving to the final assembly.
Prototyping and Design Process
Prototyping is a crucial step in the development process. Start by assembling the circuit on a breadboard to test the functionality of each component. This approach allows you to identify and resolve any issues early in the process. Once the prototype is fully functional, you can transition to a more permanent solution, such as a perfboard or a custom PCB.
For the housing, consider using 3D printing or laser-cut acrylic panels. These materials provide a durable and professional-looking enclosure for your thermostat. The design of the housing should prioritize accessibility for maintenance and aesthetic integration with your home environment.
Designing and Manufacturing the PCB
The printed circuit board (PCB) is the backbone of your thermostat. Using tools like KiCAD, you can design schematics and layouts tailored to your specific requirements. A well-designed PCB ensures that the components are securely mounted, connections are reliable and the overall assembly process is straightforward.
Once the design is finalized, the PCB can be sent to a manufacturer for production. Many online services offer affordable PCB fabrication with quick turnaround times. After receiving the PCB, you can solder the components onto it, creating a compact and professional-grade assembly.
Final Assembly and Integration
The final assembly involves combining all the components into a cohesive unit. Begin by soldering the components onto the PCB and securing them within the housing. Next, connect the thermostat to your HVAC system, making sure that all wiring is correct and secure.
Rigorous testing is essential at this stage. Verify that the thermostat accurately controls heating, cooling and fan operations. Additionally, test its integration with Home Assistant or other smart home platforms to ensure seamless functionality. This step ensures that your thermostat performs reliably under real-world conditions.
Cost and Accessibility
One of the key advantages of this project is its affordability. The total cost of components is approximately $70, making it a cost-effective alternative to commercial smart thermostats. By releasing your design as open source, you contribute to a community of makers and innovators who can replicate, modify and improve upon your work. This collaborative approach not only fosters innovation but also makes advanced technology more accessible to a wider audience.
Expanding Your Skills Through DIY Innovation
Building an open source smart thermostat is more than just a DIY project, it’s an opportunity to expand your technical skills and contribute to the growing open source community. By following this guide, you’ll create a functional, customizable device that prioritizes privacy and integrates seamlessly with your smart home ecosystem. Beyond the practical benefits, this project offers a deeper understanding of electronics, software development and design, empowering you to tackle more complex projects in the future.
Media Credit: Designing Good Ideas
Disclosure: Some of our articles include affiliate links. If you buy something through one of these links, Geeky Gadgets may earn an affiliate commission. Learn about our Disclosure Policy.
