Restoring your iPhone from a backup is an essential process to recover your data, apps, and settings. Whether you’re upgrading to a new device or troubleshooting an issue with your current one, following the correct steps ensures a smooth and hassle-free experience. This guide provides a detailed walkthrough to help you restore your iPhone backup effectively using either iCloud or a computer, safeguarding your data while making sure a seamless transition. The video below from Daniel About Tech gives us more details,

1: Prepare Your iPhone for Restoration
Before starting the restoration process, it’s important to prepare your iPhone properly. This involves resetting the device to factory settings, which clears all existing data and allows you to access the backup restoration interface. If there’s any data on your iPhone that you want to keep, ensure it’s saved elsewhere, such as on a computer or external storage, as resetting will erase everything on the device.
To reset your iPhone:
1. Navigate to Settings > General > Transfer or Reset iPhone > Erase All Content and Settings.
2. Confirm the action when prompted.
3. Allow your iPhone to restart. Once it powers back on, it will be ready for the restoration process.
Taking this preparatory step ensures that your device is clean and ready to receive the backup, minimizing the risk of errors during restoration.
2: Choose Your Backup Method
You can restore your iPhone using one of two primary methods: iCloud Backup or Computer Backup. Each method has its own advantages and the choice depends on your preferences and the resources available.
- iCloud Backup: This method is convenient as it doesn’t require a physical connection to a computer. You’ll need to sign in with the Apple ID associated with the backup and ensure a stable Wi-Fi connection. The restoration process involves downloading data directly from Apple’s servers, making it ideal for users who prioritize simplicity and accessibility.
- Computer Backup: If you’ve previously backed up your iPhone to a Mac or PC, this method allows you to restore your data using Finder (on macOS Catalina or later) or iTunes (on older macOS versions and Windows). Connect your iPhone to the computer via a USB cable, open Finder or iTunes and select the backup file you want to restore. This option is particularly useful for those with large backups or limited internet connectivity.
- Other Transfer Options: If you’re switching from another device, such as an Android phone or another iPhone, Apple’s Quick Start feature or third-party apps can help transfer your data. This is a practical solution if you don’t have a prior backup but still need to move your information to the new device.
Selecting the right method ensures that your restoration process aligns with your specific needs and circumstances.
3: Restore Your Backup
Once your iPhone is reset and ready, follow these steps to restore your backup:
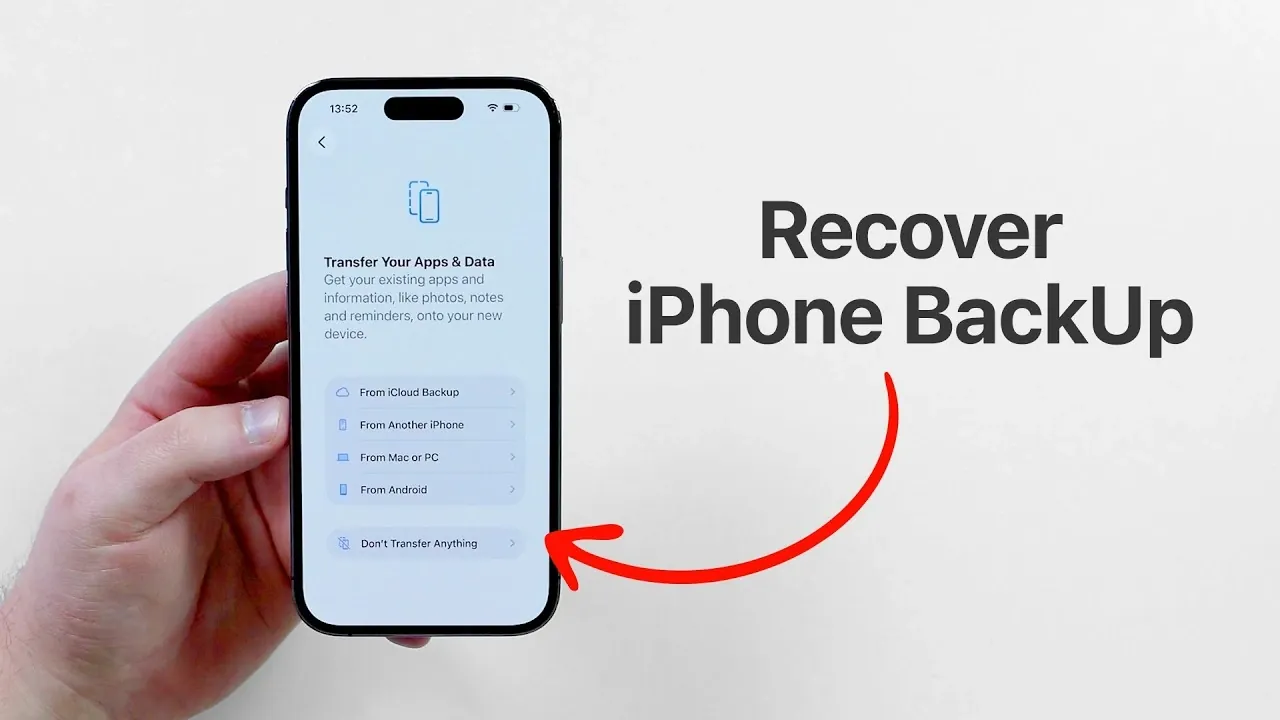
1. Power on your iPhone and follow the on-screen setup instructions until you reach the Apps & Data screen.
2. Choose the appropriate restoration method:
– For iCloud, select Restore from iCloud Backup, sign in with your Apple ID and choose the most recent or relevant backup file.
– For a computer backup, select Restore from Mac or PC, connect your iPhone to the computer and locate the backup file in Finder or iTunes.
3. Wait for the restoration process to complete. The duration depends on the size of your backup and the speed of your internet connection or computer.
4. During the setup process, you’ll be prompted to configure features such as Face ID, Apple Pay and automatic updates. Take the time to enable these features to optimize your device for daily use.
This step is critical for making sure that all your data, apps and settings are restored accurately, allowing you to resume using your iPhone without interruptions.
4: Monitor Post-Restoration Progress
After the initial restoration, your iPhone will continue downloading apps, photos and other data in the background. Monitoring this progress ensures that everything is restored correctly and helps you identify any potential issues.
To check the progress:
1. Open Settings > General > iPhone Storage.
2. Look for the “Restore in Progress” notification, which provides an overview of the remaining tasks.
This background process may take several hours, especially for large backups. Ensure your iPhone remains connected to Wi-Fi and a power source during this time to avoid interruptions.
Tips for a Smooth Restoration
To make the restoration process as seamless as possible, consider the following tips:
- Ensure you have your Apple ID credentials ready. These are required to access iCloud backups and re-download purchased apps and content.
- Use a fast and stable Wi-Fi network for iCloud restorations to minimize delays and interruptions.
- If you encounter issues such as incomplete downloads or missing data, restart your iPhone and verify your internet connection before attempting the restoration again.
- For computer backups, ensure that your Mac or PC is running the latest version of Finder or iTunes to avoid compatibility issues.
By following these tips, you can reduce the likelihood of errors and ensure a successful restoration process.
Final Thoughts on Restoring Your iPhone
Restoring your iPhone backup is a straightforward process when approached with the right preparation and method. Whether you’re using iCloud, a computer, or transferring data from another device, this guide equips you with the knowledge to handle the process efficiently. By carefully preparing your device, selecting the appropriate backup method and monitoring the restoration progress, you can recover your data and settings with ease. After the restoration is complete, don’t forget to enable key features like Face ID, Apple Pay and automatic updates to fully optimize your iPhone for everyday use.
Deep dive into the latest in iPhone Backup by exploring our other resources and articles.
- iOS 27 Leaks Reveal the End of an Era: Apple’s New Priorities Confirmed
- iPhone Ultra Leaks: Apple’s September Keynote to Feature First Ever Foldable
- iPhone Ultra Fold Leaks: The 7.8-Inch Display That Fits in Your Pocket
- No More Side Buttons: How to Put a Power Button on Your iPhone Home Screen
- iOS 26.4.2 vs. 26.5 RC: Should You Update Now or Wait for Next Week’s Release?
Source & Image Credit: Daniel About Tech
Disclosure: Some of our articles include affiliate links. If you buy something through one of these links, Geeky Gadgets may earn an affiliate commission. Learn about our Disclosure Policy.