
Following on from our earlier article on how to set up and manage your Apple Time Machine backups, capable of making sure that if you are MacBook or desktop Apple computer is lost, stolen or fails you can re-store your data, files and applications to a new system easily. We have written a quick guide on how to restore your Mac from a time machine backup.
Using the Apple Migration Assistant you can transfer files from your Time Machine backup to your Mac as individual files or small chunks depending on your needs, if you have inadvertently deleted a file or document. You can also completely restore your full Mac operating system to a new machine or reinstall it if something should go wrong. Although to carry out any of these features you will need to have made a Time Machine backup of your Mac as detailed in our previous article.
If you are using an Apple Mac computer, the Apple Time Machine feature is the easiest way to back up your computer regularly which is important to do to make sure you keep your files safe. Once you have set up a Time Machine automated backup routine your computer will automatically keep a copy of your Apple account settings, files, applications, music, photos, movies and documents.
It is worth remembering that the Time Machine process does not backup the macOS operating system which will need to be reinstalled separately. Although this is a benefit because both are separate entities and do not need to be backed up together. Allowing you to easily upgrade from older machines, restore documents from a stolen or lost MacBook or similar.
Once you have an up-to-date Time Machine backup which Apple will take automatically every hour when your computer is connected to your external storage solution. You can use the Apple Time Machine Migration Assistant to restore your personal files, apps and Apple user account when needed. Simply follow the instructions below to carry out the process.
If you need to reinstall macOS onto your machine, do this first it will be obvious that you need to do this because your Mac will start at with a flashing exclamation mark opting you that the operating system needs to be installed. Once this is complete connect your external storage drive or connect to your home or business network where the Time Machine backup is located and follow the instructions below.
Restore a Time Machine backup to your Mac
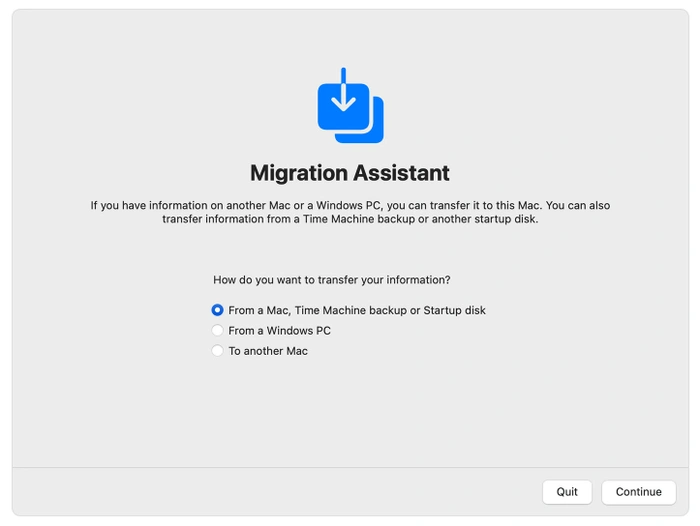
1. First open the Apple Migration Assistant on your MacBook laptop or Apple desktop computer. This is in the Utilities folder of your Applications folder in the macOS operating system. It is worth noting that if your Mac starts up with a set up assistant asking you for your country and network simply continue to the next step because the setup assistant already features the migration assistant.
2. When prompted about how you would like to install your information select the option to transfer from a Time Machine backup or start-up disk and press the continue button in the bottom right-hand corner of the screen.
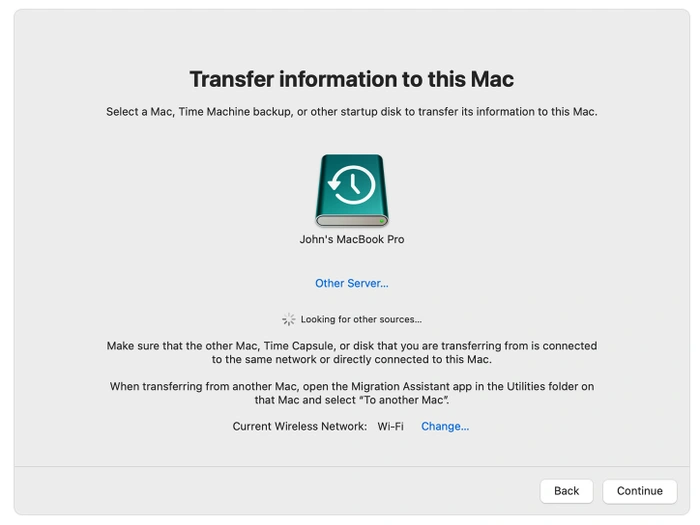
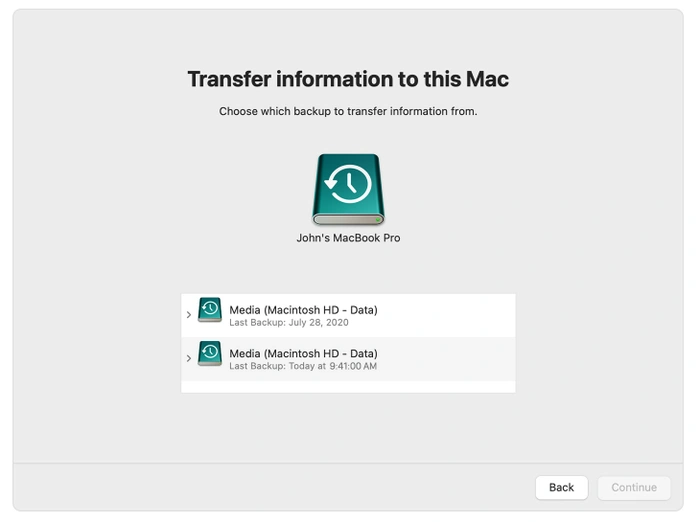
3. Select the Time Machine backup you would like to restore to your Apple Mac computer by locating it on your external storage drive. Again press the Continue button to proceed.
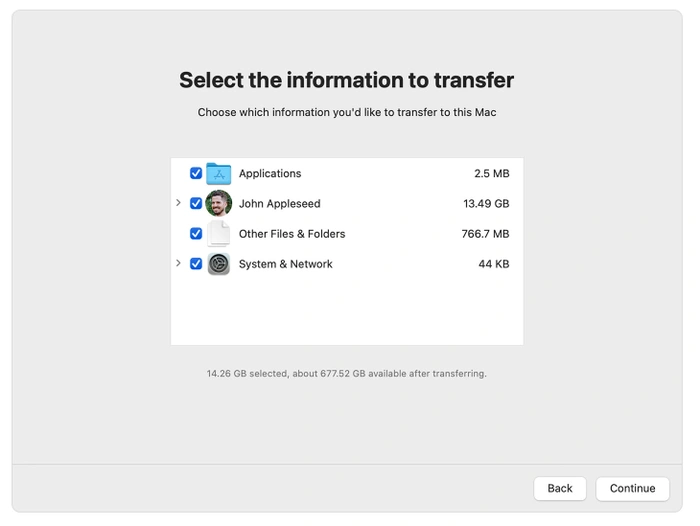
4. Apple will now provide you with information about the transfer allowing you to select unique items depending on your needs and requirements. Once you are happy with your selections press the Continue button. It is worth noting that if you are reinstalling accounts with the same name on your Mac, you will be asked to either rename or replace it.
5. Once the Time Machine restore to your Mac is underway the process can take quite several hours to complete and may even look as though it has paused or failed. Be patient and let the Time Machine backup complete its restoration process preferably overnight recommends Apple.
6. When the Migration Assistant has finished restoring your Time Machine backup to your Mac computer reboot and login to your macOS and you should see all your files, documents and Apple account settings restored.
If you are still experiencing issues, it might be worth contacting Apple or checking out the official Apple support website. Where you can book an appointment to see an Apple technician via the Apple Genius Bar in person or speak to a technical representative on the phone if needed.
Disclosure: Some of our articles include affiliate links. If you buy something through one of these links, Geeky Gadgets may earn an affiliate commission. Learn about our Disclosure Policy.