The guys over at Gizmodo have compiled a great guide on how to get OS X installed on a netbook.
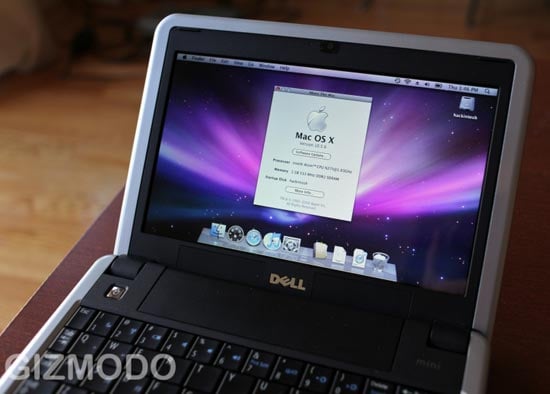
A Dell Mini 9 was chosen, as it is the most compatible with OS X, with all the hardware components working. If you want to install OS X on your Dell Mini 9, you will need the following:

- Dell Mini 9 With 16GB SSD or higher
- Retail copy of OS X 10.5.x (NOT an OEM copy that comes with a new Mac)
- A USB flash drive 8GB or higher
- An external USB DVD drive
- The “Type11” Bootloader: DellMiniBoot123v8.01.iso.zip (download link in this forum post)
- Blank CD to burn bootloader image (I actually used version 8.0 of Type11 on my CD-if your boot process with 8.01 is different than what’s spelled out in this guide, you can download 8.0 here. Both should work.)
- Windows PC for preparing the flash drive (if DVD drive works fine, this is optional)
Why Choose the Dell Mini 9?
The Dell Mini 9 is particularly favored for this Hackintosh project due to its high compatibility with OS X. Unlike other netbooks, the Dell Mini 9’s hardware components, such as the Wi-Fi card, graphics, and audio, are known to work seamlessly with OS X. This minimizes the need for additional drivers or complex configurations, making the installation process smoother and more straightforward. Additionally, the compact size and lightweight design of the Dell Mini 9 make it an ideal candidate for a portable Hackintosh setup.
Step-by-Step Installation Guide
To get started, you will need to prepare your USB flash drive. This involves formatting the drive and copying the OS X installation files onto it. Here’s a detailed breakdown of the steps:
1. Format the USB Flash Drive: Connect the USB flash drive to your Windows PC. Open the Disk Management tool and format the drive to FAT32. This will ensure that the drive is compatible with the bootloader and OS X installation files.
2. Copy OS X Installation Files: Insert the retail copy of OS X 10.5.x into the external USB DVD drive connected to your Windows PC. Use a tool like TransMac to copy the OS X installation files from the DVD to the USB flash drive.
3. Burn the Bootloader Image: Download the “Type11” Bootloader (DellMiniBoot123v8.01.iso.zip) and extract the ISO file. Use a CD burning tool to burn the bootloader image onto a blank CD.
4. Boot from the Bootloader CD: Insert the bootloader CD into the external USB DVD drive connected to your Dell Mini 9. Power on the Dell Mini 9 and press the appropriate key to enter the boot menu (usually F12). Select the external USB DVD drive as the boot device.
5. Install OS X: Once the bootloader loads, you will be prompted to insert the USB flash drive containing the OS X installation files. Follow the on-screen instructions to install OS X on your Dell Mini 9. Make sure to select the correct partition and format it as Mac OS Extended (Journaled) before proceeding with the installation.
6. Post-Installation Configuration: After the installation is complete, you may need to perform some additional configurations to ensure that all hardware components are working correctly. This may include installing additional drivers or tweaking system settings.
Head on over to Gizmodo for full instructions on how to install OS X on your Dell Mini 9. Their comprehensive guide provides detailed steps and troubleshooting tips to help you successfully transform your Dell Mini 9 into a fully functional Hackintosh.
Disclosure: Some of our articles include affiliate links. If you buy something through one of these links, Geeky Gadgets may earn an affiliate commission. Learn about our Disclosure Policy.
